Starting with cross stitch design, you might wonder about the importance of direction. It might seem small, but the direction you pick can change how your project looks. Many stitchers have a favorite way, based on habit or tradition. Yet, most agree that being consistent is what makes a piece look professional.
In cross stitch patterns, each cross is made of two diagonal stitches. Keeping your top stitches even makes your work look better. Also, if your thread twists, your stitches might not be the same thickness. So, it’s important to ‘untwist’ your thread for a smooth texture.
Knowing about these details—like keeping your stitches even, the fabric you use, and how many threads you pick—can make you better at cross stitching. As you get better and pay more attention to details, your finished pieces will show your skill in this traditional embroidery.
Key Takeaways
- The direction of your cross stitch can affect the final look of your project.
- Consistency in the top stitches provides a neater finish.
- Twists in thread can result in varying stitch thickness, so ‘untwisting’ is crucial.
- Common fabrics used include Aida and linen.
- Two strands of thread are typically recommended for a uniform texture.
- Practice and attention to detail enhance the beauty of your cross stitch work.
Introduction to Cross Stitch Direction
Learning about cross stitch direction is key for beginners. It’s about how your stitches are laid out on the fabric. This can change how your project looks and feels.
When you start with cross stitch tutorials, knowing this difference is important. The direction of your stitches can make your stitching easier. Keeping your X shapes consistent makes your work look better.
Choosing the right materials is as important as knowing the stitch direction. A size 14 cloth is good because it has 14 holes per inch. It helps you stitch clearly. Most people use DMC embroidery floss, which you split before starting. Start with 2 strands of floss for a clean look.
You’ll need a pattern, an embroidery hoop, needles, fabric, and floss to start. While not necessary, tools like a needle minder and magnifying glass can help. They make your stitching better.
| Supplies | Recommendation |
|---|---|
| Cloth | Size 14 Aida |
| Floss | DMC embroidery floss, 2 strands |
| Needle | Embroidery needle |
| Hoop | Embroidery hoop for stability |
| Scissors | Sharp stitch scissors |
Keeping your fabric from fraying is important. Use masking tape or zigzag stitches to prevent fraying. Ironing your fabric before stitching helps too.
Before stitching, prepare your thread and needle well. Leave a tail at the back instead of making knots. This avoids problems like holes or lumps. Remember, cross stitch basics are about making your stitching smooth and fun.
Common Cross Stitch Techniques
Several common cross stitch methods are key to mastering this craft. Each method adds something special to your stitching projects. Learning these advanced techniques can make your work more complex and detailed.
Bottom Left to Top Right Method
The Bottom Left to Top Right Method is popular because it fits well with right-handed stitchers’ natural movements. It helps keep your stitches even and uniform. Start each stitch from the bottom left and move to the top right. Then, complete the cross from the bottom right to the top left for a strong and consistent stitch.
Consistency in Top Stitches
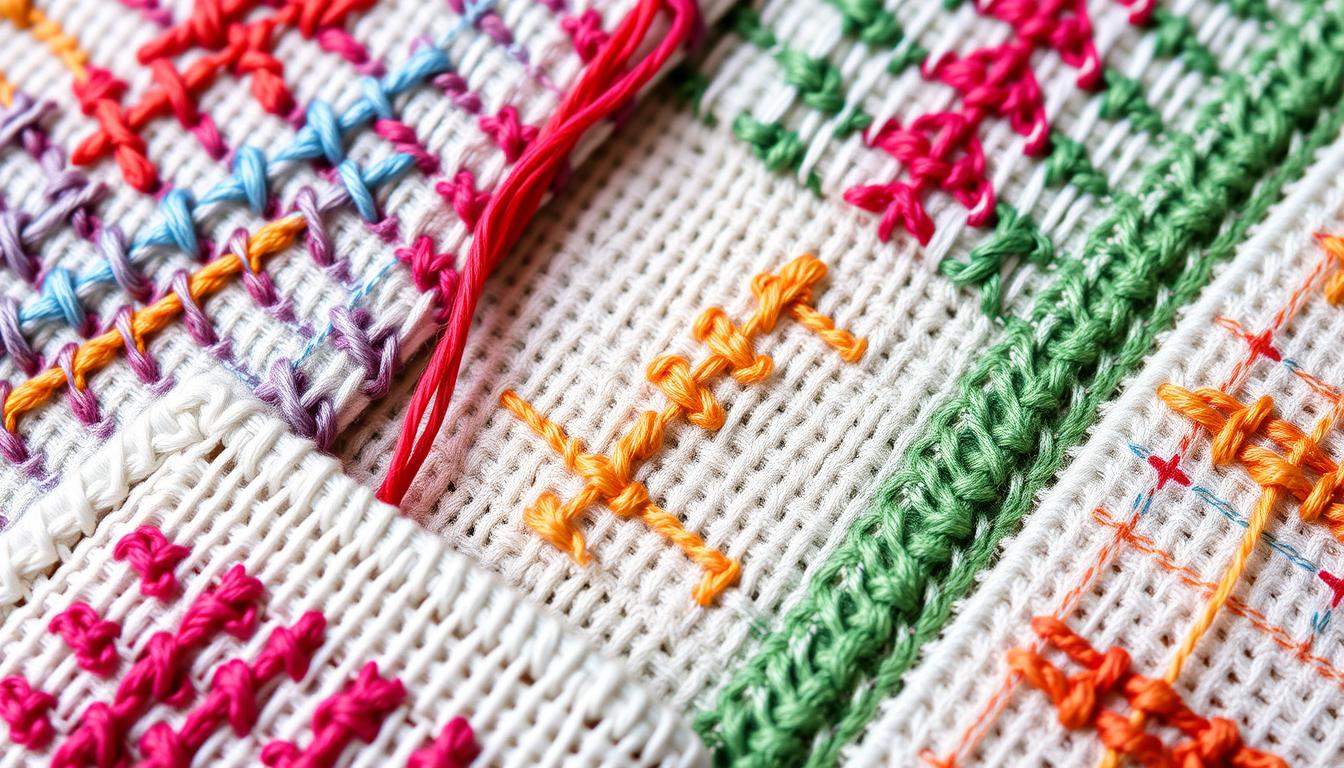
Keeping top stitches consistent is important for a clean look. All top stitches should go in the same direction. Whether you start from the top-left to bottom-right or the top-right to bottom-left, keeping it the same improves your project’s look. It makes your cross stitch designs look better and avoids a messy appearance.

Block Stitching
Block Stitching means stitching in blocks, which is great for big areas of the same color. It makes your stitching faster and more efficient. This method is perfect for big patterns, as it keeps your work consistent without needing to switch threads often.
Using these cross stitch methods will help you get beautiful and consistent results. Whether you’re working on traditional patterns or new designs, knowing these techniques is essential. They help you create stunning and professional-looking pieces.
The Impact of Direction on Cross Stitch Appearance
The direction of your stitches greatly affects the look of your cross stitch. It’s important to keep top stitches facing the same way for a clean finish. This makes the piece look better by reflecting light evenly.
Keeping top stitches consistent is key in DIY cross stitch. It makes the design look polished, especially in designs with text or detailed patterns. This helps the text or patterns stand out clearly.
A uniform stitch direction also adds to the design’s beauty by creating texture and depth. While it’s important to keep the back neat, focus more on the front for a professional look. Beginners should aim for consistent top stitches, even tension, and full coverage to hide the fabric.
On the other hand, uneven top stitches can make the design look messy. Learning to keep stitches uniform can make your cross stitch look amazing. By paying attention to stitch direction, you can make your design more interesting and detailed.
Think about how stitch direction affects your cross stitch’s look. Make choices that improve your design’s appearance. Here’s a comparison of factors influenced by stitch direction:
| Factors | Consistent Stitches | Inconsistent Stitches |
|---|---|---|
| Appearance | Clean and Polished | Messy and Chaotic |
| Light Reflection | Even | Uneven |
| Legibility of Text | Improved | Diminished |
| Texture and Depth | Enhanced | Disrupted |
The direction of your stitches is vital for both the look and quality of your cross stitch. It’s a key element in making your work visually appealing and of high quality.
Does Cross Stitch Direction Affect Finished Projects?
The way you stitch cross stitch can change how your project looks and feels. Most people like the Danish method for DMC or solid threads. It means stitching one leg first and then the other on the way back. This makes your stitches look neat and even.
Some stitchers prefer the English or Victorian method for variegated floss. They stitch one stitch at a time. This method brings out the colors in the thread, making your design pop.
The fabric you use also matters. For detailed work, 16ct or 32ct fabric is best. It lets you make tighter stitches. Evenweave fabric is good for easier stitching and a smooth finish.
Using the right number of floss strands is key. Two strands work well for finer fabrics. But for thicker ones, three strands are better for full coverage.
Tools like laying tools and railroading help keep your stitches even. They prevent mistakes like wrong colors or counts. If you make a mistake, you can often fix it without ruining your project.
Washing your cross-stitch can also make it look better. It makes the stitches stand out and fills the fabric evenly. This gives your work a professional finish.
Even small mistakes can’t ruin a beautiful project. The cross-stitch community says it’s okay to have them. They make your work unique. With practice, patience, and creativity, you’ll get amazing results.
Expert Opinions on Cross Stitch Methods
Cross stitch experts have different views on the best ways to stitch. They share insights on traditional and modern methods. This mix of old and new can change how you stitch.
Traditional Techniques
Traditional cross stitch follows old ways passed down through generations. Experts say sticking to patterns and making each stitch the same is key. This approach keeps the craft true to its roots, showing the stitcher’s dedication.
They also recommend using top-quality threads from brands like DMC, Anchor, and Kreinik. These brands are known for their excellent products.
Modern Variations
Modern cross stitch brings new tools and ways to stitch. It uses programs that turn photos into patterns and adjust colors. Brands like MacStitch, PCStitch Pro, and Stitch Fiddle have changed how we design and stitch.
This new approach makes stitching more flexible and personal. It suits both newbies and seasoned stitchers.
Advice from Experienced Stitchers
Experienced stitchers say the best technique is what feels right to you. Some prefer traditional methods for their reliability. Others like modern techniques for their creativity.
It’s important to find what works for you. Whether it’s the steady rhythm of traditional stitching or the creative freedom of modern methods, it’s all about enjoying the process.
| Pros of Stitching by Color | Cons of Stitching by Color |
|---|---|
| Efficiency in the stitching process | Thread waste from covering large sections |
| Improved thread management | Eye strain from working with similar colors |
| Satisfying color progression | Potential monotony from repetitive stitching |
| Pros of Stitching by Section | Cons of Stitching by Section |
|---|---|
| Visible progress in each section | Frequent thread changes slow progress |
| Engaging color variety | Complex planning required |
| Easier error correction | Higher skill level needed for beginners |
Cross Stitch Best Practices
Mastering cross stitch needs skill and knowing some key best practices. These practices can make your cross stitch projects look professional and polished.
Thread Management
Managing your thread well is key in cross stitch. Cut your thread to about 18 inches to avoid knots. Use high-quality skeins from brands like DMC to prevent tangling.
Start with the basics, especially if you’re new. Use kits before trying original designs. This helps avoid thread problems.

Keeping your thread smooth is important. Embroidery floss, with six strands, is often split for stitching. Secure the thread at the back of the fabric by passing the needle under at least three stitches.
Choosing the Right Fabric
Picking the right fabric is crucial. Aida and linen are common but can fray when cut. Aida comes in counts from 8 to 20, offering different levels of complexity.
Start with a count that matches your skill level and project needs. Use a round-end tapestry needle that fits your fabric. The needle size should match the fabric’s count to avoid damage.
Maintaining Consistency
Stitching consistently is key for a uniform look. Avoid stitching upwards to prevent crossing stitches in the same hole. Most cross-stitch is done in rows from left to right.
Plan your pattern before starting. This prevents running out of thread and keeps colors consistent. Using Microsoft Excel for designing shows a useful digital tool.
Try different Aida colors, dissolvable Aida, and specialty threads for interesting projects. This adds variety and makes your artwork stand out.
By following these tips and using the right tools and supplies, you can improve your technique. This will help you create beautiful cross-stitch projects with ease.
Conclusion
Cross stitching is more than just a hobby. It’s a mix of art and precision, needing the right technique and direction. This review shows how the direction of your stitches changes your project’s look and feel.
Being consistent in your stitches is key, whether you’re new or experienced. Small mistakes can make big changes in your work. This shows how important it is to be precise, from picking threads to the last stitch.
Knowing the costs helps you plan better. Kits cost between $5 and $10, fabrics like 14 count Aida are $3.99, and DMC floss is $0.62 per skein. This lets you enjoy the craft without breaking the bank. Cross stitching also helps you relax and be creative.
This summary says that while you should choose techniques you like, being precise and consistent is best. With practice and focus, your cross stitch can become something special. So, pick your favorite techniques and make something beautiful that shows your skill and effort.
