Start a fun journey of making beautiful cross stitch pieces with our detailed guide. Cross stitch is both calming and detailed, perfect for creating stunning artwork. This guide is for both newbies and experts, aiming to improve your stitching skills.
We’ll cover everything from picking the right materials to mastering complex patterns. You’ll learn advanced techniques to make your stitches look amazing. With our help, you can turn your designs into beautiful pieces of art.
Key Takeaways
- Select appropriate cross stitch supplies, including fabric, needles, and threads, for better results.
- Understand different crossstitching methods like the Danish and English techniques.
- Maintain proper tension using tools like hoops and Q-Snaps to avoid gaps or bulky stitches.
- Regular practice is vital for mastering neat stitches and improving your overall technique.
- Ensure color consistency in your projects by purchasing all supplies at the start and managing dye lot variations.
Choosing the Right Cross Stitch Supplies
In the world of cross stitch, picking the right supplies is key for a good time and great results. Whether you’re new or have been stitching for years, choosing wisely can make a big difference. This includes cross stitch kits, fabric, needles, and threads.
Cross Stitch Kits
Cross stitch kits are perfect for beginners. They usually have everything you need—fabric, needles, threads, and a pattern. This makes starting out easy. Brands like DMC offer great kits for all skill levels.
Fabric Selection
Choosing the right fabric is important for your project’s look. Aida fabric, especially the 14 count Aida, is great for adults starting out. It’s easy to work with and has a grid to help keep your stitches even.
For kids or those with poor eyesight, a 6 count Aida is better. It has a bigger grid. Advanced stitchers often prefer evenweave linen for detailed designs.
Needles and Threads
The right needles and threads can make stitching better. Fine needles are best for detailed work. They should be smooth and sturdy.
Threads from DMC, made from 100% Egyptian cotton, add shine to your work. They come in many colors and stay bright after washing.
| Needle Type | Recommended Use |
|---|---|
| Fine Needles | Detailed Work |
| Standard Needles | General Projects |
Choosing the right supplies is the first step to successful cross stitching. From kits to fabric, needles, and threads, each part is important. Happy stitching!
Understanding Cross Stitch Patterns
Exploring cross stitch patterns is key to mastering this detailed embroidery. These patterns serve as your guide, helping you make beautiful and precise pieces. For beginners, free crossstitching patterns are a great starting point.

Looking at cross stitch charts, you’ll see important details for accuracy:
- Color threads are shown by a color block and a symbol in full-color charts.
- In black and white, symbols alone show different thread colors.
- Professional charts also list fabric color and count recommendations.
It’s also crucial to know how to read these patterns. The size, shown by the number of stitches, is usually included in cross stitch patterns. Notes may also tell you how many strands of floss to use for each stitch.
Copyright laws protect most cross stitch patterns. But, you can find many charts free for personal use. This lets you practice and get better without spending money.
Beginners should start with simple crossstitching charts and move to harder ones as they get better. Cross stitch is easy to learn, making it popular among crafters of all levels.
The fabric you choose is very important. Aida and linen are favorites because of their texture and ease of use. It’s best to buy all your supplies at once because dye lots can change, affecting your project’s look.
Here’s a look at the key components typically found in cross stitch charts:
| Component | Description |
|---|---|
| Thread Symbols | Color threads and symbols, in both color and black-and-white charts. |
| Fabric Recommendations | Suggested fabric type, color, and count for best results. |
| Stitch Dimensions | Dimensions by width and height of stitches for accurate sizing. |
| Floss Usage Notes | Notes on how many strands of floss to use for different stitches. |
| Copyright Information | Legal notices to protect the pattern design. |
Understanding these elements can make your cross stitching journey better. You’ll create stunning pieces with precision and confidence.
Mastering Different Cross Stitch Techniques
Learning various cross stitch techniques can make your crafts look better and more detailed. This guide covers three main methods: the Danish, English, and Railroading techniques. Each stitch has its own benefits, adding texture and style to your work.
Danish Method
The Danish method is known for being quick and easy. You stitch in rows from left to right, then go back to finish the crosses. It’s great for big areas because it keeps the tension even and breaks threads less often. This method helps your crossstitching look neat and uniform.
English or Victorian Method
The English method is all about detailed texture. You stitch each cross individually, which is perfect for intricate designs or variegated threads. It takes longer than the Danish method but lets you control your stitches better, making your work look vibrant and textured.
Railroading Technique
The Railroading technique gives your work a smooth, polished look. You guide your needle between the floss strands to keep them flat. This method helps avoid twisted stitches, making it ideal for detailed work where neatness matters.
| Technique | Key Features | Ideal For |
|---|---|---|
| Danish Method | Fast, uniform, works in rows | Large, simple areas |
| English or Victorian Method | Detailed, completes each stitch individually | Intricate designs, variegated threads |
| Railroading Technique | Threads lie flat, smooth finish | High-detail, precise work |
Trying out these cross stitch techniques can really improve your projects. From the Danish method’s speed to the English method’s detail, and the Railroading technique’s smooth finish, each has its own perks. Mastering these methods lets you create stunning, unique cross stitch pieces.
Maintaining Proper Tension
Getting the right tension in your cross stitch is key for a professional look. The right tools and techniques help keep your stitches even and fabric tight.
Using Hoops and Q-Snaps
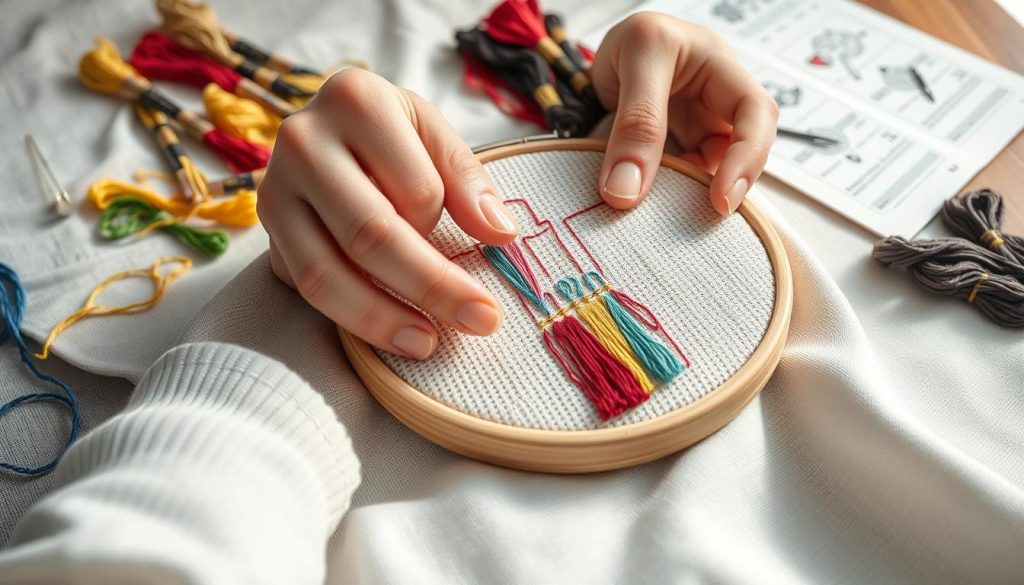
Cross stitch hoops and Q-Snaps keep your fabric tight, avoiding puckering. They come in different sizes for various projects. Hoops are round, while Q-Snaps are square or rectangular. Both help keep your stitches neat and even.

Adjusting Thread Tension
Using hoops or Q-Snaps is just part of the job. Proper thread management is also crucial. Here are some tips for adjusting thread tension:
- Cutting Threads: Cut your embroidery floss to 18 inches to avoid knots and fuzz.
- Stripping Threads: Strip your threads before threading the needle for fuller stitches.
- Securing Threads: Pass the needle under at least three stitches at the back to secure it, avoiding irregularities.
Choosing the right needle and size is also important. Use a blunt needle to avoid splitting stitches. Managing thread length and rethreading at the right spot helps keep tension even.
Remember these tips to improve your cross stitch tension and make your work look great. Here’s a table with more details:
| Recommendation | Detail |
|---|---|
| Thread Length | Cut to approximately 18 inches to avoid knots |
| Strands Used | Most patterns use 2 out of the 6 available strands |
| Secure Threads | Pass needle under at least 3 completed stitches |
| Thread Management | Organize with bobbins to prevent tangling |
Tips for Beginners
Starting cross stitch can be both exciting and daunting. But with the right approach, it becomes a fun hobby. For beginner cross stitch enthusiasts, start with a low Aida count like 8 or 10. This fabric is easier to work with and helps you learn the patterns and techniques without feeling overwhelmed.
Using children’s cross stitch kits can also be helpful. These kits make learning easier and help you move to more complex patterns as you get better. Quality threads, like DMC, make your work look better because they glide smoothly through the fabric.
Many websites, like DMC, LoveCrafts, and Hobbycraft, offer free cross stitch patterns. These are great for beginners because they have lots of designs to practice with. You can also use Microsoft Excel to design your own patterns. This lets you create unique projects that you’ll love.
When stitching, always stitch horizontally or finish all upward stitches before going down. This keeps your stitches from coming undone. Also, try using dissolvable Aida to explore new creative ways to use your stitching skills.
Using the right skeins of threads is key to keeping your beginner cross stitch projects looking good. It makes the crafting process easier. Stitching in natural light also helps you see better and avoids eye strain.
When using light effects thread, thread conditioner can make it easier to use and prevent tangling. Always remove the hoop from the Aida fabric when not stitching to avoid creases. And wash your hands before starting to avoid stains.
Plan your pattern and make sure you have enough thread before you start. Using contrasting colors on higher-count Aida can make your stitches less visible, making your work look better.
Adjusting the Aida count is another tip for beginners. It lets you change the size of your design to fit your frame or preference. By following these tips, you’ll start your stitching journey on the right foot.
Advanced Cross Stitch Techniques
Exploring advanced cross stitch techniques can boost your crafting skills. You can try using metallic threads, mixing different stitches, and making custom cross stitch designs.
Using Metallic Threads
Adding metallic threads to your projects brings a shimmer and elegance. They are a bit harder to work with because of their texture. But, they make your design pop, adding a luxurious touch.
Combining Different Stitches
Mixing stitches like backstitch, French knots, and specialty stitches adds texture and depth. These stitches help you create intricate details and depth. This makes your advanced cross stitch pieces more interesting and complex.
Designers like Teresa Wentzler and Chatelaine use these techniques in their work. They show amazing examples that spark creativity.
Creating Custom Designs
Making your own custom cross stitch designs lets you add a personal touch. You can adapt patterns or create new ones. This makes your work unique and shows your creativity.
Cross Stitch Finishing Techniques
Finishing your cross stitch project is as important as the stitching itself. It includes steps like washing and ironing, and framing your work. These techniques keep your masterpiece looking great and ready to display.
Washing and Ironing
After you finish your cross stitch, washing and ironing can make it look better. Soak the piece in lukewarm water with mild soap to clean it. Then, gently rinse and dry it with a clean towel.
Ironing is next, and it’s important to do it right. Place the piece face down on a soft towel and cover it with a pressing cloth. Use a medium-hot iron to press gently, so you don’t flatten the stitches. This careful ironing makes your work look crisp and neat.
Framing Your Work
Choosing the right frame and mat is key for cross stitch framing. These elements enhance the look and protect your work. You can also use old wooden trays or frames for a unique touch.
Begin by picking a frame that matches your design. Use backing boards for larger pieces to keep the artwork’s shape. Attach the cross stitch securely, making sure it’s centered and tight. Adding quilt batting or a felt circle to the back adds a polished look and protects the stitching from dust and damage.
Finishing techniques are crucial for the look and life of your cross stitch. By mastering these methods, like ironing and framing, you can take your projects to new heights.
| Finishing Task | Description | Tips |
|---|---|---|
| Washing | Soak in lukewarm water with mild soap | Use a clean, dry towel to pat it gently |
| Ironing | Place face down on a soft towel, cover with pressing cloth | Press gently using a medium-hot iron |
| Framing | Select a complementary frame and secure | Consider backing boards for larger pieces |
| Adding Backing | Use quilt batting or a felt circle | Personalize with messages or initials |
Conclusion
Cross stitch is a journey that mixes creativity with skill. It turns simple threads into detailed designs. Whether you’re new or experienced, each project helps you grow and express yourself.
Cross stitch is not just fun; it’s also good for your mind. It offers a way to express yourself and has mental health benefits.
To improve your cross stitch, learn new techniques and pick the right materials. DMC floss is affordable at $0.62 per skein. Luxurious fabrics can cost up to $30 per piece.
Quality tools, like DMC tapestry needles, cost about $2.99 for six. They make stitching easier.
Cross stitch also brings people together. Join online groups or local competitions to share your love for it. You’ll learn new things and celebrate the art.
It’s not just about making art; it’s also good for your mind. It reduces stress and boosts mindfulness.
This guide is here to help you at every step. Start your cross stitch projects with confidence. Each stitch brings you closer to creating beautiful, lasting pieces.
