The traditional way to start a cross stitch project is by finding the fabric’s center. This method, often recommended in cross stitch basics, keeps your design balanced and centered. For newbies, starting in the middle helps keep colors consistent, especially with multicolored threads from brands like DMC.
But, as you learn more about cross stitch techniques, you might find other starting points work better for your project. You can start in the middle or somewhere else, depending on your project and what you like. Knowing how to start can make your cross stitching more fun and effective.
Key Takeaways
- Starting in the center ensures your design is symmetrical and centered.
- DMC is a popular brand for stranded embroidery thread, used widely in cross stitching.
- Beginners are advised to use 14 count Aida fabric for ease.
- Loop starts and knotless techniques are preferred to avoid lumps on the back of the project.
- Using two strands of thread for each cross stitch is common practice.
Understanding the Basics of Cross Stitch
Cross stitch is a fun form of embroidery. It uses X-shaped stitches to make pictures. It’s great for both newbies and experienced crafters.
What is Cross Stitch?
Cross stitch uses tools and materials to create patterns. You’ll often use aida cloth, known for its even holes. Brands like Zweigart and Wichelt make high-quality aida cloth, with 14-count being the most popular.
Most patterns tell you to use two strands of embroidery floss. Brands like DMC are trusted for their colors.

Essential Tools for Cross Stitching
To start making beautiful cross stitch designs, you need the right supplies. Here’s what you’ll need:
- Fabric: Pick aida, linen, or evenweave based on your pattern.
- Embroidery Floss: DMC offers vibrant colors for your designs.
- Needles: Make sure they fit your fabric and floss.
- Embroidery Hoop: It keeps your fabric tight while stitching.
- Sharp Scissors: Needed for cutting threads.
Cross stitch kits are a great way to start. They come with fabric, floss, needles, hoops, and patterns. Whether using kits or gathering your own supplies, make sure they fit your project. This will help you succeed from the beginning.
The Importance of Starting Position
When starting a cross stitch project, the beginning position is key. Knowing how to start right can greatly improve your final design.
Why Centering Matters in Design
Starting in the center keeps your design right where it should be. This method helps avoid incomplete charts or fabric issues. It’s especially good for detailed or big projects where exact placement is crucial.
Benefits of Beginning in the Middle
Starting in the middle has many advantages. It keeps your design balanced and symmetrical. It also prevents fabric edge problems.
A Facebook poll showed many prefer starting in the center. It’s great for projects needing multiple charts, keeping everything aligned. Tools like gridding and Aida calculators help find the exact center, avoiding fabric and counting errors.
- Using a waste knot and a few tiny backstitches can be an easy and secure way to start a new embroidery thread.
- Traveling a thread on the back of the fabric saves time by avoiding the need to end a thread and start a new one.
- Long stitches across the back of your work can lead to knotting or tangling, which is eliminated by effectively traveling threads.
Starting in the middle is a proven method. It boosts accuracy, prevents misalignment, and leads to a better finish.
Alternative Starting Points in Cross Stitch
Exploring different starting points in cross stitch can be very beneficial. It’s especially true for those who enjoy advanced techniques. These methods help you work more efficiently and achieve cleaner results.

Top-Left Corner Method
The top-left corner method is a favorite among experienced stitchers. It lets you work your way across the design systematically. This is great for projects with borders.
Starting at the top-left corner helps keep your stitches aligned. This prevents mistakes that can happen with the traditional center start.
It’s important to count and align carefully when using this method. This ensures your design fits perfectly on the fabric. For advanced projects, this technique makes stitching easier and faster.
Edge Stitching Techniques
Edge stitching techniques, like the Tuck Start, Loop Start, and Pin Start, are great for starting without knots.
Let’s look at each technique:
- Tuck Start: Works well with any thread, avoiding messy backs. It’s good for Pearl Cotton and Embroidery Floss.
- Loop Start: Perfect for double-layered floss, it’s knotless. It ensures a clean start for advanced stitches.
- Pin Start: Great for aida cloth, evenweave, or linen. It keeps the back tidy, important for professional looks.
A knotless start is key to avoid tangled stitches. Using these techniques will make your projects look better and more polished.
| Starting Technique | Best For | Key Benefit |
|---|---|---|
| Tuck Start | Any embroidery thread | Versatility |
| Loop Start | Double-layered floss | Clean back |
| Pin Start | Aida, evenweave, linen | Tidy appearance |
How to Find the Center of Your Fabric
Starting your cross-stitch project right is key to success. By using precise methods, your design will be perfectly placed and sized. Here, you’ll learn how to find your fabric’s center using measuring and grid lines. This method prevents mistakes and ensures your patterns are balanced and beautiful.
Measuring Techniques
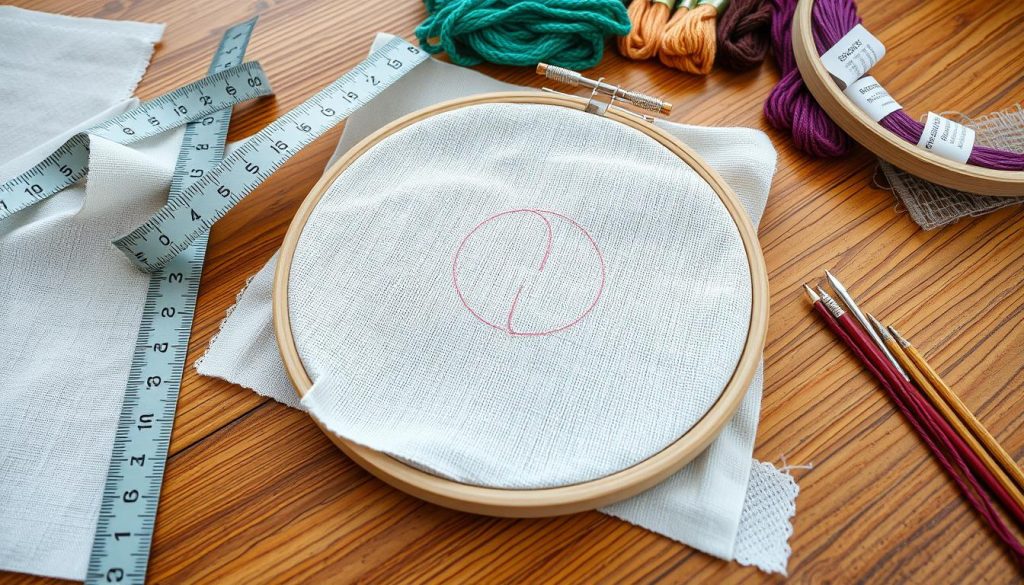
Folding is a simple way to find your fabric’s center. Fold it lengthwise and then widthwise. The point where these folds meet is your center. This step is vital when following cross stitch tutorials and for accurate measuring.
Remember to add 3-4 inches to each side of your fabric for framing. This gives you enough room for adjustments.
Most cross-stitch patterns use 14 count Aida fabric. They are stitched with two strands of embroidery floss for a standard look, or three for a heavier texture. Keeping these details in mind helps keep your project uniform.
For bigger projects, add 3 inches to the hoop diameter to find the fabric square size. This helps in planning your design.

Using Grid Lines for Accuracy
Gridding your fabric improves your stitch accuracy, especially for big and complex designs. Use a washable marker or thread to draw grid lines. This method is great for keeping your design aligned and preventing mistakes.
Many cross-stitch patterns mark the center with arrows or a dot. This makes measuring easier. It’s especially helpful when using a hoop for framing. The grid lines help you keep your stitches evenly spaced, making it easier to follow detailed patterns.
Using the right tools and techniques ensures your design is balanced and beautiful. Whether you’re new to cross stitch or have experience, measuring and gridding are essential skills for all your projects.
Tips for Starting Your Cross Stitch Project
Getting ready for your cross stitch project is key to success. First, prepare your fabric and threads. Then, plan how you’ll stitch. This guide will help you with these important steps.
Preparing Your Fabric and Threads
Choose the right fabric to start. Beginners often pick Aida fabric with counts of 8 or 10. More skilled stitchers might use counts of 14 or 16 for detailed designs.
Pre-washing your fabric stops it from shrinking or changing color later.
Threads are also vital. Use high-quality skeins like DMC to avoid tangles and get a smooth finish. Most embroidery floss has six strands, but you’ll usually use two for cross stitch.
Also, organize your threads by winding them onto bobbins or using floss organizers. A thread separator can help with this.
Planning Your Stitching Strategy
Good planning is crucial for your cross stitch project. Look at your pattern carefully. Websites like DMC, LoveCrafts, and Country Living have many free patterns to pick from.
Decide where to start, usually the center, to save material. A strategic plan is important, especially for complex designs. Use spreadsheets to design patterns or track your progress. A grid on your fabric helps keep your stitches accurate.
“Cross stitch is considered one of the easiest crafts, making it suitable for all skill levels.”—Craft Enthusiast
With the right preparation and planning, your cross stitch project will be enjoyable. Use colorful Aida fabric or try dissolvable options for creative pieces. Your project can be both fun and rewarding.
Final Thoughts on Starting Your Cross Stitch
Choosing where to start your cross stitch depends on your personal taste and project details. You can pick from center starts, corner starts, or edge stitching. Each method has its own benefits for different stitching needs.
Center starts are perfect for symmetrical designs. But, other methods might be better for complex or border-heavy patterns. This gives you more control over your work.
Choosing What Works Best for You
For DIY cross stitch beginners, picking a starting method can be tough. There are many options, from affordable kits to custom projects. Prices range from $5 to $30, depending on the material.
Some beginners struggle with tangled floss or understanding terms. But, trying different techniques and tools can help. It’s all about finding what works for you.
Encouragement for Beginners
Starting your cross stitch journey is both thrilling and challenging. 75% of beginners love the freedom it offers. It’s different from other needlework.
Don’t worry about the initial hurdles. 85% find it hard to separate embroidery floss strands, and 60% deal with needle breakage. These are just part of the learning process.
Keep trying different methods until you find one that feels natural. Your approach will change as you get better. Cross stitch offers endless creativity and growth. Happy stitching!
