Starting a cross stitch project can seem scary, especially if you’re new to it. But, by following a few simple steps and using some key tips, you can make it fun and successful. This embroidery is known for being easy and calming.
You’ll need to get your supplies ready, prepare your materials, and organize your pattern. This will help you get the best results.
It’s important to start your project right. Finding the fabric’s center is key. Most patterns say to start from the center for even design. You can find the center by folding your fabric in both directions and making a small crease.
Also, putting your fabric in an embroidery hoop keeps it tight. This makes your stitches neat and precise. Plus, cutting your threads to the right length and separating them helps avoid tangles and knots.
This way of preparing is loved by many cross stitch fans. It makes the project more enjoyable and relaxing.
Key Takeaways
- Starting from the center of your fabric ensures even design distribution.
- Using an embroidery hoop maintains fabric tension for more accurate stitching.
- Preparing threads to a manageable length helps prevent knots and tangles.
- Choosing a beginner cross stitch pattern with 3-10 colors avoids overwhelming complexity.
- Cross stitch is one of the easiest forms of hand embroidery to learn and enjoy.
Essential Cross Stitch Supplies
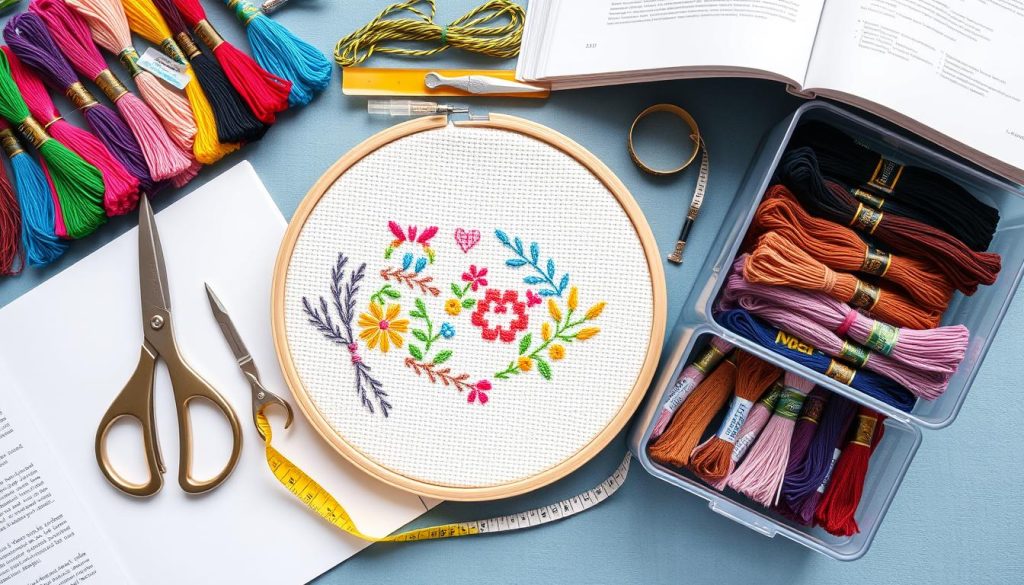
For any cross stitch project, you need a good set of tools and materials. This ensures a smooth and fun crafting experience. Knowing about these supplies can make your stitching journey better.
Cross Stitch Fabric
There are many cross stitch fabric options, like aida, linen, and evenweave. Each is for different skill levels and project details. Aida fabric is great for beginners, especially the 14-count type.
Linen and evenweave fabrics have a finer texture. They are better for more advanced stitchers.
Cross Stitch Threads
Threads are key for the look and feel of your project. DMC offers high-quality, 100% Egyptian cotton threads. They have many colors, including solid and variegated ones.
Six-stranded cotton embroidery floss is common. It lets you adjust stitch thickness by separating strands.

Cross Stitch Needles
Special needles for cross stitch are needed to avoid fabric damage. Tapestry needles, size 24, are good for beginners. They have a blunt end to prevent thread splitting.
Gold-plated needles are also popular. They glide smoothly and don’t rust easily.
Embroidery Hoop
An embroidery hoop keeps the fabric tight and flat. This is key for even stitching. Wooden hoops are best for beginners, starting with a 7-inch size.
Choose a hoop size 2 inches larger than your pattern’s largest side.
Additional Tools and Accessories
Some extra tools can make cross stitching better:
- Project Bags: Keep everything organized and clean.
- Needle Minders: Stop needles from getting lost with magnets.
- Thread Conditioners: Make fuzzy threads and metallics smooth.
- Scissor Fobs: Identify and handle scissors easily.
- Lighting: Important for eye protection and precise stitching.
Adding these supplies to your toolkit will help you make beautiful, precise, and fun cross stitch projects. Here’s a comparison of common cross stitch supplies:
| Supply | Description | Recommended For |
|---|---|---|
| Fabric | Aida, Linen, Evenweave | Beginners (Aida), Advanced (Linen, Evenweave) |
| Threads | Six-stranded Cotton Floss | All Levels |
| Needles | Tapestry, Gold-Plated | Beginners (S24 Tapestry), Advanced (Gold-Plated) |
| Embroidery Hoop | Wooden, 7-inch | Beginners |
| Additional Tools | Needle Minders, Thread Conditioners, Lighting | All Levels |
Preparing Your Fabric and Threads
Before starting your cross-stitch project, it’s important to prepare your fabric and threads well. This makes the stitching process smoother and more fun. From finding the fabric’s center to marking it with a grid, each step is key to a great final design.
Finding the Center of Your Fabric
Fold your fabric in half and then into quarters to find the center. This is where you start counting your stitches. It’s especially important for big designs that need precision.
Cutting and Preparing Your Threads
Cut your threads to 18-24 inches long. This keeps them from tangling and makes knotting easier. Use different thicknesses for your threads, depending on your design. Winding them on bobbins or pegs helps manage them better.
Using a Hoop or Frame
An embroidery hoop or frame helps keep your fabric tight and even. Make sure your fabric is snug but not too tight. This makes your stitches neat and even, a favorite among many stitchers.
Marking Your Fabric with a Grid
Marking your fabric with a grid helps you count your stitches accurately. Use water-soluble markers or temporary stitching to draw 10×10 sections. This makes tracking your progress and keeping stitches even easier.
| Preparation Step | Tool/Method |
|---|---|
| Finding the Center | Folding the fabric into quarters |
| Cutting Threads | 18-24 inches per strand |
| Using a Hoop | Embroidery hoop/frame |
| Marking a Grid | Water-soluble markers/temporary stitching |
These steps are crucial for preparing your fabric and threads. They make your stitching sessions more efficient and ensure a high-quality finish.
Cross Stitch Techniques for Beginners
Learning a few key cross stitch methods can really boost your stitching skills and fun. Start with simple techniques to build a strong base for more complex projects. Here are some key techniques for beginners.
The Waste Knot Method
The Waste Knot Method is great for beginners. It’s perfect for threads with color changes, keeping the pattern right. To do this, tie a knot at the thread end and place it on the fabric’s front. Make your first stitch on the design line.
As you stitch, the knot stays visible until you can cut it off. This secures the thread neatly on the back.
The Loop Method for Even Strands
The Loop Method is ideal for starting with even strands. It gives a clean start for beginners. Fold a strand in half, thread the loop through the needle, and bring it up from the fabric’s back.
Pass the needle through the loop to secure the thread without a loose end. This method is often recommended in cross stitch tutorials.
Securing Threads as You Stitch
Securing threads as you stitch is crucial. It keeps your work neat and prevents unraveling. Weave your thread under a few stitches on the fabric’s back.
Avoid long jumps across uncovered fabric. Carry the thread under neighboring stitches for neatness. This is key in all cross stitch tutorials for a polished finish.
Basic Cross Stitching Steps
Knowing the basic steps is essential for beginners. Start with a diagonal stitch from bottom left to top right. Then, complete the cross from bottom right to top left.
Keep your stitches consistent to avoid fabric distortion. Start from the fabric’s center to keep your design centered. These simple practices will help you master the craft quickly.

| Technique | Purpose | Benefit |
|---|---|---|
| Waste Knot Method | Maintaining thread color variation | Prevents color distortion |
| Loop Method | Starting with even strands | Clean, neat starting point |
| Securing Threads | Preventing thread unraveling | Neat and tidy finish |
| Basic Cross Stitch | Foundation stitch techniques | Consistent and even stitches |
As you start your cross stitch journey, using these methods will improve your skills. Each project will reach its full potential. Cross stitch tutorials often highlight these foundational techniques, important for both beginners and experienced stitchers.
Starting a Large Cross Stitch Project
Starting a big cross stitch project is both thrilling and a bit scary. It’s important to plan well and stay organized. This makes the whole process fun and easy.
Organizing Your Pattern and Supplies
First, sort all your supplies into neat piles. This means organizing threads, needles, and tools. Use bobbins or cards to keep colors straight and avoid tangles.
Make sure your pattern is easy to find. Break it into smaller parts to keep track of your work.
Handling Multiple Colors and Threads
Managing colors is key in big projects. Use thread organizers and labels to switch threads smoothly. Also, embroidery stands can ease hand strain, letting you stitch longer.
Grime guards help keep your fabric clean. This is very important for long projects.
Using a Temporary Grid
A temporary grid makes it easier to follow your stitches. Use markers or floss to draw a 10×10 grid. Start by dividing your fabric into four parts for better organization.
This method helps you stay accurate and catch mistakes early.
Stitching One Section or Color at a Time
Stitch one section or color at a time for better control. Breaking your project into smaller parts helps you stay focused. The Parking Method is great for switching colors smoothly.
| Method | Application |
|---|---|
| Temporary Grid | Use water-soluble markers or embroidery floss to mark every tenth hole or create a 10×10 grid. |
| Thread Organizers | Manage multiple thread colors using bobbins or cards; helps prevent tangles and confusion. |
| Quadrant Division | Divide the pattern into four equal sections for easier management and tracking. |
| Parking Method | Alternate between colors, marking thread positions to stay organized. |
| Embroidery Stands & Guards | Minimize strain on hands and keep fabrics clean during long stitching sessions. |
Conclusion
Finishing your cross stitch project is key to keeping it beautiful. Washing the fabric removes markers and lines. This makes your project look fresh and ready for display.
Pressing the fabric is also vital. Ironing smooths out wrinkles that might have formed while stitching. This step is crucial for framing, giving your work a professional look. Whether you choose a simple or elaborate frame, it showcases your hard work.
Looking back on your project can teach you a lot. You might learn to read instructions better or use threads more wisely. You might also avoid mistakes like stitching in the wrong direction or adding too many stitches.
Cross stitch is a rewarding way to express your creativity and precision. From organizing supplies to finishing techniques, each step adds to your masterpiece. Remember, even small choices like fabric or needles make a difference. With affordable patterns and supplies, cross stitching is fun and accessible. Keep exploring new designs to improve your skills and enjoy the craft even more.
