Cross stitch can make a quiet Saturday fun and fulfilling. You’ll find projects that are quick to finish and show off your work. These ideas range from bookmarks and mug cosies to portraits and tote bags. They’re both useful and beautiful, perfect for showing off or selling.
This guide offers ten cross stitch projects you can finish in one weekend. You’ll find easy ideas and tips on finishing your work. Learn about counted cross stitch and simple gridding to work faster.
These projects are great for beginners or those looking to start a business. They’re both charming and sellable. You’ll get advice on fabrics, thread, and finishing to make your pieces look professional.
Key Takeaways
- Choose small, focused projects for quick satisfaction and visible results.
- Use finishing options—hoops, frames, pillows—to turn stitches into display-ready items.
- Basic counted cross stitch, gridding, and backstitching speed up weekend builds.
- Many finished pieces, like tote bags and mugs, are both useful and sellable.
- Pick supplies thoughtfully—Aida or evenweave, and reliable DMC floss—for cleaner results.
Quick and Click-Friendly Cross Stitch Ideas for Beginners
Start with a project that can be finished in one evening. This will help you feel more confident. Choose small pieces that show off your stitches without needing to change colors often.
Why choose quick projects this weekend
When you’re new, you want to see results fast. Simple designs let you practice basic stitches and see your progress. Short projects also help you learn important skills like counting and controlling tension.
Best beginner cross stitch patterns to try
Try making bookmarks, keychains, or small motifs. Bookmarks are great on Aida bands or evenweave and look nice with felt backing. Keychains and tiny floral squares make great gifts and decorations.
Beginner cross stitch tools and DMC floss choices
Use DMC floss as your go-to thread. It’s easy to find, consistent, and simple to use. For fabric, pick 24–28 count Aida or an aida band for easy sizing. You’ll need size 24–26 needles, a small hoop, sharp scissors, and a gridding pen or waste canvas for tricky spots.
Common beginner cross stitch mistakes and how to avoid them
Miscounting the center is a common mistake. Use a grid on your fabric and start at the pattern center. Puckering on clothing can happen if the fabric moves. Use a stabilizer or stitch on an aida patch, then sew it to the garment.
Over- or under-tensioning can make your stitches uneven. Keep your hoop tension steady to avoid this. When framing, consider leaving glass off to keep the texture. Or, use a box frame to protect the work without flattening the fibers.
Turn Your Stitching into Wearable Art: Clothing and Accessories
You can make your cross stitch designs into everyday wear. Start with small motifs for tees, shoes, and bags. Get your garment ready, choose the right needle, and plan where to stitch before you start.
T-shirt and canvas shoe tips — needle selection and fabric prep
Wash and iron your clothes and shoes first. This removes finishes that thread doesn’t like. For t-shirts, stitch on aida patches and then sew them on. This keeps the knit fabric smooth and your stitches even.
For canvas shoes, use a sharp, strong needle and a small hoop if you can. Put a thin stabilizer or interfacing behind the canvas to stop it from warping. Use short floss for tight stitches and change needles when they get dull.
How to stitch on aprons and tote bags without puckering
Work on flat, stable fabrics like midweight cotton or duck canvas. Add a light interfacing behind where you’ll stitch to avoid puckers. If stitching on a hem or pocket, baste it first to keep it smooth.
When adding a stitched panel to a tote, topstitch with a narrow seam. This adds strength and shows off neat edges. For a softer look, edge the panel with a narrow bias binding.
Mug cosies and wristlet keychains — quick pattern ideas and finishing hacks
Mug cosies are quick to make on narrow aida strips. Add a button or snap for different mug sizes. Use simple patterns like hearts, dots, or tiny florals for fast, popular designs at craft fairs.
For wristlet keychains, use plastic canvas or tightly woven fabric for shape. Reinforce the hardware area with extra stitches and a small leather or vinyl backing. These keychains are perfect for impulse buys and gifts.
Home Decor Cross Stitch Projects for Instant Impact
Make a single stitched panel stand out in a room with simple touches. Choose a bold motif and pair it with a striking backing fabric. Small details in finishing can change the look and feel more than the stitching itself.

When sewing panels onto pillows, focus on durability. Use a matching backing fabric and a wide seam allowance. Add lightweight interfacing to protect the threads from wear. Finish the edges with pinking shears or a narrow zigzag to prevent fraying before sewing the pillow seams.
For cushions that get a lot of use, reinforce the seams with extra stitches. Consider a hidden zipper for easy washing. Stitched pillows are more valuable if they feel durable rather than just decorative.
Think of lampshade cross stitch as a statement piece that can also be sold. Even a simple stitched panel on a plain shade can make a big impact. Test different fabrics to see how they affect the look before finishing a shade.
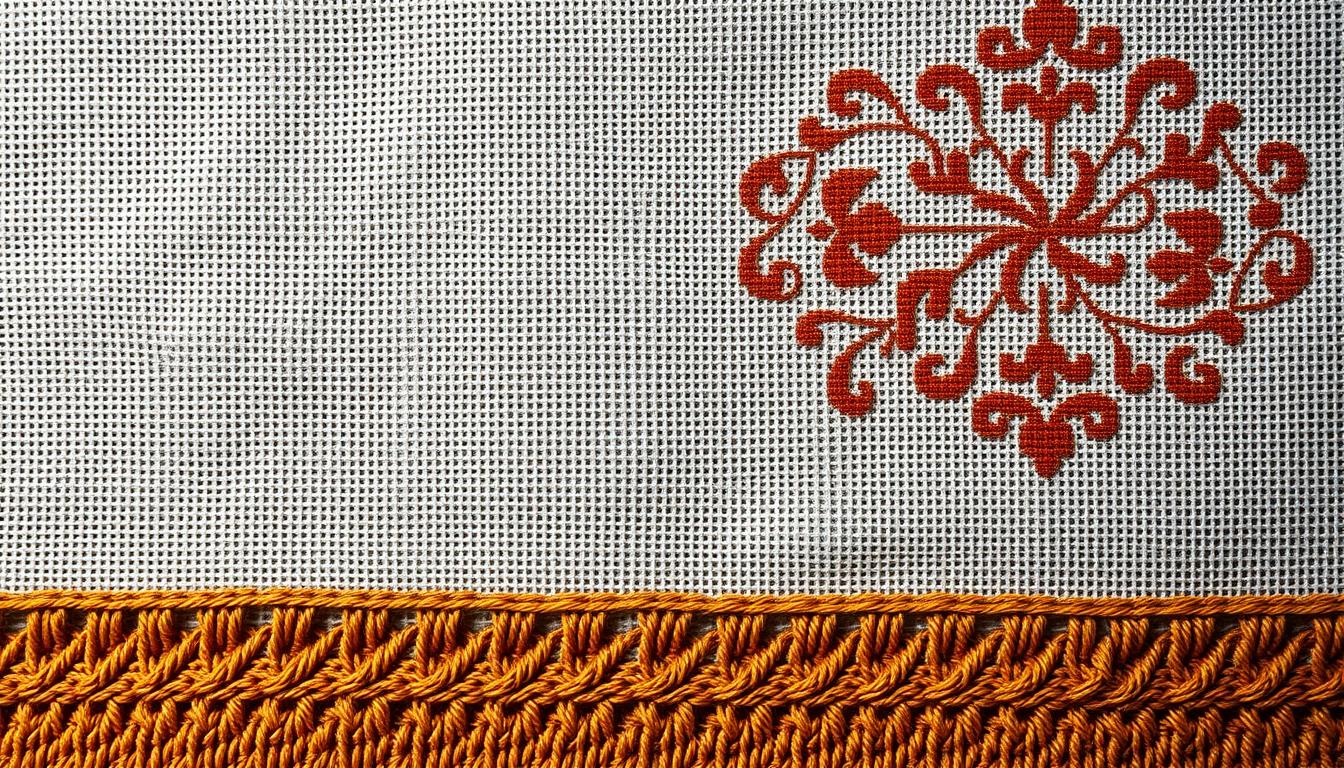
Deciding between evenweave and aida affects both appearance and assembly. Evenweave offers a finer, smoother surface that looks great on shades. Aida is easier to count and frays less, making it good for handling.
Evenweave lets colors glow warmly, while dark aida reduces light bleed. Use cross stitch frames and hoops to change the display style. A wooden hoop adds a rustic touch, while box frames or deep mats are better for a gallery look.
Shadow box cross stitch preserves texture and creates museum-style displays. Mount the fabric on acid-free board and lace it at the back for even tension. This method keeps colors vibrant and prevents glass from flattening raised stitches.
Mounting alternatives include wooden dowels or rods for modern wall hangings. These require less framing skill and let you rotate pieces by season. Use archival tape for a clean finish and avoid adhesives that can discolor fabric over time.
| Project | Fabric Choice | Finish | Durability Tip |
|---|---|---|---|
| Stitched pillows | Aida for ease, evenweave for refined look | Back with complementary fabric, hidden zipper | Interfacing and reinforced seams |
| Lampshade cross stitch (panel) | Light evenweave for glow, dark aida to reduce bleed | Sew panel onto shade or adhesive-lined trim | Test light effect; finish raw edges before joining |
| Hoop wall hangings | Any count fabric; choose color for edge contrast | Trim and back with fabric, tie twine for hanging | Secure fabric with lacing or hidden stitches |
| Shadow box cross stitch | Evenweave or aida, mounted on acid-free board | Use spacer and float mount inside box | Keep glass off stitches; use archival materials |
| Framed pieces | Evenweave for detail; aida for bold motifs | Box frames or deep mats to preserve texture | Lace back fabric and use acid-free backing |
Choose one display method and test it on a small sampler before starting a big project. The right mix of materials and finish will make your cross stitch decor look intentional and last for years.
Giftable Cross Stitch Projects and Personalized Samplers
Turn a weekend into a special gift with thoughtful design and presentation. Choose from personalized samplers, birth announcements, wedding samplers, or pet portraits. Each option affects your fabric, floss, and framing choices.
Birth announcements, wedding samplers, and custom text layouts
For birth announcements, keep the text short. Use a clear font for names and dates. Soft pastels on 14-count Aida create a classic look.
For wedding samplers, balance names with decorative motifs. Use laurel wreaths or rings for a beautiful touch.
Plan your layout before stitching. Use graph paper or software to avoid clutter. Small borders unify the design, making it a keepsake.
Portraits and pet portraits — sizing, color selection, and framing
Portrait stitching requires careful planning. Choose a size that shows facial details clearly. A 100×100 stitch grid works well for small portraits with simple text or monograms.
Match floss colors to skin tones or fur. Stick to 10–15 shades for clarity. Test colors in a small sampler square under your lighting.
For framing, avoid glass that flattens texture. Hoop frames and shallow box frames highlight stitches. Use acid-free backing to preserve color and fabric over time.
Packaging and presentation tips for handmade gifts and selling
Presentation matters a lot. Wrap pieces with tissue, satin ribbon, and a branded label. Offer framed or gift-wrapped options to appeal to buyers.
Ship items carefully with board backing and cotton tissue. Include care instructions and a note about materials. Good packaging builds trust and encourages repeat sales.
- Heirloom-ready finishing: stitch a fabric backing, add a hanging loop, and use archival materials.
- Upsell ideas: offer mounting in a hoop, linen backing, or a custom label for events.
- Pricing tip: charge more for portraits and detailed wedding sampler pieces because they require extra time and skill.
Small, Satisfying Projects: Bookmarks, Bunting, and Mini Pieces
Small projects offer quick wins and fun weekend activities. They let you try new stitches and colors. You can finish a piece in just an afternoon. DeMilked’s gallery has tiny motif ideas to fit your style.
Corner bookmarks are small and stay put on the page. Use plastic canvas or evenweave for a solid base. Back them with felt for extra durability. Traditional bookmarks work well on aida strips; stitch a central motif and trim to size.
For finishing, reinforce edges with interfacing or a zigzag stitch. Add a tassel or ribbon loop for easy handling. These steps keep your bookmarks looking professional.
Quick bunting and seasonal motifs
Triangles for cross stitch bunting stitch quickly. They let you spell messages or show tiny icons. Make a set for birthdays, holidays, or room decor using themed motifs.
Use lightweight ribbon or twine to join pennants. Fold the top edge over the ribbon and secure with a neat whipstitch. Add small loops at the ends for hanging or tie straight to a mantel or doorway.
Use leftover DMC floss and organize scraps
Leftover DMC floss fuels cross stitch mini projects. Label bobbins by color family or store small bundles in zip bags for instant access. You’ll save time and cut waste with a starter kit of pre-cut aida strips, needles, and tiny scissors.
Mini projects are great for testing larger pieces or as gifts. Keep designs under 40 by 40 stitches for same-day completion. Reinforce edges and back with fabric to make durable, giftable pieces from modest supplies.
Counted Cross Stitch Techniques to Speed Up the Weekend Project
Start your weekend project with a clear plan. Counted cross stitch works best when you set a simple goal, pick the right fabric, and decide how the finished piece will be mounted. Small prep steps save time and keep your work neat.
Use cross stitch gridding to cut down on mistakes and idle re-counting. A light water-soluble pen or pre-stitched grid threads will help you find pattern blocks quickly. Gridding makes it easier to stitch large color areas without losing your place.
Backstitching techniques bring clarity to tiny details and text. Reserve backstitch for outlines and lettering to make motifs pop. Try a single-strand backstitch for delicate lines and two strands for bolder definition.
Manage thread like a pro to keep momentum. Wind each color onto bobbins and pre-cut strand lengths that match your preferred working length. Working largest color blocks first reduces the number of thread changes during a session.
Choose a logical stitch order that suits the pattern. Color-by-color works well for motifs with big fills. Row-by-row helps when you prefer steady left-to-right progress. Stick to the approach that keeps you focused and prevents laddering.
Practical embroidery hacks speed finishing and improve presentation. Use a high-quality hoop from Millward or DMC to keep tension even. Secure fabric edges with masking tape or clips to avoid fraying while you stitch.
Consider waste canvas when stitching on non-woven surfaces like denim or kelly green t-shirts. Plan how you will mount or frame the piece before completing the final stitches. This prevents last-minute rework and creates a cleaner finish.
Below is a quick reference to compare methods and when to use them so you can pick the fastest route for your project.
| Task | Recommended Method | Why it speeds things up |
|---|---|---|
| Preventing miscounts | Cross stitch gridding with water-soluble pen | Marks blocks clearly so you avoid unpicking and re-counting |
| Defining small details | Backstitching techniques using single or double strands | Makes shapes and text legible without extra fill stitches |
| Thread changes | Work largest color blocks first; use bobbins | Reduces starts and stops, keeping stitch flow steady |
| Tension control | Quality hoop and even pull technique | Prevents puckering so finishing goes faster |
| Stitching on odd surfaces | Waste canvas or stabilizer | Allows neat stitching on apparel without fabric damage |
| Final finishing | Plan framing or mounting before last stitches | Saves time by avoiding rework and ensures a polished result |
Sellable Finished Pieces: What Sells and How to Price
Think like a buyer. You want clear photos, honest dimensions, and neat finishing. This makes cross stitch finished items feel gift-ready. Small pieces sell fast; framed art and home goods command higher prices when presentation looks professional.
High-demand finished items tend to be versatile. Framed pieces, decorative pillows, tote bags, and apparel reach different audiences. Custom pet portraits and personalized samplers attract premium buyers who will pay more for uniqueness.
Estimate materials carefully. List the fabric type, aida count, and DMC floss used so buyers see value. Track DMC floss cost per project and include backing, hoops, frames, and hardware when you calculate profit.
Time matters. You must price cross stitch to cover hours spent plus material costs. Charge an hourly rate that reflects skill level. For quick items like bookmarks or mug cosies, use a lower price and faster turnover strategy.
Good listings rely on strong cross stitch photography. Shoot in natural light and include close-ups of stitch texture. Show the piece in a lifestyle setting to help buyers imagine use. Include care instructions and turnaround time in every listing.
Use clear keywords and honest descriptions. When you sell cross stitch online, mention custom options, turnaround, and framing choices. That boosts buyer confidence and reduces questions before purchase.
| Item | Typical Time | Material Snapshot | Suggested Price Range |
|---|---|---|---|
| Bookmark | 1–2 hours | Aida scrap, small DMC floss bundle | $8–$18 |
| Mug cosy / Keychain | 1–3 hours | Small fabric piece, minimal DMC floss, hardware | $12–$30 |
| Framed art (8×10) | 6–12 hours | Quality fabric, multiple DMC colors, frame | $60–$180 |
| Decorative pillow | 8–16 hours | Panel fabric, DMC floss, backing, insert | $75–$200 |
| Personalized sampler | 10–20 hours | Custom colors, several skeins (track DMC floss cost) | $90–$300+ |
| Apparel (tote, tee) | 4–10 hours | Sturdy fabric, thread, stabilizer | $40–$150 |
| Portrait or pet portrait | 20+ hours | Many DMC colors, higher skill, framing | $200–$800+ |
When you price cross stitch, include a materials line in the listing that shows fabric, DMC floss cost, and extras. State your hourly rate and a brief note on finishing choices. That transparency makes buyers feel comfortable paying a fair price.
Final tip: invest in one strong product shoot for each item type. Great cross stitch photography drives clicks and sales. Repeatable staging speeds up listings and helps you sell cross stitch consistently.
Cross Stitch Organization and Workspace Setup
Make a cozy spot for stitching. Good organization helps you focus and saves time. A clean space, a good light, and easy tool access make stitching easy.
Essential cross stitch tools and storage ideas for floss and charts
Get the basics: sharp scissors, blunt needles, a stitch lifter, ruler, and hoops. Store DMC floss on labeled bobbins. Use clear boxes or zip pouches by color to organize floss.
Keep charts in plastic sleeves. Store printed patterns in a binder. Save space by keeping large charts digital on a tablet.
How to create a weekend-friendly stitch kit and portable hoop setup
Make a weekend kit for quick projects. Include a small hoop, Aida strips, needles, scissors, and bobbins. Don’t forget a notebook and pen.
Choose a light hoop for your bag. Use a zip pouch to keep everything together. This way, you can stitch anywhere.
Needlework secrets for preventing tangles and keeping projects tidy
Use short thread lengths to avoid tangles. Start with a loop or away knot for neat backs. If threads catch, try beeswax or Bohin products.
Label bobbins and tidy up often. Use a tray for needles and scissors. This keeps your space organized and your projects finished faster.
- Tip: Keep one chart binder and one floss box per active project to avoid mixing patterns.
- Tip: Use a tablet stand to view cross stitch charts hands-free while you stitch.
CROSS STITCH as Therapy: Mindful Stitching and Creative Benefits
The motion of a needle through fabric is calming. Cross stitch therapy can soothe your mind and help manage stress. It also builds a daily routine that supports your well-being.

How cross stitch can reduce stress and build routine
Set aside 15 to 30 minutes each day for your creative break. This small habit anchors your day. It reduces stress and brings satisfaction from small achievements.
Choosing meditative patterns — repetitive motifs and color palettes
Choose patterns with repeating motifs and few color changes. Simple designs help you focus and reduce mistakes. Soft colors like blues and greens promote relaxation.
Joining communities and sharing progress for motivation and accountability
Find cross stitch communities on Instagram, Ravelry, and local guilds. Share your work and get feedback. Posting photos and joining challenges keeps you motivated.
Try small weekend projects to enjoy and practice. Use tiny patterns to keep your creativity flowing.
Conclusion
You’ve seen many cross stitch projects for a weekend. From bookmarks to home decor, there’s something for everyone. Choose a project that fits your skill and time.
Think about counted cross stitch or simple designs. This way, you’ll finish and want to show off your work.
Use cross stitch tips for finishing and display. Frame small pieces or mount them in hoops. You can also sew them onto pillows or tote bags.
Simple finishing touches make your pieces look great. They’re ready to give as gifts or sell. Remember to value your time and materials when pricing your work.
Use the cross stitch techniques you learned here. Bring DMC floss and the right tools to make your project go faster. Pick a few ideas and enjoy a creative weekend. You’ll end up with beautiful pieces to share.