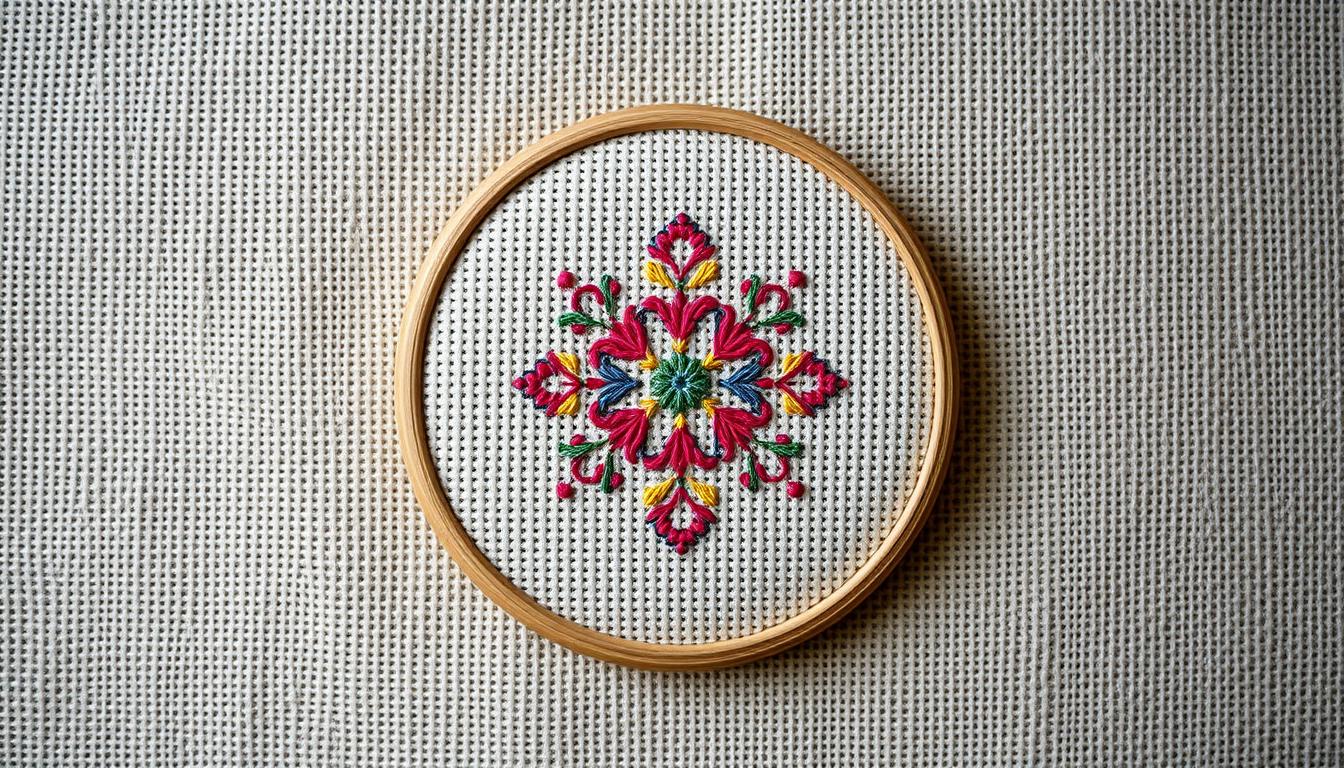
Cross stitch has evolved a lot since your grandma’s samplers. Today, Etsy designers and DeMilked show off modern kits. They mix raw linen, black aida, and wooden banners with bold designs. These ideas can inspire you to try new materials and change your project’s feel.
Exploring different fabrics like monk’s cloth or thrifted linens can save money. You can buy DMC cones in bulk, find hoops at yard sales, or use frames from estate sales. These tips help you try new things without spending a lot.
This guide offers both inspiration and practical advice. You’ll find creative prompts, step-by-step guides for unusual surfaces, and tips on tools and threads. This will help your first mixed-material project turn out great.
Key Takeaways
- Modern cross stitch kits and online roundups inspire fresh, nontraditional materials.
- Alternative fabrics and household substitutes can lower costs for beginner cross stitch makers.
- Bulk buying DMC cones and smart thrift shopping are practical money-saving strategies.
- Experimenting with new surfaces expands your cross stitch ideas and project variety.
- Start small: use kits or repurposed frames to practice mixed-material techniques safely.
Why Try Unusual Materials for Cross Stitch: benefits and creative inspiration
Trying new materials can make a classic craft feel fresh again. Modern kits from DMC and Zweigart show how different materials change a piece’s look. For example, black aida, raw linen, and wooden banners offer new ideas for projects.
Experimenting with materials can also improve your design thinking. Stitching on monk’s cloth or a painted wooden plaque can lead to bigger projects like afghans or wall hangings. This encourages you to think differently about your designs and try new things.
Working with different fabrics and threads can also help you get better at stitching. You’ll learn to control your tension when using yarn, metallics, or beads with stranded cotton. This practice can help you avoid mistakes and make your work look professional.
Using varied materials can also be therapeutic. The slow, repetitive nature of stitching can calm your mind and improve your focus. Many stitchers find cross stitch to be a creative outlet that boosts confidence and problem-solving skills.
To avoid mistakes, keep a simple checklist handy. Make sure to test colorfastness before washing, check the fabric count for counted work, and choose the right needles for specialty threads or wood. Secure beads and metallics with knots or micro-stitches to prevent tangles and breakage.
Start with small experiments to learn quickly. Try a single motif on a scrap of raw linen, or add a row of beads to a corner of an existing piece. These small trials can spark new ideas and protect your main projects from mistakes.
Monk’s Cloth and other alternative even-weave fabrics
Monk’s cloth feels different from aida and linen. It’s a 100% cotton fabric, sold by the yard. You’ll see bigger holes in 8-count monk’s cloth than in 14- or 16-count aida. This affects how you plan your cross stitch and the thread you use.
What monk’s cloth is and when to choose it over aida
Use monk’s cloth for soft, drapey items like blankets, towels, or tree skirts. Its 8-count weave is great for big projects where size and texture are key. For cross stitch, adjust your pattern counts: one stitch on 8-count equals about two on 16-count aida.
Projects that work best
Monk’s cloth is perfect for large items. Afghans, bath towels, curtains, and big wall hangings showcase its texture well. It’s ideal for cross stitch projects that look good from a distance. Look for kits or patterns from DMC or Anchor that suggest even-weave fabrics for big projects.
Beginner cross stitch tips for stitching on non-standard weaves
Start with a small sampler if you’re new to monk’s cloth. Test a swatch first to check tension and stitch size. Use a bigger needle and thicker thread or more strands of stranded cotton for clean stitches. Keep big pieces taped or clipped to prevent fraying.
| Fabric | Common Count | Best Uses | Needle & Thread Notes |
|---|---|---|---|
| Monk’s cloth | 8-count | Afghans, towels, large wall hangings, tree skirts | Use larger tapestry needle; 2–4 strands or thicker thread; test swatch |
| Aida | 14-, 16-count | Small to medium samplers, framed pieces, kits for beginners | Standard tapestry needle; 2 strands of stranded cotton; easier counting |
| Evenweave / Raw linen | 25–28-count (counted as threads) | Detailed work, contemporary kits, fine samplers | Smaller needle; single or paired strands; requires careful counting |
Black and colored ground fabrics to make colors pop
Working on a dark ground changes how you plan every stitch. Black or deep jewel tones make bright threads sing but they also demand new choices in color, contrast, and technique. Before you launch a project, test small swatches with your favored DMC floss to see which shades keep their brightness and which vanish into the fabric.
Choose thread and shading with care. Dark fabrics often need lighter highlights and stronger midtones to show depth. Use fewer muted shades and add one or two vibrant threads as accents. For portraits or complex scenes, plan extra shading rows so faces and details read clearly from a distance.
Adjust your stitch count and style. Many kits that use black aida suggest whole cross stitches for clarity. Lower-count aida can make counting simpler when contrast strains your eyes. If you prefer finer detail, test patterns at different counts to balance readability with intricacy.
Grid carefully to avoid mistakes. Cross stitch gridding on dark fabric works best with temporary basting or water-soluble pens made for textiles. Grid lines keep motifs centered and reduce rework. Mark faintly and remove lines as you finish areas to keep the surface clean.
Plan backstitching for definition. Backstitching techniques become a primary tool for outlines on dark grounds. Pick lighter backstitch colors so outlines pop without looking harsh. Try a small motif with contrasting backstitch to judge legibility before completing a whole project.
Test for colorfastness and washing. Always hand-wash a sample stitched with your chosen DMC floss to check for bleeding. Use gentle detergent and cool water. Avoid harsh chemicals that can dull bright threads or alter the fabric’s tone.
Finish with preservation in mind. Choose cross stitch frames that protect the piece and maintain contrast. Museum-quality mounting materials and acid-free backing keep colors vivid over time. If you frame under glass, leave a slight air gap or use UV-safe glazing to prevent condensation from touching threads.
Embroidery on unconventional surfaces: wood and bark
Working on wood brings fresh ideas that mix rustic and modern. Modern cross stitch kits come with wooden banners. These have pre-drilled holes for easy threading, great for both beginners and pros.
These wooden banners often have big holes for threading. Follow the instructions for tension and knotting. Test stitches on a scrap piece first.
Exposed wood edges need sanding and sealing. This prevents splinters and keeps your fabric in place.
Using wooden bases safely means having the right tools. Choose stiffer needles for pre-drilled holes. If you drill your own holes, use a brad-point bit for clean edges.
Needle choice affects your stitch quality. Use upholstery needles for thicker threads and crewel needles for stranded cotton. Keep scissors, a small awl, and a thimble ready to protect your fingers.
Designs that work well on wood have bold shapes and clear lines. Typography, botanical silhouettes, and geometric motifs look great. Minimalist designs are also good, as they highlight the wood grain.
Adding raw linen or yarn accents from your kits adds texture. Use simple motifs or short lettering for a clean look. Small stitches and strong knots secure threads on wooden banners.
Recycled and thrifted materials: thrift store frames, estate sale finds, and repurposed fabric
Thrift stores and estate sales are treasure troves for cross stitch projects. You can find unique frames and linen that add character. Look for pieces that are clean and fit your style before buying.
How to evaluate secondhand frames and fabrics
Check frames for loose joints and old nails. Look for scratches and clouding on the glass. Ask if the item was exposed to smoke or pets.
For fabrics, check edges for holes and test colorfastness. Estate sales may have original patterns or kits. You can often get a good deal by buying multiple items.
Quick restoration hacks and organization tips
Clean wooden frames with mild soap and sand them. Then, re-stain or paint to match your decor. Replace old glass with museum acrylic to protect your work.
Keep your cross stitch organized. Store leftover floss in labeled baggies. Use acid-free tissue to wrap linens. Save fabric scraps for small projects.
Stretch your stash and save money
Reusing floss saves waste and builds your stash. Substitute close shades when exact matches are missing. Buy DMC cones for common colors to save money.
Look for supplies on Facebook Marketplace and local yard sales. Freecycle and community swaps are great for finding useful items. Mixing thrifted frames with affordable hoops saves money on framing.
| Item | What to Inspect | Restoration Tip | Why It Helps Your Project |
|---|---|---|---|
| Wooden frame | Joints, surface finish, glazing condition | Sand, re-stain, replace glazing with museum acrylic | Unique display, sturdy finish, protects finished embroidery |
| Vintage linen | Holes, stains, colorfastness | Gentle wash, oxygen bleach spot treatment, acid-free pressing | Authentic texture for heirloom samplers and cross stitch patterns |
| Old kits and patterns | Completeness, legibility of charts, floss condition | Photocopy patterns, sort usable floss into labeled baggies | Source of rare motifs and practice pieces for cross stitch for beginners |
| Glass or glazing | Scratches, yellowing, fit to frame | Replace with museum acrylic, cut to size | UV protection and clearer display for finished work |
| Floss bundles | Color bleed, smell, tangles | Wind onto bobbins, label with numbers, store in baggies | Builds cross stitch stash and supports color substitution strategies |
Mixed-media additions: beads, yarn, and metallic threads

Mixing beads, yarn, and metallic threads adds depth and shine to counted cross stitch. It brings texture that plain cotton can’t. Start with small tests on scrap fabric before changing your main project.
Choosing beads and securing them in counted cross stitch
Choose beads that fit your fabric count. Seed beads and size 11-15 work well for 14- to 18-count linens. Use a beading needle or a slim crewel needle to avoid big holes.
Secure each bead with a tiny backstitch or an extra pass. Test beads on a swatch to check tension and avoid warping. These tips keep your embellishments stable over time.
Combining yarn or wool with stranded cotton
Replace one or two strands of DMC floss with thin wool or a single strand of sport-weight yarn for a raised look. Use a larger tapestry needle for thicker threads to keep stitches neat.
When using DMC cones or bulk floss, use fewer strands to match stitch size. Swatch combinations to confirm coverage and gauge. This lets you add plush detail while keeping counted cross stitch proportions.
Working with metallic threads without tangles or breakage
Choose high-quality metallic threads or pre-waxed ones for easier handling. Thread short lengths and use a needle with a polished eye. Apply Thread Heaven to reduce friction.
Keep tension gentle and avoid pulling metallic threads tight. Use a blunt tapestry needle for woven metallics and a beading or crewel needle for fine embellishments. These adjustments reduce breakage and keep your work smooth.
| Embellishment | Best Needle | Thread Choice | Key Tip |
|---|---|---|---|
| Seed beads (size 11–15) | Beading needle | None or single stranded cotton | Anchor with a tiny backstitch; test on scrap |
| Wool or bulky yarn | Large tapestry needle | Sport-weight yarn or reduced DMC floss strands | Swatch to match stitch height and coverage |
| Metallic threads | Polished-eye crewel or tapestry needle | High-quality or pre-waxed metallics | Use short lengths and thread conditioner |
| Bulk floss / cones | Tapestry needle sized to fabric | DMC cones or bulk cotton | Reduce strands; maintain even tension |
Everyday household substitutes that actually work for stitching
Modern makers use kitchen and garage items to save time and money. They find cheap items that work like professional cross stitch tools. These items keep your hands and fabric clean, stop fraying, and help organize your work.
Grime guard tip: a dollar store steering wheel cover is great as a hand rest. Place it over the part of your hoop or frame that your palm touches. It protects fabric from oils and dirt and feels soft during long stitches.
Binder clips are very helpful. They grip excess fabric outside hoops or secure an understretch on wooden frames. They are stronger than some specialized holders and prevent slipping that causes mistakes.
Painter’s tape is best for temporary edge protection. It keeps raw edges from fraying while you stitch or grid a pattern. It leaves no residue, so your fabric stays clean when you remove it.
A 3-foot exercise tape measure is great for measuring. It’s flexible enough to fit around frames and wide enough to mark centers. This small change prevents miscounts and wasted fabric.
Sandwich baggies are quick solutions for storage. Sort DMC floss by number into labeled bags, add a bit of acid-free tissue, and keep beads with matching thread. This simple system prevents color mix-ups and mistakes like starting with the wrong skein.
Buy needles, hoops, and small supplies in bulk to save trips to the store. Keep a small supply kit in a zipper pouch for travel stitching. These low-cost choices are clever embroidery hacks that make your process calm and reliable.
When you stash supplies, follow a basic system: label containers, group by project, and keep frequently used colors within arm’s reach. Good cross stitch organization cuts time hunting for supplies and reduces interruptions that break concentration.
Use clear plastic cups or ice cube trays to sort beads and specialty threads. Repurpose pill organizers for tiny needles and thimbles. These household solutions blend with traditional cross stitch tools and help you maintain neat project flow.
Small changes yield big results. A grime guard, painter’s tape, binder clips, and baggies can transform your work habits. Apply these practical embroidery hacks to save money, prevent errors, and keep projects moving smoothly.
CROSS STITCH kits and modern kit materials to spark unusual ideas
Modern cross stitch kits introduce new materials and designs that spark creativity. You’ll find everything from pre-cut raw linen to black aida and wooden banners. DeMilked shows how these kits can lead to fresh ideas and ways to present your work.
Use the materials in kits as a starting point for mixed-media projects. Save extra floss, backing fabric, and hoops. These can become trims, accents, or practice pieces for wall hangings or textile collages.
Choose kits that match your skill level to build confidence. Beginners should start with simple charts and fewer colors. As you get better, move to kits with backstitching, shading, or beads for more detail.
Look for kits from trusted brands like Cotton Clara and DMC for quality. Kits with fabric count information help you pick the right challenge. Lower-count fabric is easier for beginners, while higher count is for more detailed patterns.
Try different ways to present your work. Kits with wooden banners can teach you about tension and mounting. Raw linen kits show how natural fibers age and frame differently than standard aida. These discoveries can inspire new ideas for seasonal décor and gifts.
Use kit charts to learn and then make them your own. Follow the instructions, then change colors, swap metallic threads, or add beads. Each change turns a ready-made kit into a personalized project and improves your pattern-reading skills.
Keep a simple journal when working on modern cross stitch kits. Note the stitch count, needle size, and any changes you make. This habit helps you progress faster and choose future kits that meet your goals.
Specialty threads and floss alternatives: cones, cheap brands, and textured threads

Choosing the right thread can change your project’s look and cost. DMC floss is great for color consistency. Floss cones are useful for large pieces with repeated colors.
Buying in bulk helps save money and keeps your favorite colors ready.
When to use floss cones
Use floss cones for staple colors like black or white. They’re perfect for large samplers or repeated motifs. Cones are cheaper per yard than skeins.
They save time and ensure color consistency for big projects.
Budget brands versus established lines
Testing is key when trying cheap embroidery floss. Check for colorfastness and washability. Some budget threads work well, but DMC floss is reliable for color and strength.
Textured and novelty threads
Textured threads add depth to various projects. Use ribbon, wool, or specialty strands for raised areas or soft surfaces. Choose larger needles and test tension on a swatch for even fabric.
Practical tips for saving money and maintaining quality
Buy needles, hoops, and floss in bulk to save. Use leftover skeins from kits and label them. Test thread substitutes for bleeding.
These steps protect your work and help save money.
Needle and project pairings
Match needle size to thread thickness. Use tapestry or chenille needles for textured threads. Choose a needle with a large eye for thin metallics.
Swatching helps decide how many strands to use for the right texture.
Conclusion
Explore new ideas to grow your creativity in cross stitch. Try using raw linen, black Aida, wooden banners, or pre-drilled bases. These modern approaches can make your embroidery fresh and exciting.
Save money by using items you already have at home. Painter’s tape, sandwich baggies, and steering wheel covers can protect your supplies. Also, shop at estate sales and online to find great deals. This way, you can try new things without spending too much.
Begin with beginner kits that include unique materials. Then, move on to beads, metallics, and textured threads as you get better. Always test your stitches and colors first. Choose the right needles and keep your supplies organized to avoid mistakes.
Don’t be afraid to try new things. Making smart choices with your materials and storage can help you save. With practice and a few key techniques, your cross stitch will always be rewarding and full of new ideas.