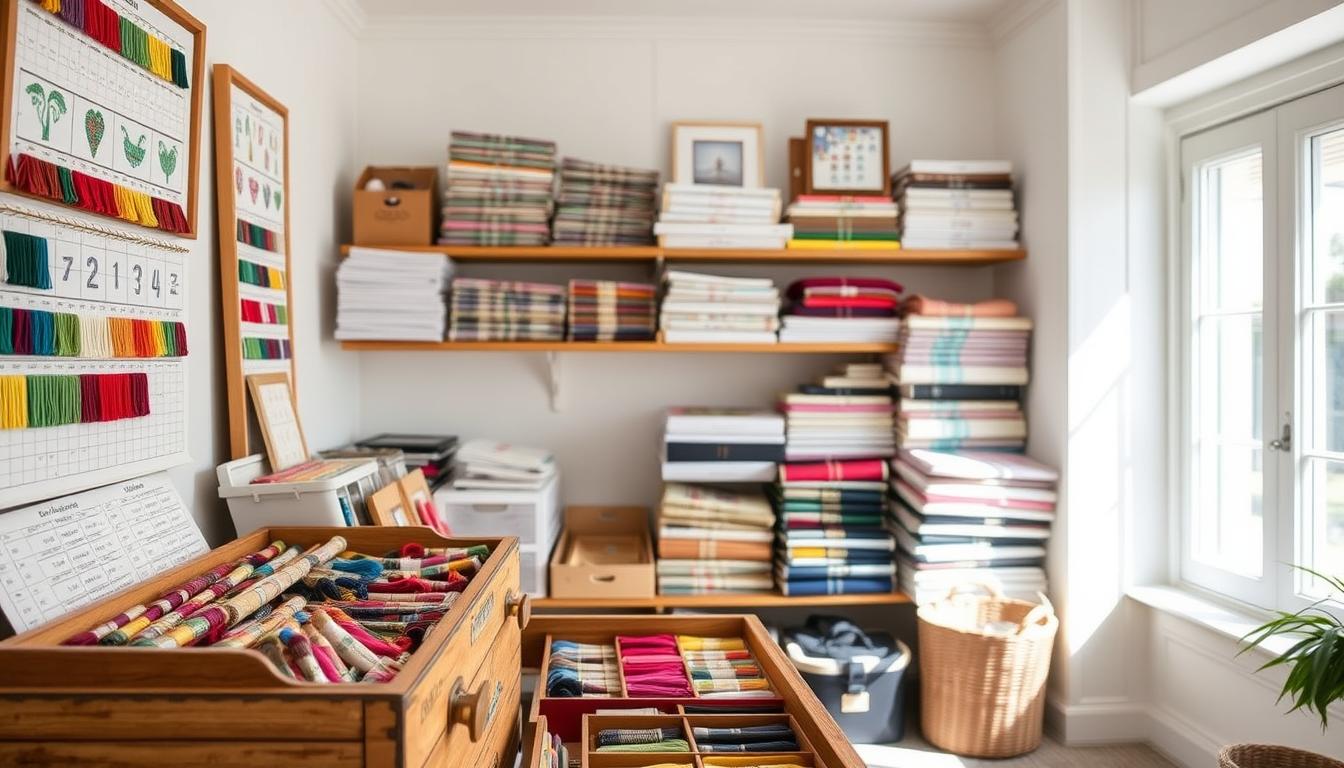
If you love CROSS STITCH, you know how fast supplies can multiply. Pinterest boards and craft forums are full of cross stitch storage ideas. You can find systems that save space, protect fabric, and keep you stitching instead of searching.
Small plastic shop bags may seem handy, but they can harm hand-dyed linens over time. Better options include muslin bags, acid-free boxes, and cedar-lined storage. These protect fabric and record details like count and fiber. A simple label makes future project starts easier.
For floss, the 4×6 photo box plus the DMC color card is a practical setup. Clear plastic cases keep skeins clean and flat. Grouping by DMC colors speeds retrieval for cross stitch projects. You’ll spend less time untangling and more time enjoying counted cross stitch.
This guide will walk you through tools, fabric care, floss systems, project organization, craft room layout, and budget-friendly DIYs. Whether you’re a hobbyist or doing cross stitch for beginners, these ideas help protect your stash. They make your workflow calm and efficient.
Key Takeaways
- Choose breathable storage like muslin or acid-free boxes for fabric protection.
- Use 4×6 photo boxes and DMC grouping to streamline floss organization.
- Clear plastic cases prevent bends and keep skeins clean for cross stitch projects.
- Labeling saves time and reduces mistakes when you return to a work in progress.
- Simple, budget-friendly solutions can be as effective as specialty storage.
Why smart cross stitch storage matters for your craft space
Good storage keeps your tools tidy and protects delicate materials. It lets you sit down to stitch faster. When your workspace is organized, you spend less time searching for items.
Protecting your materials: fabric, floss, and needles
Store cross stitch fabric in breathable containers to avoid creases and dye transfer. Use muslin bags or acid-free boxes for hand-dyed linens and specialty Aida. Needles, pins, and sharp tools should go in needle books or magnetic holders to prevent rust and loss.
Saving time: spend more minutes stitching and fewer minutes searching
Organize DMC floss by number and color for quick access. Use 4×6 photo boxes or labeled compartments to reduce bobbin winding. A tidy system speeds up setup and cuts the time between idea and action.
Preventing common cross stitch mistakes caused by disorganization
Misplaced DMC floss or unmarked fabric can cause wrong shades and stalled projects. Simple habits like clear labeling and an inventory list prevent mistakes. Protecting supplies keeps your work accurate and preserves material life.
Essential storage tools and cross stitch tools to invest in
Before you start organizing, know the basic tools needed for smooth stitching. Good storage keeps floss safe, needles organized, and colors easy to find. A few key items can make a big difference in your work.
Use durable boxes, stackable photo cases, and modular drawer systems for clear visibility. Clear plastic cases prevent tangles and keep fibers shiny. Stackable 4×6 photo boxes are great for small tools and skeins.
Durable boxes, stackable photo cases, and drawer systems
Hard plastic or acrylic boxes are best for floss storage to avoid color fading. Stackable photo cases save space and fit under shelves. Drawer systems with shallow trays help organize DMC numbers and keep project kits together.
Needle books, scissor holders, and small parts organizers
Needle books protect points and prevent rust, while scissor holders keep blades ready. Small parts organizers with many compartments are perfect for charms, clasps, and beads. Label each part so you can find what you need quickly.
Labels, DMC color cards, and inventory trackers
Labeling is a game-changer. Use color-matching stickers and printed labels for drawers and boxes. Keep a DMC color card with real samples to match shades and plan accurately.
Keep track of what you have with a spreadsheet, app, or notebook. Recording DMC numbers and project plans helps avoid buying duplicates and speeds up planning. A well-kept inventory is a top needlework secret for serious stitchers.
If you need something portable, add a small storage organizer for thread/floss to your kit. Include essential embroidery tools like good scissors and a reliable needle threader. These investments save time and protect your materials for years.
Floss organization methods that save space and sanity
Stitchers have many smart ways to keep thread tidy and easy to use. You want systems that reduce clutter, protect your DMC floss, and make stitching quicker. Here are some practical tips that save space, speed up your work, and look good.
Using 4×6 photo boxes with compartments to store skeins
4×6 photo boxes with sixteen compartments keep skeins flat and prevent crimps. Each compartment keeps dust and pet hair off your DMC floss while saving shelf space.
Organize boxes by color groups so you can find the right shade easily without digging through drawers.
Color-grouping with the DMC color card for quick retrieval
Match skeins to the DMC color card and group them by color. This makes finding the right shade quick, speeding up your work.
Label each 4×6 box with its color family. This small step cuts down search time and keeps your cross stitch organized.
Pros and cons of bobbins, mini skeins, and wrapped floss
Bobbins offer neat rows but can cause crimps and take time to wind. Electric winders make winding faster, but it still adds steps before stitching.
Mini skeins are great for often-used shades. They fit well in small cases, hold several per compartment, and you can buy them or cut from wrappers.
Wrapped floss on cards or in photo-box compartments keeps thread flat and ready. Bobbin storage can be denser but often needs more containers and careful stacking.
- Space savers: Photo boxes take less room than many bobbin systems.
- Time trade-offs: Winding bobbins costs minutes; using skeins or mini skeins saves those minutes.
- Protection: Flat storage prevents crimps and maintains sheen for specialty fibers.
Choose what matters most to you: quick access or uniform neatness. Use a mix of methods: store most colors in photo boxes, keep favorites as mini skeins, and use bobbins for rare colors.
Storing specialty threads and metallic floss safely
Specialty threads need extra care. Keep them away from regular cotton skeins to prevent snags and loss of shine. Use clear systems that let you see brand and color without excessive handling.

Separate containers for metallics, variegated threads, and silk
Store metallic floss, variegated threads, and silk in their own containers. Label them by brand and number. This way, textures like Kreinik and DMC Coloris don’t rub against each other.
Small, divided boxes or shallow drawers are great for keeping like fibers together.
Preventing tangles and preserving sheen with hard plastic cases
Hard plastic cases protect delicate strands from compression and contact. Use individual compartments or plastic bobbins inside cases to limit movement. This method helps preserve threads and keeps metallic floss bright over time.
Labeling and keeping small thread samples for color conversions
Label each compartment with brand and color code. Keep tiny snips or mini-skeins taped to cards for shade comparisons. This speeds up decisions when substituting or converting colors.
Grouping by project after sorting by fiber keeps your stash protected and ready to use.
Best ways to store cross stitch fabric and Aida cloth
Keeping your fabric fresh and colors vibrant is key. You need something that breathes, makes it easy to find, and keeps it safe for a long time. Quick fixes can lead to fading, creases, or stains.
Why plastic bags can harm hand-dyed and specialty fabrics
Plastic bags trap moisture and block air. This can damage modern dyes and cause fading, especially at folds. Storing fabric in plastic for a long time can lead to more fading and dye transfer.
Using muslin bags, acid-free boxes, and cedar-lined storage
Muslin bags are great for keeping dust away and letting air in. Use larger bags for folded items to reduce creases. Then, put them in acid-free boxes for extra protection.
Wooden chests with cedar lining are good for storing. Use cedar balls in muslin to avoid staining. Make sure the box finish is dry before adding fabric. Acid-free storage helps prevent discoloration over time.
Custom fabric labels: recording count, fiber, and intended project
Make labels on cardstock or linen tabs. Write down the dyer, color, thread count, fiber, size, and project. Use a safety pin or put the card in the muslin bag.
Good labels help avoid mix-ups later. They save time and ensure you pick the right fabric for your project.
Project organization: keep current projects ready to stitch
Having one project ready to stitch keeps your momentum going. It makes enjoying cross stitch therapy easier. A small habit like packing a single pouch with everything you need saves time.
Project bags and pouches that hold pattern, floss, and fabric
Choose clear pouches or zippered bags so you can see what’s inside. Add a needle minder, spare bobbins, and small scissors. Keep mini-skein wrappers or labeled floss cards inside to avoid re-wrapping threads.
Portable kits for stitching on the go and travel-friendly storage
Make portable kits that fit in a purse or backpack for stitching on the go. Use compact organizers with compartments for needles, a pattern copy, and a tiny hoop. Packing a travel-friendly kit makes it easy to stitch during waiting times.
Tracking progress: project tags, notes, and digital project sheets
Attach a physical tag to each project bag with start date, DMC numbers, and key instructions. Sync that tag with digital project trackers for quick access. A simple spreadsheet or app helps you log stitch counts and color swaps.
Use a visible project bag system, portable kits, and synced project trackers. This setup offers redundancy, faster setup, and less stress. It lets you focus on stitching and enjoying the calming benefits of cross stitch therapy.
Setting up a stitch-friendly craft room and sewing storage
Create a compact, calm workspace. Make sure tools are easy to find and use. Good organization reduces clutter and saves time.
Think vertical when space is limited. This helps use every inch of your room.
Space-saving furniture and vertical storage for small rooms
Choose tall shelves and wall-mounted pegboards. Narrow carts are also great for saving space. Stackable photo cases fit well on shelves and in dressers.
Use shallow drawer units for big thread boxes. Two or three 12×12 containers work well for fabric. These options save space without sacrificing efficiency.
Workstation layout: lighting, tools within reach, and comfort
Place a daylight-equivalent lamp over your main table. This improves color accuracy and reduces eye strain. Keep scissors, needles, and threaders close to avoid standing and searching.
Choose an ergonomic chair and set your table height right. This keeps your shoulders relaxed. A well-planned workstation helps you work longer without interruptions.
Creating zones: floss, fabric, patterns, tools, and finishes
Divide your room into clear zones. Store floss in labeled cases, fabric in acid-free containers, and patterns in binders. This makes finding what you need quick.
Group finishing supplies near a finishing table. This makes your project flow smoothly. It also helps with long-term organization.
CROSS STITCH organization tips for beginners and seasoned stitchers
Getting your supplies in order makes stitching more fun and less stressful. Start small, keep like items together, and pick systems that match your space. Clear storage and simple lists help whether you’re doing beginner cross stitch projects or complex designs.

Simple starters
Use clear zip pouches for complete kit storage so pattern, fabric, and floss stay together. Keep a small box with basic DMC colors and a compact needlebook for ready-to-go work. A labeled pouch for needles, a tiny pair of Fiskars scissors, and a printed copy of the pattern remove friction when you sit down to stitch.
Common beginner errors to avoid
Avoid storing fabrics in sealed plastic bags; trapped moisture can dull dyes and cause mildew. Label each fabric with count and fiber to prevent mixing 14-count Aida with 18-count linen by accident. Keep skeins untangled by looping ends into a rubber band or using simple bobbins stored upright to prevent cross stitch mistakes that waste time and thread.
Practical embroidery hacks
Swap bobbins for 4×6 photo boxes to hold full skeins or mini-skeins for faster color picks. Invest in an official DMC color card to speed conversions and reduce duplicate purchases. When a floss wrapper slips, use mini-skeins or wrapper loops to keep colors intact during swaps and pattern edits.
Inventory and workflow tips
- Keep a single inventory sheet with DMC numbers, location, and quantity for quick checks.
- Group floss by value and hue to cut search time while stitching.
- Pack one project bag for travel that includes pattern, fabric, and labeled thread bundles.
These cross stitch tips and embroidery hacks reduce common frustrations and help you stay creative. With organized kits and a simple inventory, cross stitch for beginners becomes less overwhelming and more enjoyable.
Protecting finished pieces and framing ideas with cross stitch frames
Keep your finished work flat and clean for display. Lay pieces between acid-free tissue or on a board to avoid creases and dust. Before framing, choose a frame that suits your work.
Choose mounts that support stitch integrity. Linen-lacing or stretching on archival mounting boards preserves tension and shape. Select mats and frames that complement your backstitching techniques so fine lines and details remain visible.
Use a checklist when preparing items for framing: trim excess backing, press gently from the back with a towel and iron on low, and secure threads at the edges. If you plan to show pieces at fairs, consider custom sizes to fit standard frames and reduce last-minute adjustments.
For finished pieces storage, keep items separated with acid-free tissue and store flat in a portfolio or shallow box. Avoid plastic that traps moisture. Label each package with project name, fabric count, and date so you can find pieces fast.
When you pack work for craft fair transport or shipping, wrap in acid-free tissue, add a layer of bubble wrap, and place in a sturdy, clearly labeled box. For local transport, a rigid portfolio or flat storage tote prevents bending and protects frames from knocks.
Pick cross stitch frames and mounting techniques that match your aesthetic and the work’s size. Museums and many framers use archival materials; you can get similar results with museum-grade mats and UV-protective glazing for long-term color care.
Small touches matter. Secure loose threads, keep a record of which framing technique you used, and note any special care instructions for the buyer or recipient. That practice preserves workmanship and highlights the value of your craft at shows and in homes.
Digital and spreadsheet systems to manage your stash and patterns
Keeping your supplies organized is easy with a digital workflow. Start by organizing folders on Google Drive or Dropbox. Then, use a spreadsheet for project details and link photos for easy access. This method saves time and keeps your cross stitch projects in order.
Use a floss inventory template to track every skein. List brand, DMC numbers, count, and storage location. This helps avoid buying duplicates and planning for color changes.
A pattern tracker is great for tracking projects. Tag them with start dates, fabric count, and floss lists. Add links to PDFs and photos for quick reference.
Combine physical labels with digital project sheets for the best results. Tag items by project name, DMC numbers, and storage location. Log notes on backstitching, color swaps, and stitch counts to preserve decisions.
Choose cloud-backed apps or Google Sheets for your pattern tracker and floss inventory. Sync progress photos and backups to avoid data loss. Access project details from any device.
Below is a compact comparison of common digital tools and what they handle well for your cross stitch organization.
| Tool | Best for | Floss inventory | Pattern tracker | Cloud backup |
|---|---|---|---|---|
| Google Sheets | Custom templates and tagging | Easy to update with DMC numbers | Flexible trackers with image links | Yes, automatic |
| Notion | Database views and linked pages | Rich metadata and attachments | Kanban or table trackers | Yes, cross-device |
| Excel (OneDrive) | Advanced formulas and exports | Detailed use logs and totals | Structured pattern sheets | Yes, with OneDrive sync |
| Cloud photo apps | Visual search of stored items | Photos tagged with DMC numbers | Image-based quick lookup | Yes, automatic |
Keep entries short and consistent for quick filtering and sorting. Update counts regularly. Small habits lead to better stash control over time.
Sustainable and budget-friendly storage hacks and DIY ideas
Smart storage keeps your stitching tidy and saves you money. You can turn common items into lasting solutions. These protect fabric, organize floss, and store tools without buying specialty boxes.
First, check what you already own. Empty 4×6 photo boxes, mason jars, and cleared packaging are great for small tools and threads. Comic book boxes are useful when you pick acid-free options and layer muslin bags inside to protect fabrics.
Try simple DIY projects that take little time. Sew a needlebook from scrap cotton to keep needles safe. Use printable bobbin templates or cut cardboard strips to make bobbin alternatives instead of spending hours winding traditional bobbins.
Labels make a big difference. Print or handwrite tags for containers, then group by color or project. This DIY storage saves time when you search for DMC numbers or a specific skein.
Keep finishes and wooden boxes cured before storing textiles. Store cedar in a separate muslin bag to avoid staining fabrics. These steps protect specialty threads and hand-dyed cloth while keeping costs low for budget cross stitch efforts.
Below is a quick comparison to help you choose the right repurposed storage for different needs.
| Item | Best Use | Cost | Durability | Notes |
|---|---|---|---|---|
| 4×6 Photo Box | Floss storage and bobbin alternatives | Low | High (plastic) | Good for winding-free storage and color grouping |
| Comic Book Box (acid-free) | Long-term fabric storage and projects | Low to Medium | High (archival) | Use muslin liners to avoid contact with finishes |
| Mason Jars | Needles, small scissors, and buttons | Very Low | Medium (glass) | Clear view of contents; secure lids help prevent spills |
| Shoe Box with Acid-free Paper | Bulk fabric storage and project kits | Very Low | Medium | Line with acid-free paper; keep wooden boxes aired and cured |
| Printable Labels & Templates | Organization and bobbin templates | Very Low | Depends on material | Easy to customize for budget cross stitch and mixed threads |
You can mix these embroidery hacks and repurposed storage ideas to match your space. A few smart swaps make your craft area neater, protect your stash, and keep you stitching more with less expense.
Conclusion
Organizing your supplies changes how you stitch. Clear labeled containers and 4×6 photo boxes sorted by DMC numbers make things easy to find. This lets you spend more time stitching.
These tips turn clutter into a calm workspace. They bring practical embroidery inspiration to your daily routines.
Protecting fabric is key: avoid long-term plastic for delicate cloth. Use muslin bags or acid-free boxes instead. Keep metallic threads separate to preserve their sheen.
Smart choices prevent fading, tangles, and wasted hours. This helps you finish projects with less stress.
Combine physical systems with a simple digital inventory and dedicated project kits. When floss, fabric, and patterns are organized and labeled, mistakes drop and creativity rises.
These small changes are true cross stitch storage that will change your life. They keep your craft time joyful.