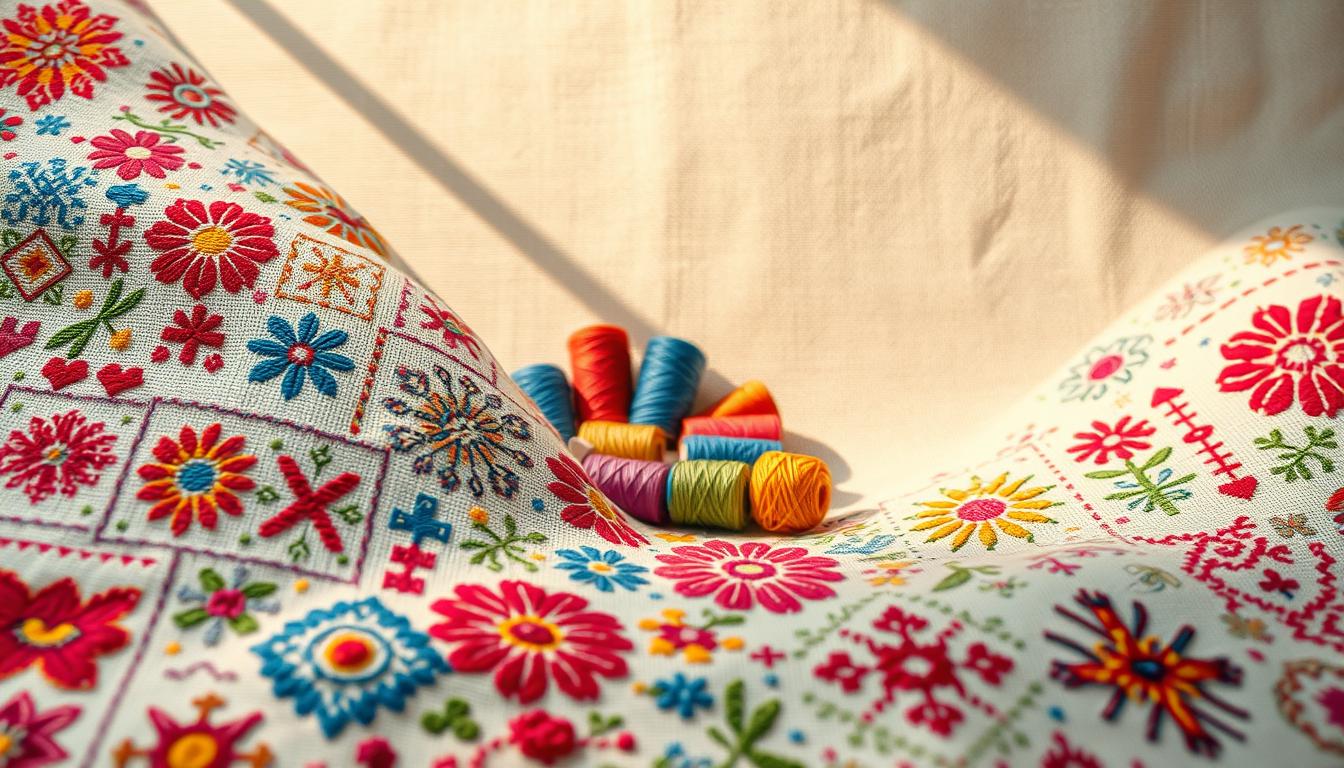
Starting a cross stitch project can be exciting. You pick a chart, sort floss, and hoop the fabric. At first, stitching seems easy and fun.
But then, you hit long stretches of the same color. This can make stitching feel like a chore. It’s normal to feel this way, especially with lots of the same color.
Many designers use tricks to make patterns look detailed but easy to stitch. They use simple shading and clear outlines. Tools like Pattern Keeper help you track your progress and avoid mistakes.
Experienced stitchers have tips to make stitching easier. They use multi-needle parking and start in the center. This keeps the stitches flowing and the project moving.
Looking at collections like the Victoria & Albert Museum shows the beauty of small imperfections. It’s not about perfection but about expressing yourself through stitching.
In this article, you’ll learn how to tackle complex patterns. You’ll discover tools and habits that make stitching faster. And you’ll see how community and acceptance of imperfection make stitching rewarding.
Key Takeaways
- Visual detail doesn’t always mean more stitches; design choices can simplify execution.
- Use multi-needle parking and anchoring to speed through large single-color areas.
- Start in the center and mark your chart to avoid counting mistakes and stay motivated.
- Digital charts and apps like Pattern Keeper make complex charts manageable.
- Community support and a focus on process over perfection keep stitching enjoyable.
Why some cross stitch patterns seem intimidating but are beginner-friendly
Looking at a chart might make you feel overwhelmed. Designers use special techniques to make it look detailed. But, the actual stitching is simple.
Visual complexity vs stitch complexity
What makes a pattern look hard is how colors are arranged, not the stitches. A chart might show many color changes, but you only use basic stitches. The effort is in arranging colors, not in the stitches themselves.
How large color blocks and shading create perceived difficulty
Big, dark areas can look like a lot of work, even if you’re just repeating a simple stitch. These areas might seem tedious, but they’re not hard to do. Shading and color shifts make designs look rich, but each stitch is still easy.
Design choices that make a pattern look detailed without adding stitches
Designers at Advanced Cross Stitch and others use simple color schemes and clear outlines. They also use a symbol key and smart color choices. This way, your cross stitch can look complex but still be easy to do.
Here are some tips: choose patterns with strong outlines, work in zones, and use a highlighted chart. These strategies make busy charts into fun, doable projects in counted cross stitch.
Understanding counted cross stitch basics before you start
Before you start stitching, get familiar with some key terms and steps. Your journey begins with picking a pattern, arranging threads, and cutting fabric. Then, you mount it in a frame and start stitching. Knowing terms like counted cross stitch, Aida, and floss helps you understand what you’re doing.
Essential vocabulary
Counted cross stitch uses a grid, not an outline. Aida fabric is common; its count tells you stitches per inch. DMC floss is standard; each number corresponds to a color. Strand counts guide you on thread usage for coverage.
Charts, symbols, and color keys
Charts turn designs into grids of symbols. Each symbol points to a color on the chart’s key. Most symbols mean the same simple stitch, so visual complexity doesn’t translate to difficulty.
Mapping chart to action
Use good tools to keep symbols in order. Highlight completed areas on physical charts. Digital apps like Pattern Keeper offer zoom, highlight, and symbol-only views. These features help avoid mistakes and speed up stitching.
Start point strategies
Start near the center or in a cluster of same-color stitches. This anchors the design and keeps margins even. You can also grid your fabric with washable markers before starting. Gridding and a highlighted chart help keep your work accurate and confident.
Practical basics at a glance
- Choose the right Aida count for the level of detail you want.
- Match chart symbols to DMC floss numbers using the color key.
- Work with 2 or 3 strands as the pattern recommends for even coverage.
- Keep a simple set of cross stitch tools—needle, hoop or frame, scissors, and a good light source.
Mastering these basics makes complex patterns easier. As you stitch, pay attention to tension and material choices. They affect the final look, so observe how they interact.
Choosing easy-looking patterns that deliver “wow” results
Look for patterns that are easy to read at first glance. A clear outline, smart shading, and a simple color palette make simple stitches pop. You get bold results without needing lots of colors or complicated stitches.
Look for designs with clear outlines and simple backstitching techniques
When searching for cross stitch patterns, choose ones with clear edges. These outlines make shapes easy to see and speed up your work. Simple backstitching turns filled blocks into sharp features, making simple designs look complex.
How limited palettes and clever shading create detail without complexity
Using fewer colors makes stitching faster and easier to track your progress. A palette of four to six DMC shades can suggest texture and depth. Clever shading lets gradients form without needing to blend threads, making it easy for beginners.
Examples of pattern types that appear intricate but stitch simply
- Silhouettes: strong contrast and a solid outline deliver a striking image with mostly full crosses.
- Pixel-art designs: blocky color fields read as detailed from a distance and stitch quickly up close.
- Minimalist portraits: a few strategic highlights and backstitch accents convey facial features without heavy stitching.
Choose patterns with clustered color islands so you can group work by area. This approach helps keep your momentum and makes even “busy” charts feel doable as you complete visible sections.
Focus on charts that show defined shapes and keep DMC counts low. These design choices produce cross stitch ideas that look advanced but are simple to stitch. They’re perfect for your next project.
Tools and materials that simplify complex-looking projects
Choosing the right supplies makes complex patterns easier. Use good cross stitch fabric, quality threads, and smart tools. This reduces mistakes and speeds up your work. Start with the basics and add tools as needed.

Choosing the right fabric: Aida counts and how they affect perceived detail
For visible detail, pick Aida count. A 14- or 16-count is great for beginners. It offers a polished look without tiny holes.
For finer detail, choose 18- or 28-count. But, it takes longer and needs better eyesight or magnification.
Fabric quality and stitch tension affect how colors look. Better fabric resists distortion and keeps shading right.
Selecting DMC floss and organizing threads to avoid overwhelm
DMC floss has clear numbers for easy reordering. Sort skeins on bobbins or in a thread organizer before starting. Label each bobbin with the DMC number and a note about its symbol.
Use multiple needles for active areas. This saves time and keeps long floats off the back. Good organization prevents mistakes and speeds up your work.
Useful tools: frames, needles, magnifiers, and Pattern Keeper or digital charts
An embroidery frame or Q-snap keeps tension even and reduces fatigue. Use tapestry needles in sizes 24–26 for Aida counts 14–18. A bright lamp or magnifier makes details clear.
Digital chart viewers like Pattern Keeper track progress and zoom in on symbols. They highlight active zones. Clean symbols from reputable providers make charts easier to read.
- Must-haves: 14/16 Aida, DMC floss, tapestry needles, Q-snap or frame.
- Helpful extras: magnifier lamp, bobbins with labels, clipboard or magnetic board for charts.
- Digital aids: Pattern Keeper or similar apps to reduce eye strain and improve tracking.
Embroidery hacks to speed up filling large areas without fatigue
Large color fills can feel endless. But, you can make them less tedious with some embroidery hacks. These hacks keep your hands and eyes fresh. Choose a workflow that suits your stitching style, and your project will move faster.
First, prepare your threads. Use parking threads and multiple needles for frequent color changes. Thread several needles with the colors you need for a zone. Then, stitch one color and park the needle just outside the working area.
Anchor those parked threads over a few stitches to avoid long floats and a messy back.
Divide the fabric into manageable portions. Working in blocks or zones gives you repeated wins and reduces counting errors. Complete one grid square or a group of four to eight inches, mark progress, then move on. This keeps boredom away and limits mistakes.
Gridding saves time on corrections. Use a water-soluble pen or a removable thread that matches the chart grid for cross stitch gridding. Match your grid to the printed chart and you will spot miscounts quickly, cutting frogging time.
Adjust your stitch method for speed. Try continental or tent-style fills where appropriate to reduce the number of passes through the fabric. Use fractional stitches sparingly to smooth edges without adding bulk. These cross stitch techniques keep appearance high while saving effort.
Tool choices matter. Use an ergonomic frame, a good magnifier, and Pattern Keeper on your tablet to zoom and track stitches. Join a stitchalong or Flosstube group when you need pace and morale. Shared goals will help you finish broad fills that once felt draining.
| Hack | What it fixes | How to apply | Time or fatigue saved |
|---|---|---|---|
| Parking threads | Frequent small color changes, long floats | Thread multiple needles; park outside area; anchor over parked threads | Reduces re-threading and back-maintenance by up to 40% |
| Working in zones | Loss of momentum, counting errors | Divide pattern into same-size blocks; finish one block before starting next | Improves progress perception and lowers mistakes |
| Cross stitch gridding | Miscounts and frogging | Grid fabric to match chart using pen or thread; check intersections often | Cuts correction time significantly |
| Alternative fills | Slow stitch styles | Use continental or tent stitch for large fills; limit fractional stitches | Saves hand movement and speeds coverage |
| Ergonomic tools & communities | Physical fatigue and motivation dips | Use frames, magnifiers, digital charts and join stitchalongs | Reduces strain and increases steady progress |
Beginner cross stitch strategies to tackle “busy” designs
Complex charts can feel overwhelming, but you can break them into clear, bite-sized steps. Start with a small area near the center. Choose clusters of similarly colored stitches to build early momentum. This approach keeps errors low and turns intimidating pages into familiar patterns.
How to break a complex chart into manageable steps
First, grid the chart into blocks of 10×10 or use a printed highlighter to mark those squares. Set short goals, such as finishing one block per sitting. Track time and treat each block as a mini project so progress stays visible.
Next, prioritize areas with large color fields if you prefer quick fills. Choose scattered color islands when you enjoy frequent color changes. Your preference will shape how you split the chart.
Using highlighters and stitch trackers to maintain progress
Mark completed stitches on paper charts with a light highlighter or use digital tools like Pattern Keeper to hide finished boxes. Stitch trackers keep your place and reduce recounts, making them essential for busy cross stitch projects.
Thread several needles for recurring colors and park threads when islands of a shade recur. This saves time and keeps your rhythm steady during long sessions.
Adapting your rhythm: when to switch colors vs. color-by-color stitching
Switch to color-by-color for large, contiguous blocks to minimize thread changes. Use a zone-by-zone method or parking for designs with many small motifs mixed across the canvas. Test both methods on a sampler to see which fits your pace.
Your stitching style matters. Some stitchers like beginning many pieces, others finish one at a time. Imperfect stitching is normal. Let your personal journey guide which cross stitch tips you adopt and which you discard.
Join stitchalongs on Facebook or follow Flosstube creators for support. Community feedback helps you refine techniques for varied cross stitch projects and keeps motivation high.
Common cross stitch mistakes in intricate-looking patterns and how to avoid them
Complex charts can hide simple pitfalls. Spotting errors early can save time and reduce frustration. By following a few habits, you can keep your cross stitch neat and steady from start to finish.
Counting errors are common. Make sure your Aida grid matches the chart. Start from a clear center or edge. Mark completed rows with a highlighter to keep track.
If you find a miscount, stop right away. Re-count a small area and frog only the needed stitches. Fixing errors early prevents bigger problems.
Long floats and messy backs can make your project look amateurish. Anchor thread tails by weaving them under a few stitches. Use the loop start for thread beginnings on the same color. Bring parked threads out of the main stitching zone to avoid catching them.
Work over loose threads when possible. This keeps the back tidy and reduces the chance of knots or tangles. It also keeps stitches on the front in place.
Color confusion is another common issue. Label DMC floss by number and wind each color onto bobbins or toggles. Keep a small floss organizer or project bag for the section you are stitching. This way, you only handle a few shades at a time.
Digital tools can help with symbol misreads. Use apps that let you toggle color layers or highlight symbols. This saves time and reduces mental load when working complex designs.
Below is a quick reference you can use before starting a busy design.
| Problem | Quick Fix | Tools to Use |
|---|---|---|
| Counting errors | Grid fabric, start at center, highlight chart progress | Washable fabric marker, highlighter, ruler |
| Large corrections | Stop early and frog minimal area, re-count surrounding stitches | Small scissors, stitch rippers, bright light |
| Long floats and messy backs | Weave tails, use loop start, park threads safely | Tapestry needles, thread bobbins, thread conditioner |
| Color confusion | Label DMC floss, use bobbins, keep active colors in a pouch | Floss organizer, printed DMC chart, project bag |
| Symbol misreads | Use digital charting or print enlarged charts, mark completed areas | Tablet with chart app, magnifier, printed enlarged key |
Backstitching techniques and finishes that add perceived detail
With a few smart backstitch moves, you can make large, simple color areas look crisp and recognizable. Small choices, like where to place a top stitch or how tight your thread is, greatly affect how a piece looks. Backstitching techniques can make expressions clearer, define edges, and add a sharp final touch to portraits or motifs.

Adding backstitch lines around a motif makes color blocks look intentional. Use backstitch to trace contours, hint at facial features, or create texture like hair or fur. A narrow outline creates a delicate look, while a doubled strand gives more weight and contrast.
Railroading keeps lines tidy. Separate two strands slightly, then pull the needle so the threads sit side-by-side across the fabric. This prevents a twisted, ropey look that can blur detail. Pair railroading with steady, even tension to avoid puckers that ruin a smooth finish.
Thread choice is important. Use one strand for fine details on 18-count Aida or two strands for bolder lines on 14-count. Cotton stranded floss from DMC or Anchor gives consistent coverage. Test a scrap before you commit to ensure line weight matches the design’s scale.
Finishing transforms a nicely stitched piece into a gallery-ready object. Block your work gently to square the fabric and flatten stitches. Mount on a supportive board covered in linen or use a float mount to show edges without tension from tight hoops. Professional cross stitch frames protect and present your work, making colors pop and edges read cleanly.
Consider these practical cross stitch finishes when you prepare your piece for display:
| Step | Why it matters | Tips |
|---|---|---|
| Blocking and pressing | Removes warps, evens tension, sets stitch appearance | Steam lightly from the back, pin to a board while damp, avoid direct iron contact with threads |
| Mounting on a board | Provides stable support and prevents sagging over time | Use acid-free foam or masonite, stretch evenly, consider linen covering for a museum look |
| Choosing cross stitch frames | Frames determine final visual impact and protection | Pick flat or floater frames for modern pieces, use mats to separate glass from floss |
| Edge treatment | Clean edges make a stitched piece look intentional and polished | Trim excess fabric to a uniform margin, whip-stitch or glue to the mount for neatness |
| Protective glazing | Shields colors and stops dust accumulation | Choose UV-filtering glass or acrylic, avoid pressing glass onto stitches |
Your finishing choices greatly influence how viewers read detail. A well-executed backstitch with careful railroading, steady tension, and a considered mounting plan elevates simple stitching into a professional-looking piece. Small investments in proper cross stitch finishes and framing pay off in how your work is perceived and preserved.
Project ideas that look advanced but are stitchable for most crafters
Choose projects that look complex from afar but are easy to stitch. You can achieve dramatic results with small pieces and smart color choices. These cross stitch ideas boost your confidence without tedious filling.
Minimalist portraits and pixel-style pieces are great for beginners. They offer a bold look with a simple palette. Strong contrast and clear shapes help your work appear advanced, even with basic stitches.
Small panels or samplers are perfect for mixing motifs. Combine silhouettes, tiny florals, and motif blocks for a stunning design. These projects avoid large single-color areas, keeping your stitching exciting.
Custom charts make personal images stitchable. Services like Advanced Cross Stitch can convert photos into stitchable designs. By reducing colors, you get a faithful portrait that’s still manageable.
Pixel-art cross stitch uses grid logic similar to counted work. Treat each stitch as a pixel and plan large shapes first. This way, you can adapt a reference image into a neat, complex-looking chart.
| Project Type | Why it reads advanced | Why it stays stitchable |
|---|---|---|
| Minimalist portrait | High contrast, carefully placed details create depth | Small palette, large blocks, minimal backstitch |
| Pixelated animal | Blocky shapes mimic digital art for instant impact | Grid-based layout, repeatable color clusters |
| Themed sampler panel | Combines motifs for variety and gallery appeal | Short motifs, easy color swaps, modular stitching |
| Photo-to-chart conversion | Personal images become unique, artful pieces | Custom charts can reduce colors and simplify details |
| Silhouette motif | Strong shapes suggest complexity with few stitches | Single-color fills and optional backstitch accents |
When ordering custom charts, ask for Pattern Keeper compatibility if you use digital tools. Photo conversion works best with a reduced palette and larger stitch blocks. These tweaks turn elaborate-looking images into achievable weekend projects.
Use these cross stitch ideas to plan projects that teach techniques while delivering visible payoff. Start with small projects, try a photo conversion for a beloved image, and test a pixel-art cross stitch design. See how few stitches can make a strong statement.
CROSS STITCH as therapy and motivation for tackling bigger projects
Stitching can be a quiet form of therapy that keeps you steady during stressful days. The repetitive motion soothes nerves, eases anxiety, and gives you a simple task to focus on. For those managing chronic pain or arthritis, gentle stitching offers movement that feels purposeful without strain.
You gain measurable progress with every completed row. That progress builds confidence and makes larger or visually complex patterns feel achievable. If you are exploring cross stitch for beginners, start with small blocks or motifs to feel that momentum quickly.
Many stitchers prefer the rush of beginnings over the final push to finish. Starting multiple projects keeps interest high and gives fresh motivation when one piece stalls. Organizing a queue of starts and short finishes helps you balance novelty with steady progress.
Community support turns solo stitching into shared purpose. Join Zoom stitchalongs to work live with others and get real-time tips. Flosstube videos and Facebook stitching meetups offer embroidery inspiration, troubleshooting, and friendly accountability that keeps you moving forward on ambitious pieces.
Use social groups to learn time-saving techniques and to borrow ideas for simplifying color palettes or filling large areas. Pattern Keeper and project threads on Facebook help you track work, compare notes, and gain the small boosts that sustain long-term projects.
| Benefit | How it helps you | Where to find it |
|---|---|---|
| Stress relief | Repetitive stitching lowers heart rate and improves focus | Daily practice, short sessions |
| Motivation through starts | New projects renew interest and prevent burnout | Personal project queue, stitch-alongs |
| Community accountability | Live feedback and shared milestones keep you on track | Zoom stitchalongs, Flosstube, Facebook groups |
| Practical tips | Tricks for filling large areas, color management, and avoiding errors | Video tutorials, Pattern Keeper, group threads |
| Beginner confidence | Small wins teach rhythm and counting skills | Starter kits, simple charts, cross stitch for beginners resources |
Advanced tips and needlework secrets to make “hard” patterns easier
When a pattern seems too hard, small changes can help. You might change the fabric, mix threads differently, or adjust where you place stitches. These tips come from real stitching experience and help keep you going on big projects.
Mix counts and threads
Try stitching a 14-count chart on 16-count Aida to make it smaller and more detailed. Use two strands instead of three for full coverage. Mixing counts and threads keeps the image clear while saving time.
Modify the chart
Use fewer colors if they don’t contrast much. Replace complex blends with bigger color blocks for less effort. Simplifying blends or using similar DMC colors makes shading easier without changing threads too often.
Adopt an efficient workflow
Start with the edges to frame your design and see progress quickly. Use zones for long sessions. Begin in the center if counting is easier, then fill outwards to avoid mistakes.
Use multi-needle parking and anchoring
Thread several needles with common colors and park them safely. This saves time with scattered stitches. Anchor thread ends by weaving them under stitches or working over them to keep the back neat.
Gridding and organization
Mark a light grid on your fabric or use cross stitch gridding on charts. Good organization—labeled bobbins, color blocks, and numbered containers—makes stitching faster and reduces hesitation.
| Tip | What it fixes | How to apply |
|---|---|---|
| Mix fabric counts | Overly large finished size and fuzzed detail | Stitch a 14ct pattern on 16ct Aida; check gauge on a scrap |
| Reduce colors | Too many tiny color changes that slow progress | Group similar DMC shades into a single tone for blocks |
| Multi-needle parking | Frequent switching for scattered stitches | Thread several needles and park them at stitch edges |
| Anchor thread ends | Messy backs and loose tails | Weave tails under stitches or work over them for security |
| Perimeter-first stitching | Counting errors and lack of a visual frame | Outline the motif, then fill inward by zones |
| Cross stitch gridding | Frequent frogging and misalignment | Mark 10×10 squares on fabric or grid the chart digitally |
| Cross stitch organization | Lost time searching for floss and symbols | Use labeled bobbins, trays, and a short master key |
Try one or two of these tips at a time to see what works for you. Small changes can make a big difference, turning hard charts into enjoyable stitching.
Conclusion
You don’t need perfect technique to make an impactful CROSS STITCH piece. Embrace the journey. Early progress and the final backstitch can lift the whole project. Small mistakes often add character.
Use practical cross stitch tips like multi-needle parking and starting in the center. Marking charts with a highlighter helps too. Organizing DMC floss and gridding the fabric keeps you on track.
Leverage quality charts and digital conversions. Join community stitchalongs on Zoom or Facebook. Use smart embroidery hacks to make designs achievable.
Choose patterns that excite you and apply beginner cross stitch strategies. Use the right tools. With these elements, you can produce gallery-ready results while enjoying the craft.