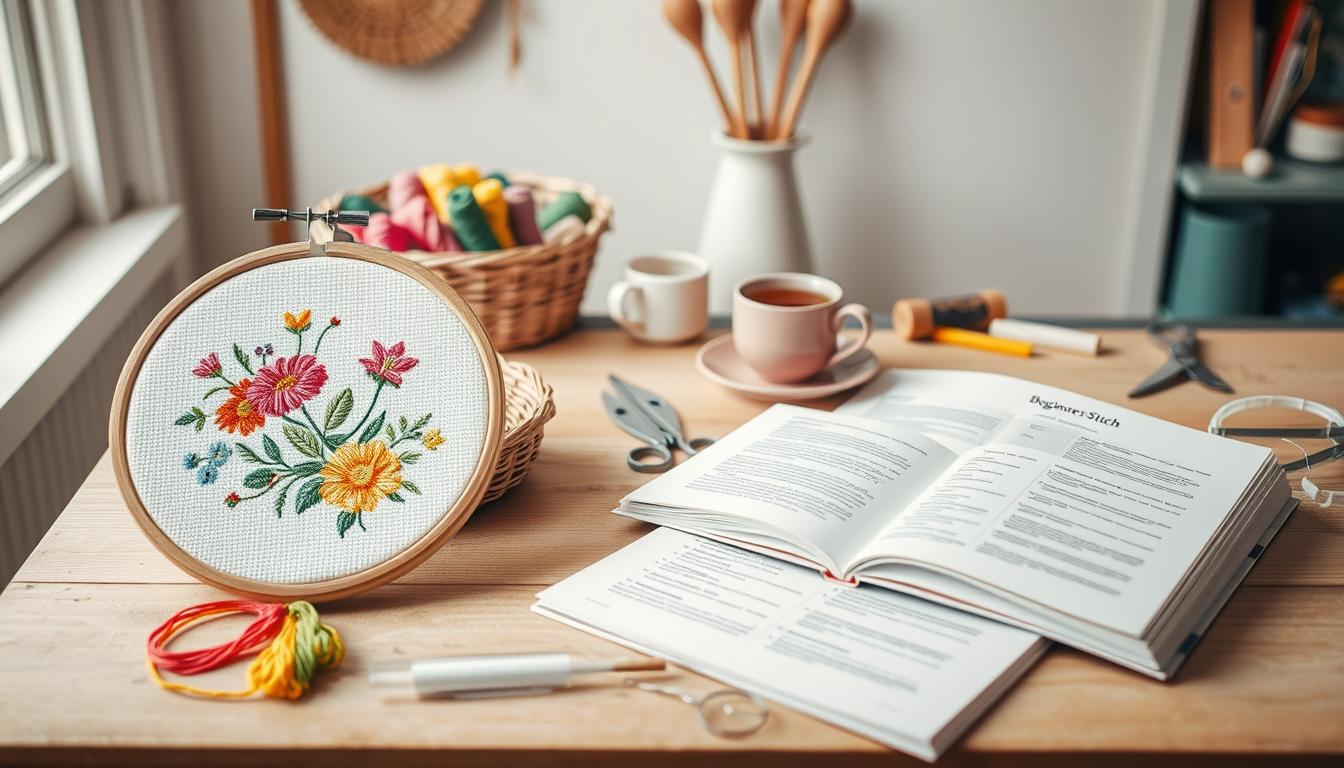
If you love counted cross stitch, this guide will help you improve fast. It’s a calming hobby that uses a grid on fabric like Aida or evenweave. With the right habits, you can go beyond beginner levels and create neat, intentional work.
This article shares seven habits to start today. Learn how to pick fabric and count, choose the right thread and needles, and more. You’ll get tips on gridding, starting without knots, and keeping your workspace tidy.
Cross stitch is easy on the wallet and accessible. Aida fabric (15″×18″) costs about $3.99, and a DMC skein is $0.62. Starter kits are $5–$10, so you can practice without spending a lot. You’ll learn techniques used by pros.
Expect practical tips and brand suggestions in the following sections. You’ll learn how to avoid common mistakes. Get clear steps on counted cross stitch, tool choices, and workflow changes to improve your stitches and speed.
Key Takeaways
- Cross stitch rewards consistent habits: fabric, thread, and needle choices matter.
- Affordable supplies like Aida and DMC make it easy to start and practice.
- Gridding and good counting reduce costly errors and save time.
- Thread handling and knotless techniques keep your work clean and even.
- Small ergonomic changes and finishing steps make projects display-ready.
Mastering the Basics: Choosing the Right Fabric and Count
Choosing the right cross stitch fabric and Aida count is key for every project. Start with material that has clear holes and feels comfortable. This makes counted cross stitch easier and helps you avoid mistakes while learning.
Why start with lower Aida counts
Begin with lower Aida counts like 8, 10, or 11 if 14 feels too tight. Larger holes make it easier to see where each stitch goes. This reduces counting errors, lets you work faster, and builds confidence.
As your eyesight and muscle memory improve, move to 14, 16, or finer counts for more detail. Very fine counts over 20 need thin needles and good lighting.
How to measure and center your fabric
Always measure from the center of the pattern to the center of your fabric. Use the triangular center marks on charts and a stitch calculator to convert stitches to inches or centimeters. This simple step helps prevent running out of margin and avoids frustrating re-centering later.
Count directly on the fabric when needed. Match stitch counts on the pattern to the fabric grid. This tactile check complements digital tools and reduces surprises when you begin stitching.
Securing and preparing fabric edges
Prevent fraying before you stitch. Use hemming tape, fabric glue, or a zigzag machine stitch around edges. You can skip hemming, but leave extra margin for framing and finishing. For garments or non-flat projects, use dissolvable Aida and follow manufacturer washing instructions to remove it after stitching.
Consider colored Aida like navy, gray, or pastel shades to enhance your design. Starter kits from brands such as DMC often include an appropriate Aida count and save you time choosing materials. Proper prep and the right fabric choice support clean stitching and reduce the need for extensive cross stitch gridding or rework later.
Thread and Floss Habits Pros Rely On
Good thread habits make your finished piece look better and stitching smoother. Professionals pick quality materials and test special fibers. They also keep everything neat. These habits save time and make your work look cleaner.
Invest in quality skeins
Choosing trusted brands like DMC and Anchor gives you consistent color and less fray. DMC floss works well with fabric and doesn’t fade easily. For sparkle, try DMC Light Effects or Kreinik metallics.
Choose specialty threads for impact
Variegated threads like DMC Coloris or hand-dyed options add subtle color shifts. Metallic threads add highlights when used sparingly. Silk and perlé cottons add sheen and texture for special areas. Use tapestry wool only for canvaswork where it fits the fabric.
Organize and cut thread to optimal lengths
Cutting thread to about 18 inches reduces tangles. Many stitchers prefer this length for 14–16 count fabric. Keep your threads on labeled bobbins or rings for easy access. Precut threads and thread cards help during long sessions.
| Thread Type | Typical Use | Recommended Length | Notes |
|---|---|---|---|
| DMC stranded cotton | Everyday cross stitch threads for solid coverage | 18″ (2 strands on 14–16 count) | Colorfast, smooth, minimal tangles |
| Variegated threads | Shading and subtle color shifts | 18″–24″ | Use shorter lengths to control pooling |
| Metallic threads | Highlights and sparkle | 12″–18″ | Mix one metallic strand with cotton for comfort |
| Silk & perlé | Sheen and texture for focal motifs | 12″–18″ | Perlé is single-strand; silk may require fewer strands |
| Tapestry wool | Canvaswork and textured areas | 18″–24″ | Best for larger counts and needlepoint |
Most embroidery floss has six strands. For standard projects, you usually use two strands. Adjust strand count for varied coverage or darker fabric. Keep sharp scissors ready for clean cuts and to avoid frayed ends.
Needle Know-How: Choosing and Caring for Needles
Choosing the right needle is key to your stitching speed and quality. Make sure the needle fits the fabric and thread well. This prevents holes and pulled fibers. Keep a few favorite needles ready for quick changes in your projects.

Pick the right needle size for your fabric
For 14-count Aida, use size 24 tapestry needles. Size 26 is best for 16-count. Size 28 works well for 18-count.
Coarse linens need sizes 18–20. Fine evenweaves over two threads need 24–28. Use blunt needles for Aida and evenweave to protect your fabric.
Best needle brands and specialty options
Go for trusted brands like Bohin needles, John James, or Tulip. Bohin needles are known for their smooth eyes and durability. Gold-plated Bohin needles are great for those with nickel allergies and for delicate work.
Keep a mix of standard and specialty needles for different stitches.
Needle care and storage
Replace bent or dull needles to avoid fraying and snags. Store needles in labeled cases or on a magnetic strip. This keeps them organized and prevents rust.
Clean oily needles gently with a soft cloth. Discard needles with burrs or bends; they can cause invisible pulls that show later.
Practical cross stitch tools to keep handy
- Assorted tapestry needle pack with sizes 18–28
- Needle case or magnetic holder labeled by size
- Gold-plated needles for those with metal sensitivities
- Small awl or stiletto for tight fabrics
Knowing about needle sizes and caring for your supplies is a secret pros use. It keeps stitching smooth and projects neat. Keep a set of trusted needles to save time and keep fabric quality high over many projects.
CROSS STITCH Workflow: Gridding, Counting, and Sectioning
Start your project with a simple plan to avoid mistakes. A clear workflow saves time and reduces errors. First, visualize the pattern on your fabric. Then, choose a gridding method that fits your style and project size.
Divide your fabric into 10×10 blocks using a water-soluble pen or a removable marker. These lines help match the pattern and prevent miscounts. Gridding makes placing motifs faster and reduces ripping time.
Break big designs into smaller zones for steady progress. Mark the pattern and fabric in matching blocks. Aim for blocks of 100–150 stitches. Use a hoop or frame for each block to ensure even stitches.
Use a stitch calculator to check your finished size. It helps you order the right fabric and frame. Digital tools let you zoom, change colors, and track your progress on-screen.
Develop habits to keep your work steady. Count twice, especially in high-contrast areas. Grid before stitching and tackle bold elements first. Stitch horizontally to avoid tension issues.
Use both paper and digital tools as needed. Apps help with conversions and tracking. With gridding, a stitch calculator, and a section plan, you’ll make fewer mistakes and progress smoothly.
Thread Handling Techniques That Keep Your Work Clean
Good thread habits make your work look neat on both sides. You’ll spend less time fixing mistakes with simple moves. These tips help keep your fabric flat and stitches consistent.
Proper strand separation and prevention of tangles
Separate strands slowly, pulling one at a time to avoid twist. Try the knees trick: hold an unseparated skein between your knees while easing strands apart. Let the needle and thread hang to unwind twists naturally.
Keep precut lengths on labeled bobbins to reduce handling. Sharp scissors give a clean cut, preventing frayed ends and snags. Small habits like these speed your work and cut frustration.
Starting and ending threads without knots
For doubled strands, use the loop start method for even numbers. Fold the strand, pass through the needle, and anchor with the first stitch to avoid bulky knots. When finishing, weave the tail under at least three stitches on the reverse to hold it secure and flat.
Leave a 1″–1.5″ tail when anchoring so you can weave easily. If you need an alternative, whip the tail across a few nearby stitches instead of tying a knot. The back will stay tidy and your frame will sit flat under glass.
Make crosses in the same direction and manage tension
Always make the top stitch cross in the same direction across the piece for uniform texture. Consistent crosses give a crisp pattern read at a distance. Use two strands for most 14–16 count projects unless the chart says otherwise.
Keep an eye on cross stitch tension. Pulling too tight causes puckering; too loose makes uneven coverage. Use a relaxed tug so each stitch sits snug but not pinched. For fine details or backstitching techniques, switch to a single strand.
- Tip: Practice strand separation early to speed workflow.
- Tip: Organize threads by color and length to limit tangles.
- Tip: Add small finishing moves from cross stitch finishing techniques to present a polished piece.
Pro Pattern and Lettering Strategies
Finding a great pattern is key to success. Look at sources like DMC, LoveCrafts, and The Spruce Crafts. These places offer a wide range of styles and prices. Join online communities and blogs to find new patterns and share tips.

For affordable options, search for free patterns online. Use these to practice new skills or try small designs. Keep a list of reliable sources for future projects.
Personalize your cross stitch by changing colors. Choose colors that match the room or the person. Use warm colors for autumn and cool colors for modern looks. On dark fabric, use extra threads for better visibility.
Designing lettering needs careful planning. Use Stitchpoint’s tool to test fonts and spacing. Start with a small test to check if it looks good.
For custom designs, start with simple shapes. Use tools like Excel to plan your design. Turn photos into patterns with Pic2Pat for unique gifts.
Make your designs durable and wearable. Use dissolvable Aida for clothes. Consider the fabric and thread for wall art. Keep a list of embroidery hacks for future projects.
Workspace, Ergonomics, and Tools That Speed Progress
Make a workspace that lets you stitch longer without getting tired. Good lighting and the right posture reduce eye and neck strain. A tidy setup helps you focus on your pattern, not searching for supplies.
Set up good lighting and posture
Place your project near a window if you can. If not, use a daylight lamp with a color temperature of 5000–6500K. This mimics natural light well. For detailed work, a magnifier with a built-in light is helpful.
Sit with your feet flat, shoulders relaxed, and your project at eye level. Take breaks every 30–45 minutes to stretch. This prevents strain from repetitive movements.
Use hoops, frames, and table stands appropriately
Use hoops for small areas because they’re affordable and keep fabric tight. For longer sessions, choose a scroll frame, Q-snap, or adjustable table stand. These reduce arm fatigue. Use cross stitch frames for finished pieces you want to display.
Switch hoops as you move across a design. This prevents pulling the same area too tight and keeps tension even across the cloth.
Organizational tools for a tidy workflow
Label floss on bobbins and use acrylic organizers or small parts boxes for active colors. Keep your tools—needle cases, small sharp scissors, and threaders—within arm’s reach. This keeps you efficient.
Use a simple spreadsheet to track palette choices and skein usage. Portable kits or a compact pouch let you stitch on the go. This helps with cross stitch organization.
Practical ergonomics to protect your hands and back
Avoid stitching too tightly; maintain even tension so your fabric lies flat. Choose a supportive chair with lumbar support or add a cushion for longer sessions. A lap frame or table stand moves the weight off your shoulders and keeps posture steady.
Combine good setup with quality cross stitch tools like ergonomic needles and LED lamps. Small adjustments can improve comfort and speed without sacrificing stitch quality.
Finishing and Display Techniques for Professional Results
Finishing your cross stitch work well helps it last longer and look great. A few steps after stitching will keep colors bright and edges neat. Choose the tips that fit your project and room decor.
Washing cross stitch starts with a gentle handwash in cold water and a mild detergent. Gently submerge the piece to remove oils and markings. If using dissolvable Aida, follow the manufacturer’s instructions for safe removal.
Rinse the fabric until the water runs clear. Press out excess water by rolling in a clean towel. Lay flat to air dry on a breathable surface to keep the shape even.
When blocking and preparing for framing, stretch your piece onto a foam board or mounting board. This removes wrinkles and sets edges. Use stainless pins or acid-free tape at the back to hold tension. Trim fabric with enough margin for your chosen frame or hoop.
Ironing cross stitch requires care. Place a protective cloth between the iron and the stitched side. Press on the reverse to avoid flattening stitches. For unwashed pieces, use a low heat and a light press from the back only.
For display cross stitch, choose a presentation that fits the design and room. Classic frames work well under glass for protection. Hoops for display offer a quick, decorative option that you can paint or embellish.
Mounting on cushions, stools, or drum keels creates functional art. Seasonal ornaments and rotating displays keep your décor fresh. Stitching on dissolvable Aida lets you add designs directly to garments and towels for wearable pieces.
| Finishing Step | When to Use | Key Benefit |
|---|---|---|
| Handwash in cold water | All washable pieces | Removes oils and markings without color loss |
| Blocking on foam board | Before framing or mounting | Ensures even shape and tension |
| Ironing from the back with cloth | After washing or for light pressing | Prevents crushed stitches and iron marks |
| Framing under glass | Wall art and preservation | Protects from dust and UV damage |
| Hoops for display | Casual decor and quick shows | Easy change-outs and decorative edge |
| Mounting on cushions or stools | Functional home accents | Makes stitched pieces usable and visible |
Conclusion
You’ve learned about seven habits that make cross stitch a true craft. Start by picking the right Aida count and preparing your fabric well. Use quality threads like DMC and keep them organized.
Choose the right needles and take care of them. Use gridding and sectioning to avoid mistakes. Start threads without knots and keep your stitch direction consistent. These tips help make your work look professional.
Work in a tidy space and set up an ergonomic, well-lit area. This helps you work faster and keeps you comfortable. Find patterns from trusted sources and customize them with tools like Stitchpoint or Pic2Pat.
Finish your projects with care, including washing, blocking, and framing. Cross stitch is not just about making things look good. It’s also a form of therapy that brings calm to your day.
For beginners, start with a kit from DMC or LoveCrafts. Practice loop starts and two-strand stitching on 14-count Aida. Buy a small pack of DMC skeins and a Bohin needle.
Grid your fabric before starting. Plan a simple display for your first finished piece. Use free patterns and online communities to learn more. Keep trying new threads and designing simple motifs to keep your inspiration flowing.
FAQ
What count Aida should I start with as a beginner?
How do I measure and center my fabric so I don’t run out of margin?
What’s the best way to stop Aida from fraying at the edges?
Why should I invest in DMC or Anchor floss instead of bargain threads?
Which specialty threads should I try for impact and how do I use them?
How long should I cut my thread and how do I avoid tangles?
How many strands of floss should I use on 14–16 count fabric?
What needle size should I use for different fabric counts?
Which needle brands are recommended and why?
How should I store and care for my needles?
Should I grid my fabric and how do I do it?
How do I break a large pattern into manageable pieces?
What digital tools and calculators are useful for cross stitch?
How do I separate strands without creating tangles?
How can I start and end threads without knots for a clean back?
Should all my crosses go in the same direction?
Where can I find reliable free and paid patterns?
Can I change colors to match décor or gifting preferences?
How do I design lettering or simple custom motifs?
What lighting and posture tips help reduce eye strain and fatigue?
When should I use hoops vs. frames vs. scroll frames?
What organization tools help speed up stitching?
How should I wash, block, and iron my finished piece before framing?
What creative display options work well for finished cross stitch?
Are cross stitch kits affordable for beginners and what can I expect to pay?
FAQ
What count Aida should I start with as a beginner?
Start with a lower-count Aida for easier stitching. Choose 8-, 10-, or 11-count if you can find them. A larger-hole 14-count Aida is a good compromise.
Lower counts give bigger holes and faster visible progress. As your skills improve, move to 14-, 16-, or higher-count fabrics for finer detail. Very fine counts (20+ or specialty evenweaves) require good eyesight and thinner needles.
How do I measure and center my fabric so I don’t run out of margin?
Always find the center of both pattern and fabric before you start. Use the triangular center markers on charts or a cross-stitch calculator to convert stitch counts into inches or centimeters.
Alternatively, count stitches on the pattern and match that count on the fabric to place your starting point. Leave extra margins for framing—typically at least 2–3 inches beyond the stitching area.
What’s the best way to stop Aida from fraying at the edges?
Secure edges with heat-activated hemming tape, a zigzag stitch on a sewing machine, or a thin line of fabric glue. Framing or hemming is optional but leaving adequate margins helps.
For stitching on clothing, use dissolvable Aida: tack it in place, stitch, and wash away per the manufacturer’s instructions.
Why should I invest in DMC or Anchor floss instead of bargain threads?
Reputable brands like DMC and Anchor offer colorfast, smooth stranded cotton. This type of floss tangles less and produces a cleaner finish.
Quality floss lays better, has consistent dye lots, and resists fading. Specialty options like DMC Light Effects, Kreinik metallics, or variegated Coloris and hand-dyed threads give texture and sparkle that cheap bulk floss can’t match.
Which specialty threads should I try for impact and how do I use them?
Use variegated floss (e.g., DMC Coloris or hand-dyed skeins) for subtle color shifts. Kreinik or DMC metallics add shimmer. Mix one metallic strand with regular cotton strands to add sparkle without bulk.
Silk and perlé cottons add sheen and texture for highlights. For canvaswork, tapestry wool like Anchor Tapisserie gives a woolly look.
How long should I cut my thread and how do I avoid tangles?
Cut floss to about fingertip-to-elbow length (roughly 18–24 inches), with 18″ a common working standard. Shorter lengths reduce tangles and twist.
Store organized on bobbins, acrylic thread keepers, or labeled cards. Use sharp embroidery scissors to make clean cuts and prevent fraying.
How many strands of floss should I use on 14–16 count fabric?
Standard cross stitch uses two strands of stranded cotton on 14–16 count Aida. Adjust strand count per pattern or effect: one strand for fine backstitching or delicate details, three or more for bolder coverage or darker fabrics.
Always follow pattern recommendations or test on a swatch.
What needle size should I use for different fabric counts?
Match needle size to fabric count. Typical guidance: 14-count Aida → size 24 needle; 16-count → size 26; 18-count → size 28. Coarse fabrics (6–8 count) use sizes 18–20; very fine evenweave or 28–36 over two may require small sizes around 24–28 depending on strand thickness.
Use tapestry (blunt) needles for Aida and evenweave to avoid splitting threads.
Which needle brands are recommended and why?
Bohin needles are highly recommended for smooth stitching and durability; gold-plated Bohin options suit nickel-allergic stitchers. John James and Tulip are also reputable brands. Choose needles with smooth eyes and no burrs to protect threads and fabric.
How should I store and care for my needles?
Replace bent or burr-marked needles to avoid snagging thread or damaging fabric. Store needles in labeled cases, magnetic strips, or small tins to prevent loss and rust.
Clean needles if they build up oils; discard any with visible damage.
Should I grid my fabric and how do I do it?
Yes—gridding dramatically reduces costly counting mistakes. Mark 10×10 stitch grids with a water-soluble pen, thin contrasting thread, or a removable marker to align with pattern blocks.
Grid before starting complex designs so you can work section by section and keep placement accurate.
How do I break a large pattern into manageable pieces?
Divide the design into smaller zones—100–150 stitch blocks or logical motifs. Work one zone at a time, use a hoop or frame sized for that section, and mark completed areas on your pattern with a highlighter.
This reduces overwhelm and helps keep tension consistent.
What digital tools and calculators are useful for cross stitch?
Use cross-stitch calculators to convert stitches to finished size. Tools like Stitchpoint’s Cross Stitch Writer help plan lettering; Pic2Pat and Photo-stitch convert photos to patterns.
Many stitchers use digital pattern viewers and apps to zoom, toggle colors, and track progress. Sources like DMC, LoveCrafts, and The Spruce Crafts offer patterns and resources.
How do I separate strands without creating tangles?
Separate strands slowly, pulling them out one at a time rather than flaming them apart. Use the “knees trick” (hold unseparated skein between knees) or twist-and-strip gently.
Let the threaded needle hang occasionally to let the thread untwist and reduce kinks.
How can I start and end threads without knots for a clean back?
Use the loop-start method for doubled strands (fold floss, thread through needle, anchor the loop with the first stitch). End by weaving the tail under at least three stitches on the reverse; avoid surface knots.
Alternate anchors include weaving the tail across existing stitches or using a small whip stitch on the backside.
Should all my crosses go in the same direction?
Yes—make the top stitch cross consistently in the same direction across the entire piece. Consistent stitch direction creates a uniform sheen and professional look.
Maintain even tension to avoid puckering; don’t pull stitches too tight.
Where can I find reliable free and paid patterns?
Trusted pattern sources include DMC, LoveCrafts, The Spruce Crafts, Country Living, and Etsy for paid designs. Many designers sell PDFs on Etsy; Craft With Cartwright and Gathered are good blogs for inspiration.
Join cross-stitch communities and forums for pattern swaps and free charts.
Can I change colors to match décor or gifting preferences?
Absolutely. Customize palettes to match a room or recipient by substituting recommended skeins with colors you prefer. Increase strand count or use a darker/background-appropriate thread on dark Aida to preserve contrast.
Test color choices on a small swatch before committing.
How do I design lettering or simple custom motifs?
Use Stitchpoint’s Cross Stitch Writer or alphabet samplers to preview fonts and spacing. For custom motifs, plan in Excel by resizing cells to squares, or use Pic2Pat to convert simple images.
Test lettering at full scale on a swatch and allow adequate spacing for stacked words.
What lighting and posture tips help reduce eye strain and fatigue?
Stitch in natural daylight when possible or use a daylight lamp with adjustable brightness. Keep your project at eye level or use a table stand to avoid hunching.
Use magnifiers with built-in lights on fine counts and take regular breaks to stretch and rest eyes and hands.
When should I use hoops vs. frames vs. scroll frames?
Use hoops for small sections and quick projects; they’re inexpensive and portable. Larger frames, scroll frames, or lap frames are better for big projects and long sessions to reduce arm fatigue.
Only hoop the area you’re actively stitching to protect fabric tension and avoid distortion.
What organization tools help speed up stitching?
Use bobbins, labeled floss cards, acrylic organizers, and pre-cut thread packs. Keep a small pair of sharp scissors, needle case, and a stitching checklist nearby.
Spreadsheets and Excel grids can double as design planners. Portable pouches make on-the-go stitching easy.
How should I wash, block, and iron my finished piece before framing?
Handwash finished pieces gently in cold water with mild detergent to remove oils and soluble markings. Rinse thoroughly and air dry flat.
For ironing, press from the reverse using a protective cloth between iron and stitching. For best display, block the piece onto foam or mounting board to get even shape before framing.
What creative display options work well for finished cross stitch?
Classic framing (with or without glass), hoop displays, cushions, ornaments, mounted panels on foam board, and wearable items stitched with dissolvable Aida are popular. Paint or decorate hoops for casual looks; choose UV-resistant glass and archival mounting for long-term preservation.
Are cross stitch kits affordable for beginners and what can I expect to pay?
Yes—cross stitch is accessible and affordable. Beginner kits often cost –. Aida fabric (example: 15”x18”) can cost around .99 and an individual DMC skein about
FAQ
What count Aida should I start with as a beginner?
Start with a lower-count Aida for easier stitching. Choose 8-, 10-, or 11-count if you can find them. A larger-hole 14-count Aida is a good compromise.
Lower counts give bigger holes and faster visible progress. As your skills improve, move to 14-, 16-, or higher-count fabrics for finer detail. Very fine counts (20+ or specialty evenweaves) require good eyesight and thinner needles.
How do I measure and center my fabric so I don’t run out of margin?
Always find the center of both pattern and fabric before you start. Use the triangular center markers on charts or a cross-stitch calculator to convert stitch counts into inches or centimeters.
Alternatively, count stitches on the pattern and match that count on the fabric to place your starting point. Leave extra margins for framing—typically at least 2–3 inches beyond the stitching area.
What’s the best way to stop Aida from fraying at the edges?
Secure edges with heat-activated hemming tape, a zigzag stitch on a sewing machine, or a thin line of fabric glue. Framing or hemming is optional but leaving adequate margins helps.
For stitching on clothing, use dissolvable Aida: tack it in place, stitch, and wash away per the manufacturer’s instructions.
Why should I invest in DMC or Anchor floss instead of bargain threads?
Reputable brands like DMC and Anchor offer colorfast, smooth stranded cotton. This type of floss tangles less and produces a cleaner finish.
Quality floss lays better, has consistent dye lots, and resists fading. Specialty options like DMC Light Effects, Kreinik metallics, or variegated Coloris and hand-dyed threads give texture and sparkle that cheap bulk floss can’t match.
Which specialty threads should I try for impact and how do I use them?
Use variegated floss (e.g., DMC Coloris or hand-dyed skeins) for subtle color shifts. Kreinik or DMC metallics add shimmer. Mix one metallic strand with regular cotton strands to add sparkle without bulk.
Silk and perlé cottons add sheen and texture for highlights. For canvaswork, tapestry wool like Anchor Tapisserie gives a woolly look.
How long should I cut my thread and how do I avoid tangles?
Cut floss to about fingertip-to-elbow length (roughly 18–24 inches), with 18″ a common working standard. Shorter lengths reduce tangles and twist.
Store organized on bobbins, acrylic thread keepers, or labeled cards. Use sharp embroidery scissors to make clean cuts and prevent fraying.
How many strands of floss should I use on 14–16 count fabric?
Standard cross stitch uses two strands of stranded cotton on 14–16 count Aida. Adjust strand count per pattern or effect: one strand for fine backstitching or delicate details, three or more for bolder coverage or darker fabrics.
Always follow pattern recommendations or test on a swatch.
What needle size should I use for different fabric counts?
Match needle size to fabric count. Typical guidance: 14-count Aida → size 24 needle; 16-count → size 26; 18-count → size 28. Coarse fabrics (6–8 count) use sizes 18–20; very fine evenweave or 28–36 over two may require small sizes around 24–28 depending on strand thickness.
Use tapestry (blunt) needles for Aida and evenweave to avoid splitting threads.
Which needle brands are recommended and why?
Bohin needles are highly recommended for smooth stitching and durability; gold-plated Bohin options suit nickel-allergic stitchers. John James and Tulip are also reputable brands. Choose needles with smooth eyes and no burrs to protect threads and fabric.
How should I store and care for my needles?
Replace bent or burr-marked needles to avoid snagging thread or damaging fabric. Store needles in labeled cases, magnetic strips, or small tins to prevent loss and rust.
Clean needles if they build up oils; discard any with visible damage.
Should I grid my fabric and how do I do it?
Yes—gridding dramatically reduces costly counting mistakes. Mark 10×10 stitch grids with a water-soluble pen, thin contrasting thread, or a removable marker to align with pattern blocks.
Grid before starting complex designs so you can work section by section and keep placement accurate.
How do I break a large pattern into manageable pieces?
Divide the design into smaller zones—100–150 stitch blocks or logical motifs. Work one zone at a time, use a hoop or frame sized for that section, and mark completed areas on your pattern with a highlighter.
This reduces overwhelm and helps keep tension consistent.
What digital tools and calculators are useful for cross stitch?
Use cross-stitch calculators to convert stitches to finished size. Tools like Stitchpoint’s Cross Stitch Writer help plan lettering; Pic2Pat and Photo-stitch convert photos to patterns.
Many stitchers use digital pattern viewers and apps to zoom, toggle colors, and track progress. Sources like DMC, LoveCrafts, and The Spruce Crafts offer patterns and resources.
How do I separate strands without creating tangles?
Separate strands slowly, pulling them out one at a time rather than flaming them apart. Use the “knees trick” (hold unseparated skein between knees) or twist-and-strip gently.
Let the threaded needle hang occasionally to let the thread untwist and reduce kinks.
How can I start and end threads without knots for a clean back?
Use the loop-start method for doubled strands (fold floss, thread through needle, anchor the loop with the first stitch). End by weaving the tail under at least three stitches on the reverse; avoid surface knots.
Alternate anchors include weaving the tail across existing stitches or using a small whip stitch on the backside.
Should all my crosses go in the same direction?
Yes—make the top stitch cross consistently in the same direction across the entire piece. Consistent stitch direction creates a uniform sheen and professional look.
Maintain even tension to avoid puckering; don’t pull stitches too tight.
Where can I find reliable free and paid patterns?
Trusted pattern sources include DMC, LoveCrafts, The Spruce Crafts, Country Living, and Etsy for paid designs. Many designers sell PDFs on Etsy; Craft With Cartwright and Gathered are good blogs for inspiration.
Join cross-stitch communities and forums for pattern swaps and free charts.
Can I change colors to match décor or gifting preferences?
Absolutely. Customize palettes to match a room or recipient by substituting recommended skeins with colors you prefer. Increase strand count or use a darker/background-appropriate thread on dark Aida to preserve contrast.
Test color choices on a small swatch before committing.
How do I design lettering or simple custom motifs?
Use Stitchpoint’s Cross Stitch Writer or alphabet samplers to preview fonts and spacing. For custom motifs, plan in Excel by resizing cells to squares, or use Pic2Pat to convert simple images.
Test lettering at full scale on a swatch and allow adequate spacing for stacked words.
What lighting and posture tips help reduce eye strain and fatigue?
Stitch in natural daylight when possible or use a daylight lamp with adjustable brightness. Keep your project at eye level or use a table stand to avoid hunching.
Use magnifiers with built-in lights on fine counts and take regular breaks to stretch and rest eyes and hands.
When should I use hoops vs. frames vs. scroll frames?
Use hoops for small sections and quick projects; they’re inexpensive and portable. Larger frames, scroll frames, or lap frames are better for big projects and long sessions to reduce arm fatigue.
Only hoop the area you’re actively stitching to protect fabric tension and avoid distortion.
What organization tools help speed up stitching?
Use bobbins, labeled floss cards, acrylic organizers, and pre-cut thread packs. Keep a small pair of sharp scissors, needle case, and a stitching checklist nearby.
Spreadsheets and Excel grids can double as design planners. Portable pouches make on-the-go stitching easy.
How should I wash, block, and iron my finished piece before framing?
Handwash finished pieces gently in cold water with mild detergent to remove oils and soluble markings. Rinse thoroughly and air dry flat.
For ironing, press from the reverse using a protective cloth between iron and stitching. For best display, block the piece onto foam or mounting board to get even shape before framing.
What creative display options work well for finished cross stitch?
Classic framing (with or without glass), hoop displays, cushions, ornaments, mounted panels on foam board, and wearable items stitched with dissolvable Aida are popular. Paint or decorate hoops for casual looks; choose UV-resistant glass and archival mounting for long-term preservation.
Are cross stitch kits affordable for beginners and what can I expect to pay?
Yes—cross stitch is accessible and affordable. Beginner kits often cost $5–$10. Aida fabric (example: 15”x18”) can cost around $3.99 and an individual DMC skein about $0.62.
Investing in a few quality tools—DMC skeins, a Bohin needle, and a small hoop—goes a long way.
What quick habits will most improve my stitch quality immediately?
Grid your fabric before you start, use two strands on 14–16 count, practice loop starts and knotless ends, keep stitch direction consistent, maintain even tension, invest in quality DMC or Anchor floss, and use a proper-sized Bohin or John James tapestry needle.
These changes reduce mistakes and elevate the finished look.
How can I keep learning and improving beyond beginner projects?
Join online communities, follow blogs and pattern designers, experiment with specialty threads like Kreinik metallics or silk, try pattern-making tools like Stitchpoint or Pic2Pat, and practice higher-count evenweaves.
Take on lettering or small custom motifs in Excel to build design skills and confidence.
.62.
Investing in a few quality tools—DMC skeins, a Bohin needle, and a small hoop—goes a long way.
What quick habits will most improve my stitch quality immediately?
Grid your fabric before you start, use two strands on 14–16 count, practice loop starts and knotless ends, keep stitch direction consistent, maintain even tension, invest in quality DMC or Anchor floss, and use a proper-sized Bohin or John James tapestry needle.
These changes reduce mistakes and elevate the finished look.
How can I keep learning and improving beyond beginner projects?
Join online communities, follow blogs and pattern designers, experiment with specialty threads like Kreinik metallics or silk, try pattern-making tools like Stitchpoint or Pic2Pat, and practice higher-count evenweaves.
Take on lettering or small custom motifs in Excel to build design skills and confidence.