Cross stitch is more than just a hobby. It’s a journey into fine needlework, filled with techniques and materials to explore. You don’t have to follow kits or simple patterns. Stitchers use mixed media, specialty threads, and photo conversions to bring their vision to life.
For beginners, start with small goals and simple stitches. Use your early success to learn counting, tension, and basic finishes. Then, try beads, metallics, or silk threads to add texture and interest. These small steps can lead to bigger projects and lasting inspiration.
Here are some practical tips: organize your patterns and works-in-progress in project bags. Protect your fabrics from sunlight and pests. Also, test framing options early. Proper mounting and acid-free materials ensure your work lasts and increases in value.
Key Takeaways
- Cross stitch is versatile—mixed media and specialty threads expand creative options.
- Begin with simple projects, then apply cross stitch tips to advance skills.
- Protect and organize supplies to keep patterns and fabric safe.
- Photo conversions and large charts are doable with planning and software.
- Good framing and preservation greatly increase the value of finished pieces.
Myth: Cross stitch is only for beginners and isn’t “real” art
Starting with a cute kit and a small hoop, you might think cross stitch is simple. Many first projects use basic patterns and motifs. But, these quick kits don’t show the true depth of the craft.
Why you might think that
Beginner kits from places like Dimensions and Mill Hill come with clear charts and basic threads. They teach the essential stitches. This might make you think cross stitch is just for beginners.
How counted cross stitch and full-coverage projects prove the craft’s complexity
Counted cross stitch needs careful planning and focus. Big designs require gridding, color mapping, and counting thousands of stitches. Managing floss and charts is crucial to avoid mistakes.
Turning photos into charts with software like PCStitch shows the skill needed. Creating patterns involves choosing colors and shades, much like painting. This shows the complexity of counted cross stitch, beyond what hobby kits show.
Examples of advanced techniques that elevate cross stitch to fine needlework
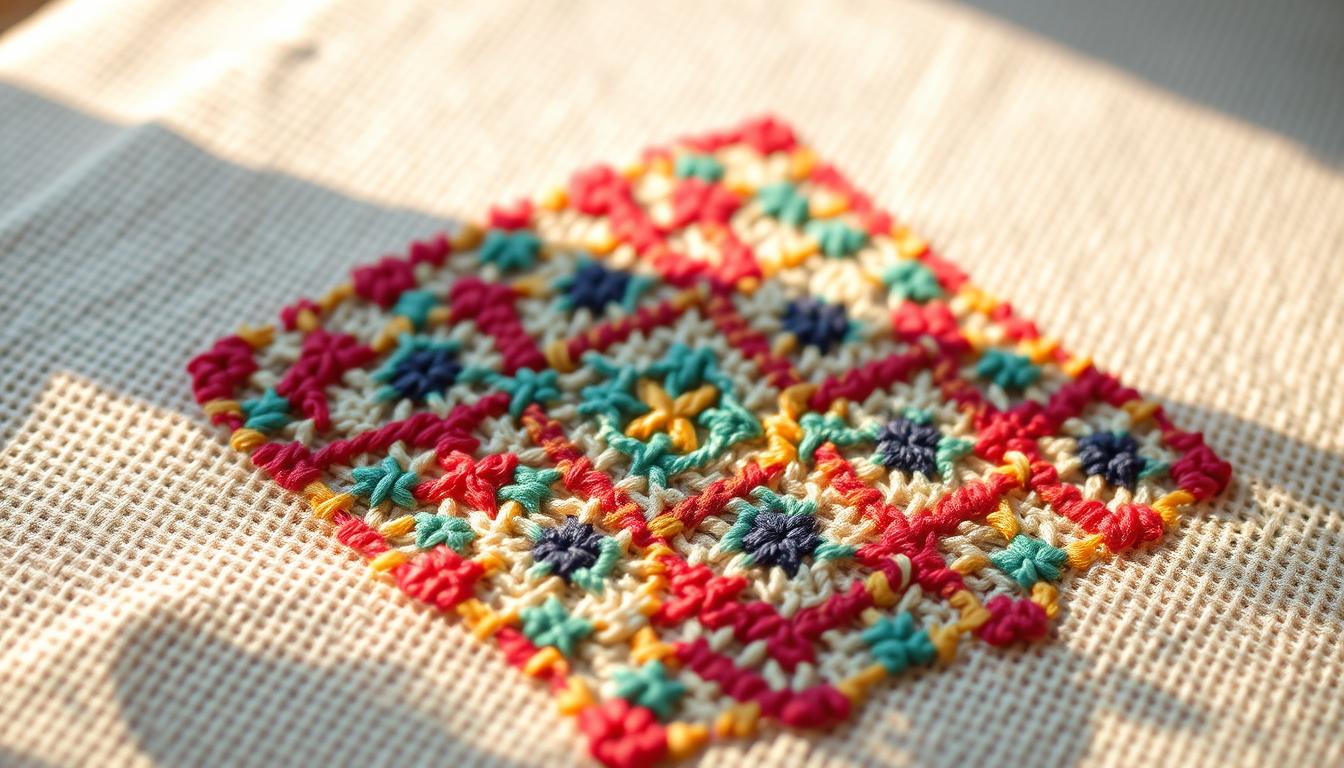
Advanced techniques include one-over-one stitching and using blended threads for shading. Stitchers often mix silk and cotton or add metallics for texture. These techniques add depth to cross stitch.
Backstitching can turn blocks of color into detailed features. Fine line work and layered stitches can make a flat grid into a detailed portrait. Adding beads or charms can make the piece three-dimensional, beyond just “craft.”
| Aspect | Beginner Kits | Advanced Projects |
|---|---|---|
| Design Scope | Small motifs, simple charts | Full-coverage charts, photo conversions |
| Techniques Used | Basic cross stitch, basic backstitch | One-over-one, blended threads, advanced backstitching techniques |
| Materials | Aida, standard cotton floss | High-count linen, silks, metallics, specialty floss brands |
| Tools & Prep | Simple hoop, printed chart | Gridding tools, software for patterns, ball-tip needles |
| Presentation | Small frames, casual display | Contoured mats, raised mounting, gallery framing |
Myth: You must use brand-name supplies like DMC floss to get good results
Many think DMC floss is the only way to get clean results. This is because many patterns suggest using it. It’s easy to find and has a wide range of colors that match many charts.
What DMC offers and why it’s popular
DMC has a huge color palette and consistent thread. Many designers list DMC numbers to help you find the right shade. It also has a reliable structure and sheen that works well with common stitching tools.
Quality vs. brand: alternative cross stitch threads and specialty floss
Quality is more important than the brand name. Brands like Cottage Garden Threads and WonderFil are also favorites among stitchers. Cottage Garden Threads offers hand-dyed colors and soft textures. WonderFil is known for its silky feel and smooth stitching.
How thread choice affects color, texture, and longevity
The thread you choose changes the final look, feel, and durability of your work. High-end silks and specialty floss can add shine and depth but need care. Some threads last longer and resist fading and shredding better. They might require special needles and handling to avoid bulk.
It’s okay to mix brands for the best results. Try combining one strand of silk with one strand of cotton for a subtle shine. Always test blends on a scrap first. This saves time and prevents surprises with color or texture when you finish the full piece.
Myth: You’ll always ruin the fabric if you try mixed media or embellishments
Adding beads, charms, or ribbons might seem scary for your cross stitch fabric. Many worry about Aida fraying, loose threads, or puckering. But, these issues can be avoided with simple steps.

Common concerns and why they happen
Not finishing cut edges of Aida can lead to fraying. Evenweave and linen may wear out at spots where embellishments rub. Heavy beads or metallic threads without support can also cause fibers to loosen.
Practical embroidery hacks to protect fabric
Seal cut edges with Mod Podge or textile glue to prevent fraying. Use a zigzag stitch or whipstitch to reinforce edges on small panels.
Secure embellishments with anchor stitches or a backing patch. Mounting on acid-free board and spacing beads away from glass in frames adds extra protection.
Finishing methods that work
Clear vinyl pockets protect and display works-in-progress. Store embroidered pieces in a vinyl sleeve to prevent beads from snagging and show progress without touching the fabric.
For heirloom pieces, use archival mounting and spacing. Apply fabric glue or Mod Podge near cut edges, then stitch over them once dry. Stamping guides on Aida with archival ink helps place designs safely without weakening the fabric.
Creative mixed media examples you can try
- Mix metallic threads and silk floss for subtle highlights around beads.
- Add small charms and buttons as focal points, anchoring each with doubled thread and a catch stitch beneath the charm.
- Stamp grid lines or motif outlines on Aida with an acrylic stamp and archival ink to follow a freeform layout safely.
- Use clear vinyl on project bags to sort and protect cross stitch embellishments while you travel or stitch on the go.
By using these embroidery hacks, proper edge finishes, and careful mounting, you can explore mixed media cross stitch safely. Testing on scrap Aida prevents surprises and keeps your finished pieces durable and beautiful.
Myth: You can’t personalize cross stitch patterns or convert photos successfully
You can make a favorite photo into a cross stitch design. This doesn’t mean losing the photo’s essence. With today’s software and planning, you can create stunning cross stitch projects, big or small.
First, use the right tools. Programs like PCStitch help with pattern conversion. They let you choose fabric, colors, and stitch styles. You can even see how stitches will look before you start.
Pick the focus. Cut out the background to focus on the main subject. This makes the design smaller and easier to stitch. A big design can be reduced to fit on fewer pages.
Keep your colors simple. Use fewer colors to make the design easier to stitch. Mix threads to create gradients without many colors. Test these blends on small swatches to check how they look.
Think about the fabric and size you need. Use finer fabrics for detailed designs. For big projects, plan for more floss and a bigger frame.
Gridding helps with big designs. Use printed grids or mark fabric with cross stitch gridding. This makes it easier to stitch without mistakes. Keep your floss organized and track your progress.
Be ready to make changes. The first version of your design might not be perfect. Refine it by adjusting colors, testing areas, and tweaking symbols. This keeps your design looking great while making it easier to stitch.
CROSS STITCH is all about perfect backs and you must obsess over the reverse
Shows often show off perfect reverse work, making you want to match it. Tidy backs look great and prevent snags. But, not every piece needs to be museum-quality.
Casual samplers, gift ornaments, and practice pieces can still look good despite mistakes on the reverse.
Why tidy workmanship is a bonus, not a rule
For most hobby pieces, the front is what matters. If you’re looking for speed or ease, a functional back is okay. Counted cross stitch focuses on accurate crosses and color placement.
You can still keep things neat by using consistent starting and ending methods.
When the reverse truly matters
For competition entries, commissioned work, or heirloom pieces, the reverse is crucial. Poor tension, long floats, or loose ends can damage the piece over time. Professional presentation is key for pieces meant to last.
Practical tips to tidy the back without slowing down
Use loop starts for even thread lengths and secure ends with small catch stitches. Run short thread tails behind nearby stitches when safe. Avoid long floats that can snag or shift over time.
Trim stray fibres and grid well to minimize frogging that ruins tidy backs.
Simple habits that prevent common errors
Adopt a few repeatable techniques. Start threads away from the viewable front. End with tiny locking stitches instead of bulky knots. Keep floats under four squares when possible.
These steps reduce mistakes and keep your work ready for good finishing later.
| Situation | When to prioritize tidy backs | Quick method to use |
|---|---|---|
| Everyday practice | Low priority — focus on speed and learning | Loop start, loose tail tucked behind nearby stitches |
| Gift or sale item | Medium priority — presentable reverse helps durability | Secure ends with small catch stitches and trim tails |
| Commissioned or judged piece | High priority — framers and judges inspect backs | Consistent starts/ends, minimal long floats, even tension |
| Heirloom preservation | Highest priority — longevity is essential | Use conservation techniques in cross stitch finishing and choose archival materials |
Myth: Framing cross stitch is simple — any framer will do it right
Many stitchers think framing cross stitch is easy. They believe a quick visit to a local shop will do. But, framing needlework is more than just a frame and glass. It’s about preserving color, fabric, and stitch tension for years to come.
What proper preservation framing requires
Begin with acid-free materials to prevent yellowing and slow down fabric decay. Use acid-free mats and backing, and add interleaving when necessary. Make sure there’s a gap between the glass and embroidery to avoid flattened stitches and trapped moisture.
Mount the piece with lacing or stitching to a fabric board. This keeps the work taut without using glue or tape. Contoured or carved mats add depth and highlight design features without stressing the cloth.
Why many stitchers prefer specialized framers and what to expect in cost vs. value
Specialized framers know how to stretch and mount needlework without distortion. They use archival supplies and can create custom mounts for sculpted pieces. Expect to pay more for framing, but your piece will be protected and presented beautifully.
Ways you can prepare your piece for framing to reduce framing time and expense
Press and gently clean your finished work before sending it out. Trim fabric but leave a generous margin for stretching; many framers ask for at least two inches. Include acid-free backing and a note with your desired spacing and focal alignment.
Photograph the front and back and keep a scanned copy of your pattern for records. These steps help the framer work faster and can lower your final bill.
When choosing cross stitch frames, remember the frame is part of the artwork. Good framing practices and careful prep preserve your effort. Preservation framing ensures your work’s color, texture, and stitch integrity last for generations.
Myth: You need perfect organization and a giant stash to start projects
You don’t need a huge stash to enjoy counted cross stitch. A few smart habits and the right tools will help. Start by doing a simple stash appraisal to see what you have and what you need.
First, group your patterns, threads, fabric, and tools. Check for damage or broken items and set them aside. Scan or photograph paper patterns so you have a copy while keeping the original safe.
Use project bags for each work in progress. Choose clear vinyl pockets for easy progress tracking. For big projects, store skeins in a tackle box to keep everything tidy.
Label threads with DMC numbers and sort fabrics by count and color. Note how many skeins you need for each project. Keep one working chart and store originals to avoid spills.
Do a stash appraisal every few months. Donate duplicates or unfinished kits to schools or community groups. This helps free up space and focus on projects you love.
Track your progress with simple systems or apps. Use a spreadsheet for floss usage and fabric counts. Apps like Evernote can hold photos and stitch logs. WIP tracking boards help set monthly goals and keep you moving.
Choose tools that are portable and project-specific. Carry a small kit of essentials like needles, scissors, and a highlighter. Save larger items for dedicated work sessions. This approach lets you start quickly without buying too much.
| Task | Recommended Item | Why it helps |
|---|---|---|
| Short-term WIP storage | Project bags with clear pocket | Keeps pattern, fabric, and current floss together and visible |
| Floss organization | Tackle box + labels with DMC numbers | Prevents duplicate purchases and speeds color matching |
| Stash appraisal | Scan app or camera | Creates a digital archive and working copy to protect originals |
| Progress tracking | Spreadsheet / Evernote / WIPGO-style board | Records floss usage, fabric counts, and sets monthly goals |
| Portable toolkit | Needles, snips, needle minder, small hoop | Makes short sessions productive without moving large supplies |
Myth: Cross stitch is bad for your health — you’ll get repetitive strain and must stop
Many stitchers worry about pain from long sessions. But, research and community stories tell a different tale. Stitching can calm your mind and keep you focused.
Online groups like Flosstube and WIPGO offer support. They help boost your mood. This therapy can reduce stress and improve sleep if done with balance.
Cross stitch health is about how you stitch, not giving up. Use tools that fit your body and project. A good task light reduces eye strain.
Comfortable frames and hoops cut awkward wrist angles. Ball-tip needles ease work on high-count fabric and lower poke-related fatigue.
Ergonomic cross stitch means choosing the right equipment and refining your movements. Pick needle sizes that match fabric and thread. Try ergonomic needle grips or thimbles if your hands tire quickly.
Keep supplies within easy reach to avoid stretching and repeated twisting. Small habits deliver big gains for long projects. Take short breaks every 20–30 minutes to stand and stretch.
Alternate hands or stitch styles to shift muscle use. Adjust thread tension so your fingers do less work. These habits help you avoid RSI and extend your stitching time without pain.
Simple routines save you from chronic issues. Add wrist and finger mobility exercises before and after sessions. Use a needle minder and thread cutter to limit awkward moves.
If discomfort persists, seek advice from a physical therapist who understands repetitive tasks.
Myth: You must always follow the pattern exactly — improvisation isn’t allowed
You don’t have to stick to a pattern 100%. Many stitchers change colors, fabrics, or add beads to make it their own. These small changes can make your work unique and show off your style.

When it’s safe and creative to modify
Swapping colors can match your room or mood. Changing the fabric can change the look and feel. Adding beads or metallic threads is fun for personal projects. But, check with clients first for commissioned work.
How to plan and test changes
Try out changes on a small swatch first. Use special fabric or mark it up to see how changes look. This way, you can avoid surprises and make sure your design works.
Examples of successful personalization
Biscornus are great for showing off your creativity. You can change the edges, colors, and add special touches to the center. Adding your own borders to old patterns can also make them new again. Your finishing touches, like fringe or custom bags, can make your work look professional or personal.
Practical tips and risk management
Test color combinations with thread samples. Keep a record of your changes so you can do them again. For items you sell or show, document your changes and price them based on your time and materials.
Myth: Specialty fabrics and counts are only for experts
Choosing the right cross stitch fabric can seem daunting, but it’s not just for experts. You can pick from various fabrics like Aida, evenweave, Lugana, and linen. Each has its own unique feel and stitch quality.
Start with a small swatch to test the fabric. A 14-count Aida is great for beginners. It’s forgiving and works well for two over two stitching. For sharper details, try evenweave or Lugana in higher counts.
Understanding fabric choices: Aida, evenweave, Lugana, linen and their counts
Aida has clear holes, making counting easier and reducing mistakes. Evenweave and Lugana offer uniform threads for even stitches. Linen adds texture but can be tricky for beginners.
Counts affect the size of your stitches. Lower counts mean larger stitches and faster work. Higher counts are for finer details but require better eyesight or magnification.
How to choose the right fabric for beginner cross stitch vs. advanced techniques
Beginners should start with 14-count Aida and two over two stitching. For finer details, try 28-count Lugana or 25–28 count linen. Always plan for framing and consider the cost of your fabric.
Test your fabric with a swatch before buying. This helps you see how threads work together and if the design looks good at the chosen count.
Tips for stitching on fine fabrics
Working with fine fabrics requires care. Use size 26–28 ball-tip needles to avoid splitting threads. Good lighting and a magnifier help keep your stitches accurate.
Start with small projects. Practice one over one on modest charts. This will help you build technique and confidence while learning about fabric textures and colors.
Conclusion
Cross stitch is more than just beginner kits. It’s a flexible art form that includes counted work, photo conversions, mixed media, and specialty threads. By using practical techniques and embroidery hacks, you can grow your skills. This includes working with blended threads and securing edges.
These steps help turn simple patterns into beautiful pieces worth framing. They show how depth and creativity can transform a simple design into something special.
You don’t need only brand-name supplies to achieve great results. Try using silks, metallics, and other alternatives alongside DMC floss. Test different colors on a small swatch before starting.
Use cross stitch tips like gridding, proper lighting, and ball-tip needles. These make your stitches cleaner and faster, without losing quality.
Organization and presentation are key. Use project bags or a tackle box to keep things organized. Label threads by DMC number and join communities like Flosstube or WIPGO for support.
When displaying your work, choose acid-free materials and professional matting. This helps preserve the color and value of your cross stitch frames.
Start small with a mixed-media accent or a photo conversion. Take ergonomic breaks to stitch sustainably. With the right tools, planning, and tips, you can overcome common myths and enjoy more creative projects.