If you stitch often, you’ve seen how quickly floss can get tangled. In CROSS STITCH and embroidery, messy thread storage wastes time and causes errors. Good organization is key to avoiding these problems.
This guide will help you manage a large floss collection. You’ll learn useful tips and hacks, from traditional methods to digital solutions. The aim is to save time, extend thread life, and keep your creativity flowing.
Key Takeaways
- Proper storage reduces rework and keeps DMC floss color accurate for counted cross stitch.
- Organizing by number, color family, or a hybrid system each has practical benefits.
- Simple tools—bobbins, photo boxes, and binder rings—scale well for 500+ skeins.
- Digital inventories and photo catalogs speed locating colors and prevent duplicate purchases.
- Budget-friendly hacks and specialty thread care help you protect and use your entire stash.
Why Proper Floss Organization Matters for Cross Stitch and Embroidery
Keeping your floss stash organized saves time and keeps your creative flow. When threads are untangled and easy to see, you spend less time searching for colors. This lets you focus more on stitching.
Clear organization also makes setting up project kits easier. This way, you can start working on your projects even when you’re busy.
Good storage helps keep threads from fading or getting damaged. Using top brands like DMC or Anchor and storing them in a cool, dark place helps. This way, your colors stay true and you won’t have to redo your work.
Being able to see all your threads helps avoid mistakes. If you can see every color, you won’t mix them up by mistake. This is especially important for beginners who are still learning.
Organizing your supplies in a way that works for you saves time and money. Whether you organize by project or keep everything out, a consistent method helps. This means fewer interruptions and more steady progress.
Having your supplies organized also sparks creativity. A neat and inspiring setup encourages you to try new things. You’ll stitch more, learn faster, and feel less frustrated.
Essential Storage Methods for Large Collections
When your stash grows, you need better storage. Look for systems that protect your fiber, keep colors visible, and make kitting easy. Here are three methods for hobbyists and prolific stitchers.
Bobbin systems: pros, cons, and maintenance tips
Winding DMC floss onto bobbins keeps your stash tidy. You can label each bobbin for quick reference.
Bobbin systems are great for visibility and sorting. But, winding takes time, and tightly wrapped floss can kink. Securing leftover strands can be tricky.
To avoid issues, label before winding and use permanent markers. A bobbin winder is worth it for large collections. Check bobbins for wear and replace sharp ones.
Photo box solutions for fast, space-efficient storage
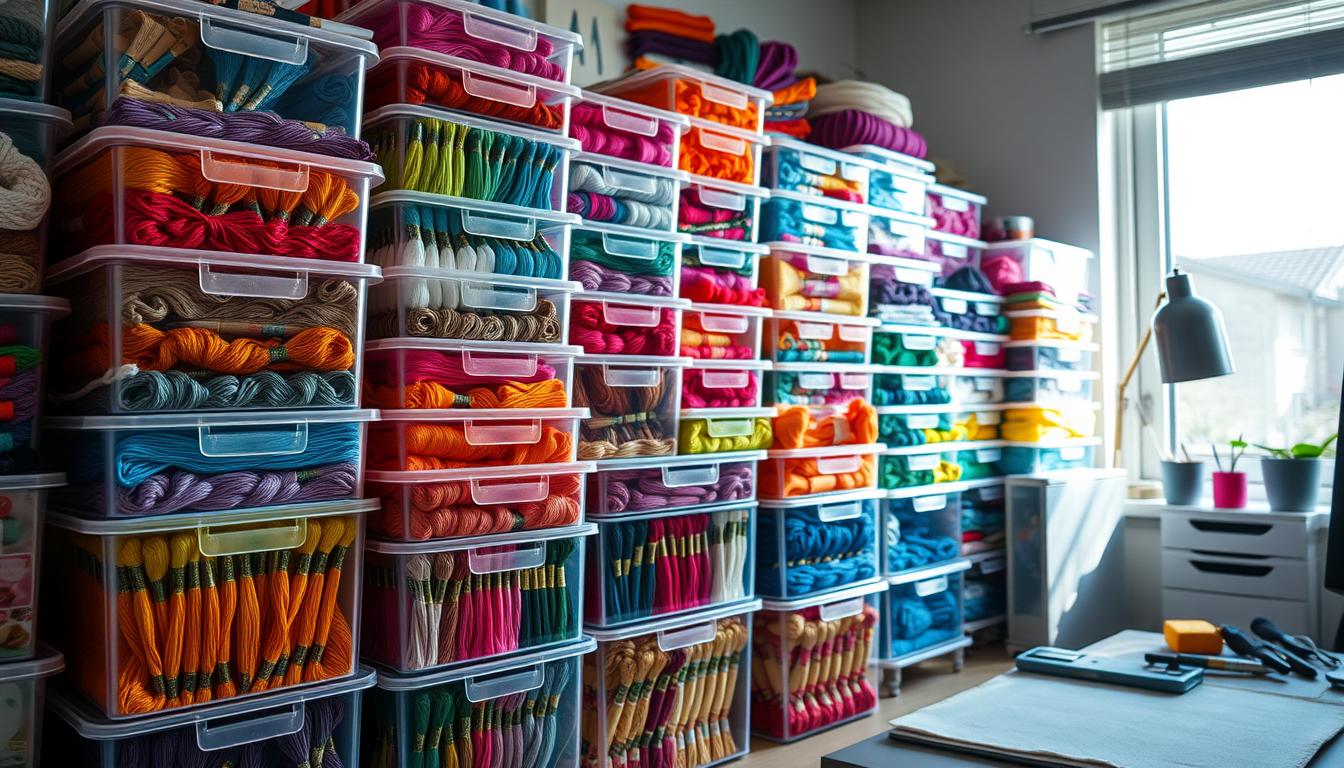
Photo box storage keeps skeins flat, saving time. A 4×6 case holds many skeins, and two 12×12 cases can store a whole DMC collection.
This method is stackable, dust-protective, and space-saving. Use labels or color cards to organize. It’s perfect for quick browsing without rewinding skeins.
Floss-Away bags and binder rings for portability
Floss-Away bags protect single skeins or leftovers for classes or retreats. Label each bag and clip them to binder rings for organized sets.
They’re great for portability and keeping skeins in shape. But, they can lead to plastic waste and wear. Consider mesh or fabric pouches for a greener option.
Choose storage based on your work style. For many kits, durable cabinets or a mix of systems will help organize your DMC floss.
Sorting Strategies: Color Family vs Numbered Systems
Sorting your floss stash affects your workflow and creativity. You can use numbers for pattern work or colors for freeform projects. Each method supports different techniques, so pick what fits your project.
For counted cross stitch, sorting by DMC number is efficient. It matches pattern symbols to chart numbers, reducing errors. Keep DMC numbers for Anchor conversions to avoid color mix-ups.
Sorting by color family is great for creative projects. It helps see color shifts and plan shading. This method sparks ideas that a numbered system might miss.
Hybrid systems offer both precision and creativity. Many keep a numbered section for patterns and a color-sorted area for design. Labels with both DMC numbers and color names help switch between systems.
Choosing a method depends on your project. For a counted portrait, use a numbered palette. For thread painting, sort by color to compare blends.
Keep your system organized with consistent labels and empty slots for new colors. Add swatches or digital cards for quick reference. This helps avoid mistakes and speeds up switching between tasks.
| Goal | Sorting Method | Benefits | When to Use |
|---|---|---|---|
| Exact pattern matching | Numbered (DMC floss) | Fast chart matching, fewer errors, standard across patterns | Counted cross stitch projects and pattern-driven work |
| Color blending and shading | Color family | Easy visual comparison, better for thread painting and design | Freeform embroidery, experimental cross stitch techniques |
| Mixed workload | Hybrid (dual labels, separate zones) | Flexibility, quick switching between accuracy and creativity | Stitchers who alternate between cross stitch patterns and original designs |
Creating a Workflow: Project Kits, Kits-on-the-Go, and WIP Management
Make a simple routine for your cross stitch projects. Start by gathering the pattern, needles, fabric, and the exact DMC numbers. Keep the process short and repeatable to save time before classes or retreats.

Kit up floss by grouping required skeins into labeled Floss-Away bags or onto binder rings. Use printed labels that list the DMC number and project name. Clip a project ring or place one clear Floss-Away bag in a project bag so you can grab everything at once.
For multiple WIPs, store each kit in a photo box or a compact project bag. Keep a “project ring” with leftover bits attached to the kit. Clear containers let you see which project is inside at a glance. This makes WIP management tidy and motivating.
When you work on production pieces or garments, streamline kits to match machine and color needs. Pre-kitted thread groups cut setup time and pair well with workflow enhancers like MaggieFrame-style systems. That approach speeds hooping and keeps you focused on stitching instead of searching.
Labeling prevents repeat buys and mix-ups. Record every kit in a central inventory: a spreadsheet or app that tracks colors, quantities, and location. Mark quantities used when you pull floss so you know when to restock without buying duplicates.
- Pack for classes: one printed label, one Floss-Away bag, one binder rings set with tags.
- Store multiple WIPs: clear photo boxes or dedicated project bags with visible labels.
- Maintain inventory: update your digital list whenever you kit up or finish a section.
Keep a small in-progress area separate from your main stash. Seeing a tidy, labeled cluster of project kits increases momentum. For cross stitch for beginners, this habit reduces overwhelm and helps you finish more pieces.
Digital Inventory and Cataloging Tools for Your Floss Stash
Keeping a digital inventory makes organizing your cross stitch easy and quick. Start with a basic DMC numbers spreadsheet. It tracks color, quantity, where you store it, and any leftover lengths. This one file stops you from buying the same thing twice and shows what you need before you shop.
You can add columns for brand conversions, thread type, and color family. Use cloud-sync services so your spreadsheet is always up to date on your phone. Update counts after each project to keep your catalog accurate and reduce waste.
Choose embroidery apps that let you attach photos of skeins or bobbins. Visual search helps match shades in natural light and speeds up project prep. Many apps include barcode scanning, notes fields, and quick filters for storage location.
Syncing your digital inventory with your physical systems is key. Label bobbins and photo boxes with the same codes as your spreadsheet. When you use floss for a project, mark the change in the app or sheet to keep counts accurate.
Below is a compact workflow table to help you set up a reliable system. Use it as a checklist when creating your catalog and integrating cross stitch tools into daily practice.
| Step | Tool | Key Fields | Outcome |
|---|---|---|---|
| Initial Census | DMC numbers spreadsheet (Google Sheets) | Brand, DMC/Anchor code, color name, quantity, storage slot | Complete list of stash with searchable codes |
| Visual Catalog | Embroidery apps with photo support | Photo, lighting note, sample bobbin ID, conversion codes | Fast color matching and inspiration for projects |
| Sync & Access | Cloud sync (iCloud, Google Drive) | Version history, mobile access, shared editing | Update inventory from shop or sewing table |
| Purchase Planning | DMC numbers spreadsheet + app | Low-stock flags, preferred vendors, bulk vs single SKU | Smarter buys and fewer duplicates |
| Conversion & Care | Reference table in spreadsheet | Brand conversion codes, thread type, washing notes | Accurate substitutions and preserved thread quality |
Space-Saving Storage Options for Small Studios and Apartments
In a small cross stitch studio, smart storage is key. It keeps your yarn organized and your space clear. Use vertical systems to save floor space and see colors easily. Pair wall mounts with drawer units to protect threads from light and dust.
Wall racks and pegboard setups make colors easy to see. Place them away from sunlight to prevent fading. Use IKEA pegboard accessories or 3D-printed caddies to organize tools and small bins.
Drawer units like IKEA Alex or Bisley stack well in apartments. Photo case organization fits many DMC skeins in a small space. Modular bins nest and stack for easy seasonal rotation or travel.
DIY embroidery storage is budget-friendly without losing function. Use hardware drawers, glass jars, and Ferrero Rocher boxes to separate colors and thread types. Binder systems with coin sleeves become a portable floss rolodex for classes or travel.
Keep everyday threads within arm’s reach on a small wall rack. Store specialty metallics and backups in photo cases or drawer units to preserve colorfastness. Add thread nets on cones and clear labels to speed up pattern prep and reduce duplicate purchases.
Below is a compact comparison to help you choose the right combo for your space and workflow.
| Option | Best For | Space Footprint | Pros | Cons |
|---|---|---|---|---|
| Wall rack / pegboard | Frequent use colors, quick access | Vertical, minimal floor space | Instant visibility, customizable with hooks and caddies | Exposure to light if not placed carefully |
| Photo case organization | Large DMC collections, backups | Slim, stackable | Dust protection, compact, great for numbered systems | Less immediate visibility than wall displays |
| Drawer units (IKEA Alex, Bisley) | Mixed tools and threads, heavy items | Moderate; fits under desks | Durable, lockable, easy to label | Requires floor or desk space |
| DIY / repurposed (jars, hardware drawers, binders) | Budget setups, creative customization | Variable; scalable | Affordable, creative, portable binder ideas | May need extra labeling for fast searching |
| Modular bins | Seasonal rotation, mixed media | Stackable; flexible | Easy to reorganize, good for specialty threads | Can become cluttered without routine |
Sustainable and Budget-Friendly Organization Hacks
Keeping a large floss stash tidy doesn’t have to cost a lot. Look for simple swaps that help with sustainable embroidery and reduce waste. Choose a mix of thrifted items and durable purchases for your most-used threads.
Upcycle craft storage makes your studio unique and useful. Use Ferrero Rocher boxes and spice jars for mini-skeins or bobbins. Vintage card catalogs and thrifted photo boxes offer protection and order while saving money.
Reusing existing gear extends its life and reduces clutter. Keep Floss-Away bags in rotation when they’re still good. Swap old plastic for mesh pouches or cotton drawstrings for better airflow and floss reuse.
Use inexpensive solutions for overflow. Binder rings, zip bags, and clothespin wall displays are cheap and portable. Reserve photo boxes and hardware drawers for often-used shades for easy access.
Track your spending as you build your system. This helps you decide where to invest and where to upcycle. Small savings add up, making budget-friendly floss storage achievable for most stitchers.
Below is a practical cost and performance comparison to help you balance time, money, and protection for your collection.
| Method | Typical Cost (US$) | Protection | Time Investment | Best Use |
|---|---|---|---|---|
| Ziplock / Floss-Away pouches | $0–$10 | Low to Moderate | Low | Short-term kits, travel, trial storage |
| Thrifted photo boxes (upcycled) | $5–$25 | High | Low to Moderate | Bulk storage, seasonal rotation, protective display |
| Hardware drawers / modular bins | $25–$50 | High | Low | Long-term organization, easy access |
| Bobbins (card or plastic) | $10–$40 | Moderate | High | Color sorting, small skeins, precision projects |
| Premium cabinets / specialty units | $75+ | Very High | Low | Large collections, studio focal points |
Try creative embroidery hacks that double as decor. Frame displays, clothespin galleries, and mounted dowel racks keep floss visible and inspire new projects. You save money while creating an attractive workspace.
Make choices that favor floss reuse and longevity. Use breathable containers for delicate fibers and label often. A mix of thrifted containers and targeted purchases will give you flexible, budget-friendly floss storage that suits your workflow.
CROSS STITCH — Optimizing Storage for Pattern-Driven Work
When you work on detailed charts, smart storage is key. Use clear, numbered systems to match colors to patterns easily. Label bobbins, bags, or photo box slots with DMC floss numbers to avoid mistakes and save time.

Why numbered systems help with counted cross stitch and pattern matching
Numbered organization makes counted cross stitch charts easy to follow. You match a DMC code on the pattern with the same code on your shelf. This consistency helps avoid mistakes and keeps your work looking good.
When switching between brands, keep a small conversion sheet handy. Write Anchor or Madeira equivalents next to DMC floss numbers. This ensures accurate replacements.
Preparing thread palettes for complex cross stitch patterns
Before starting, gather all needed colors and organize them together. Use pre-wound bobbins or labeled Floss-Away bags on a binder ring to keep your palette together.
Store the palette in a project box or small photo case with the pattern and needle. This keeps everything you need in one place, so you don’t have to search for it while stitching.
Cross stitch gridding, backstitching techniques, and keeping needed floss handy
Mark fabric grid lines and place your labeled thread palette near your hoop. For cross stitch gridding, keep highlight and outline colors within arm’s reach.
For backstitching techniques, prepare contrasting threads in pre-cut lengths. Keep them in a desk caddy or the top layer of your photo box for quick access.
Use pre-wound bobbins for your most-used shades. This small habit reduces interruptions and helps you focus on stitch quality.
Specialty Threads and Partial Skein Management
Working with specialty fibers requires simple systems to save time and protect value. Keep metallic threads, variegated thread, rayon, and polyester embroidery thread separate by type. Note the needle size and preferred working length in your digital or paper inventory. This small note helps avoid guessing during a project.
Storing metallics needs care to prevent kinks and tarnish. Use hard plastic or UV-protected containers and bobbins with minimal tension. Wind metallics loosely, avoid long working lengths, and switch to larger-eye metallic needles. Shorter strands and gentler tension reduce breakage and improve stitch appearance.
Variegated thread behaves differently. Coil it on bobbins or mini skeins so color shifts remain predictable. Keep variegated thread with similar fibers to avoid uneven wear. Label each bobbin with the brand and color number to match patterns quickly.
Leftovers add up fast. Wind partial skeins onto plastic bobbins or into mini-skein rings. Use Floss-Away bags or small labeled zip pouches to group leftovers by project or color family. Store all partial skeins in a dedicated drawer or photo box to make reuse painless.
Blends and specialty fibers need tailored care. Rayon shows beautiful sheen but wears easier than polyester. For rayon thread care, avoid bleach and rough handling. Trilobal polyester holds up well for wearable items. Note fiber type next to each stored bundle so you pick the right thread for washability and longevity.
Practical embroidery hacks speed setup. Write working length and needle preference on bobbins, use binder rings for mini skeins, and keep a small sachet of silica gel in containers to reduce moisture. Separate metallic threads from other fibers to limit tarnish and abrasion.
| Thread Type | Storage | Working Length | Needle | Care Notes |
|---|---|---|---|---|
| Metallic threads | Hard plastic / UV box, loose bobbins | 12–18 in. | Larger-eye metallic needle | Store separate; gentle tension; use beeswax sparingly |
| Variegated thread | Bobbins or mini skeins on rings | 12–20 in. | Needle matching base fiber | Label color shifts; keep with like fibers |
| Rayon blends | Plastic boxes, padded if possible | 10–16 in. | Sharp embroidery needle | For rayon thread care: avoid bleach and heat; handle gently |
| Polyester embroidery thread | Standard bobbins in dry drawers | 12–18 in. | Universal or sharp needle | Durable, bleach resistant, good for wearables |
| Partial skeins | Mini-skein rings, labeled Floss-Away bags | Varies — label exact length | Match stored info | Keep a dedicated photo box to encourage reuse |
Tool Integration: Needles, Hoops, Frames, and Workflow Enhancers
Using cross stitch tools with floss storage makes stitching faster and less stressful. Keep a desk caddy, pegboard pocket, or shallow top drawer with essentials. This way, you can quickly grab what you need and start stitching.
Storing tools and DMC floss together for seamless use
Put your most-used DMC floss near your tools. Use small labeled containers for needles by size and type. This way, you won’t have to search through mixed boxes.
A magnetic needle holder keeps sharp tools visible and secure. Thread nets should be with cone or spool storage to prevent tangles. Keep spare bobbins and a bobbin winder nearby for quick maintenance.
How hoop systems like MaggieFrame speed wearable embroidery prep
Magnetic frames and similar hoop systems make hooping faster and fabric tension steady. Use them with pre-kitted thread groups for garments and accessories.
Pre-sort threads by project and place fabric in a MaggieFrame. This cuts prep time to minutes. It reduces start-stop friction and improves consistency.
Organizing scissors, needles, and thread nets with your floss collection
Set up scissor racks and small snip holders near your floss boxes. This keeps cutting and trimming tidy. Use labeled zipper pouches for project kits with a basic repair kit.
Needle organization can be improved with magnetic strips or foam inserts labeled by size. Keep thread nets for larger spools near the winding station. This way, you can protect threads and refill bobbins quickly.
By adding these practical touches, you’ll save time, protect materials, and keep creativity flowing during every cross-stitch session.
Maintenance Routines to Keep 500+ Colors Functional and Inspiring
Keeping a large stash of colors ready for use is simple. Just set a routine that works for you. Treat upkeep as part of your cross stitch organization. Small habits can save a lot of time and keep your creativity flowing.
Inventory checks
Do inventory checks after big projects and every few months. Update your spreadsheet or app to match your physical stash. This helps you track dye lots and quantities, so you know when to buy more.
Cleaning and UV protection
Wipe or vacuum storage containers and photo boxes to remove dust. Store threads in UV protection or opaque drawers to prevent fading. Rotate your colors so no single shade gets worn out or lost, keeping your collection fresh for future projects.
Preventing tangles and resolving knots
Secure loose ends on bobbins with notches or use Floss-Away bags to prevent tangles. If a knot forms, gently tease it with tweezers or ease the thread through a needle eye. Label bobbins and bags with permanent markers or printed labels to avoid mix-ups.
Keep a simple log to track usage rates and where each skein is stored. This helps you reconcile inventory checks and avoid buying duplicates. Organized care is like cross stitch therapy: quiet, methodical work that keeps your tools ready and your mind calm.
Conclusion
Choosing a good system for cross stitch organization makes stitching easier and less stressful. You can use bobbins, photo boxes, or Floss-Away bags. This method saves time and keeps your threads safe.
Good storage helps your threads last longer and stay vibrant. It also makes it easy to find the right color for your project.
Investing in quality threads like DMC or Anchor is smart. They work well with the right storage. This combo helps you avoid mistakes and get better results.
Small habits like labeling and using digital logs can help a lot. They reduce errors and save you money by avoiding duplicate purchases.
Keeping your collection organized sparks creativity and inspires new ideas. A mix of physical storage and digital inventory is best. It grows with your collection and fits your work style.
Follow these tips: pick one main storage method, use a simple catalog, prepare project kits, and maintain a routine. This way, your 500+ colors will stay useful and inspiring.