You’re holding a special counted piece and see a stain, loose thread, or dye spread. This guide offers clear steps to act quickly and save your work. Whether you stitch for fun or teach beginners, quick and careful actions can often save what seems lost.
Many cross stitch projects can be saved with careful testing, gentle cleaning, and drying. You’ll learn methods for both heirloom samplers and modern designs. This includes checking DMC floss colorfastness and using rust-proof nails for stretching. But, avoid dry cleaners as their solvents can set stains and cause colors to bleed.
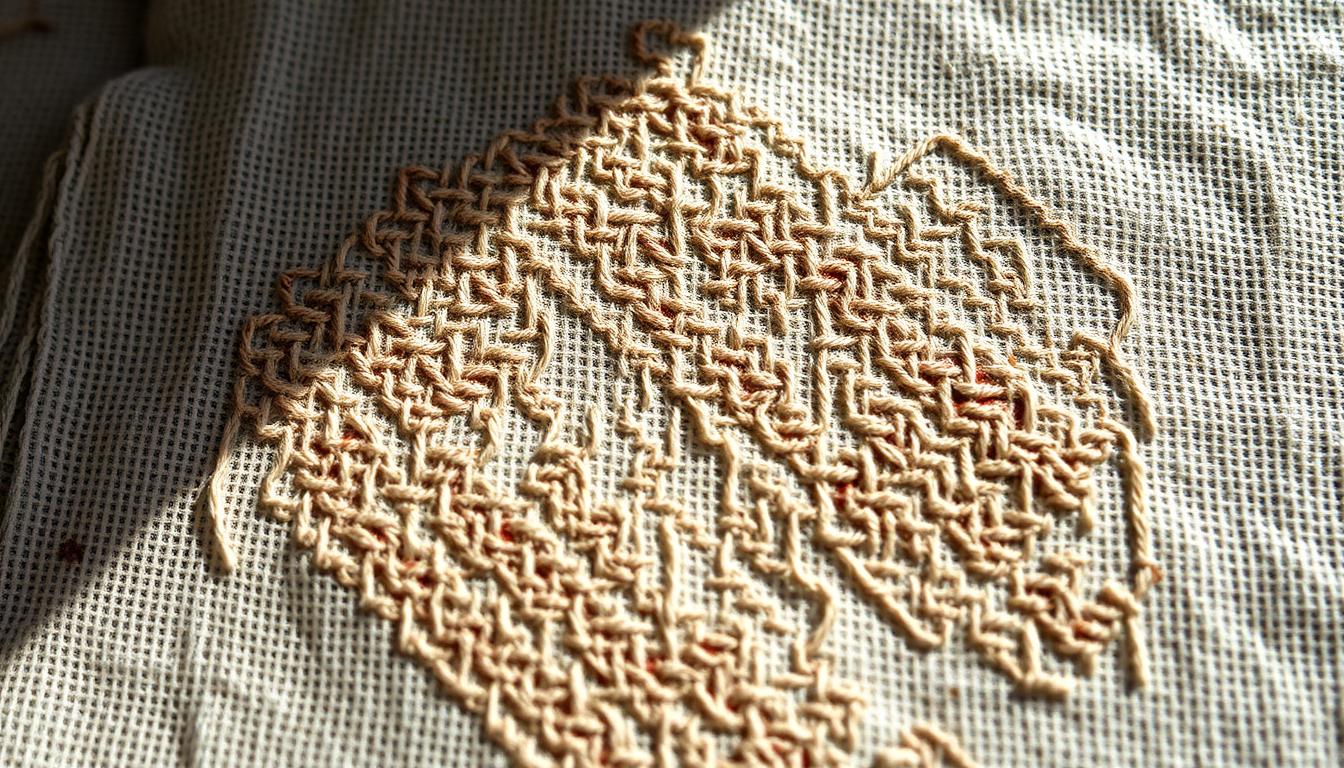
Try to work on your project early in the day. This way, you have time to watch for dye movement. A stretched piece on a clean board shows dye migration better than one folded on a towel. With patience, basic supplies, and some cross stitch tips, you can fix texture, keep backstitching details, and stay true to your original idea.
Key Takeaways
- Act quickly: fresh stains and loose threads are easier to fix.
- Test floss for colorfastness before any wet cleaning.
- Avoid dry-cleaning; use gentle, home-safe methods instead.
- Stretch on a clean board with rust-proof nails rather than ironing.
- Work earlier in the day to monitor dye migration and reactions.
- Techniques here apply to beginner cross stitch and advanced restorations.
Understand the types of damage to cross stitch and why quick action matters
Before you try to fix a treasured piece, you need to know what can go wrong. Stains, dye migration, rust, smoke, and physical wear each need a different fix. Quick action can make the difference between a simple fix and a permanent loss.
Common stains and causes
Coffee and tea spills are common problems in stitching spaces. Food stains and pen marks happen when projects travel or sit on busy tables. Blood from a needle prick can soak in quickly.
Rust appears when metal hoops, pins, or frames touch damp storage. Older samplers often show scorch or smoke discoloration from past homes and heating methods.
Thread bleed occurs when non-colorfast threads wash with hot water or mix with strong cleaners. Even high-quality DMC floss can bleed if you mix dye lots or expose it to heat and harsh chemicals. Knowing the source helps you choose a safe test area and the least risky treatment.
Why immediate response improves salvage chances
Fresh stains are easier to lift because they haven’t bonded to fibers. Cold water and blotting limit spread and lower the chance of setting. Heat from ironing or hot water can fix a stain into the weave, making later chemical treatments less effective.
Delaying action raises the risk of permanent fiber damage and may force you into invasive repairs. Quick steps also reduce the chance of thread bleed and color transfer between DMC floss and cross stitch fabric. When a piece is valuable or emotionally important, treat it like an archival object: test treatments on a hidden edge, avoid aggressive home remedies, and consider controlled cleaning.
| Damage Type | Common Cause | First Response | Risk if Delayed |
|---|---|---|---|
| Fresh liquid stains | Coffee, tea, juice, water-based inks | Blot with cold water; avoid rubbing | Set stains; deeper fiber penetration |
| Protein stains | Blood, sweat | Cold water soak; gentle enzyme cleaner test | Hard-to-remove set marks; discoloration |
| Rust | Metal frames, pins, storage hardware | Keep dry; test oxalic acid on a scrap | Permanent brown spots; weakened fabric |
| Scorch and smoke | Old heating, cigarette smoke | Dry brushing; mild soda or vinegar poultice test | Yellowing that deepens with heat |
| Thread bleed | Non-colorfast floss, hot water, harsh soap | Cold rinse; separate colorfast testing for DMC floss | Color migration across motifs; ruined contrast |
| Physical damage | Tears, holes, worn fabric | Support weak areas; avoid stretching | Irreversible loss of pattern and structure |
Assess your project: fabric, floss, and construction before cleaning
Before you start cleaning, take a close look at your piece. A quick check helps you pick safe cleaning methods and the right tools. Look at the fabric, thread, and how it’s mounted or framed. This way, you avoid making things worse.
Identify counted cross stitch fabric and fiber types
See if your piece is on Aida, evenweave, or linen. Aida’s holes make it strong for washing. But evenweave and linen might stretch or shrink more in warm water.
Natural fibers like cotton and linen react differently to chemicals than synthetic ones. So, know the material before cleaning.
Check floss dye fastness and pattern details
Test a spare thread of DMC floss or a hidden stitch for color bleeding. Bright colors like reds and blues are more likely to run. If you can’t spare thread, press a damp white paper towel against the back of a stitched area to check for dye transfer.
Inspect seams, frames, and mounting that could influence restoration
Look for rusted staples, old stretcher bars, or acidic backing that might stain. Pressing or framing before can set stains, making them harder to remove. Note any weak spots, tears, or loose seams that need fixing before cleaning.
Write down what you find and get the right tools, spare DMC floss, and a small fabric sample. This preparation keeps your work safe and helps you plan a careful restoration based on your cross stitch patterns and materials.
Immediate on-the-spot treatments for fresh stains
When a spill happens, quick action is key. Treat the area gently and avoid heat. These steps work for many fabrics and patterns.

Cold water and blotting remove many stains. Use a cloth or paper towel to blot from the back if you can. Press down, lift, and repeat until no more color transfers. Don’t rub, as it can distort the stitches.
For blood, mix three parts salt with one part water. Make a paste or light solution. Gently work it into the stain, repeating until it no longer discolors. Then, rinse with cold water. For dried blood, soak the area in a saturated salt solution until fibers loosen, then blot carefully.
For tea or coffee, pour cold carbonated water over the spot. Let the bubbles lift the stain. Blot away liquid and repeat. For food stains, use a tiny amount of mild detergent on a damp cloth and blot; strong solvents can damage dyes and fibers.
Ink spots respond to lemon juice applied with a cotton swab, followed by a cold rinse. Test on an inconspicuous area first. Lemon can fade dyes over time, so treat sparingly.
If dye starts to run, fibers feel mushy, or your remedy fails, stop. Switch to controlled cleaning. Overworking a stain causes abrasion and color migration. Moving on to a careful soaking or to specialist treatments preserves the rest of the piece.
These quick responses keep your work safe while you learn more. Treating a fresh spill correctly supports the therapeutic rhythm of cross stitch therapy. It protects the time you’ve spent following detailed patterns, whether you are a beginner or more experienced.
Safe hand-washing methods for delicate or vintage needlework
When you handle a cherished piece, set up a calm, clean workspace and gather gentle supplies. Use cold water and a mild soap such as Woolite or a lingerie wash. Keep an oxyclean product on hand for spot tests only. Have your cross stitch tools ready: soft towels, a shallow basin, and a mesh support if the fabric is fragile.
Fill a basin with cold water. Add a small amount of Woolite and stir to dissolve. Do not use hot water; heat can set stains and cause dye bleed. Test a tiny hidden edge if you are unsure about dye fastness.
Soaking technique and stain treating agents:
Submerge the piece flat and let it rest for short soaks under ten minutes for most items. For stubborn dirt you can try a longer cold soak, but check the fabric often. For targeted stains, make a diluted OxiClean solution in cold water and apply with a cotton swab to a test area before treating visible marks.
Washing method:
Gently swish the project in the water without rubbing or wringing. Keep movements slow to protect counted areas and delicate threads. Use your hands to support the fabric fully when lifting it from the basin to avoid stretching or distorting stitches.
Rinsing and handling to protect stitches and fabric:
Rinse in several changes of cold water until no suds or discoloration remain. Lay the piece flat on clean towels and roll to remove excess water by gentle pressure. Unroll and smooth the fabric, then lay flat to dry away from direct sun or heat. Do not hang; that can warp the work.
These cross stitch tips preserve color and structure while you clean. Keep cross stitch washing tools simple and effective to minimize risk to vintage textiles. When in doubt, test and retreat gently rather than forcing a quick fix.
Special treatments for stubborn stains and damage
You might find rust, scorch marks, or dye migration that can’t be removed by regular washing. Use special methods and safety steps to avoid making things worse. Always test any treatment on a hidden area first. Work in a well-ventilated area, wearing gloves and eye protection.
Oxalic acid for rust marks
Oxalic acid is great for removing rust because it bonds with iron. You can find it at reputable suppliers, like those used by beekeepers or conservation labs. Mix about 10 g of it with a tablespoon of water to create a paste.
Apply the paste to the rust spot, leave it for about 15 minutes, then rinse under running water. Always follow the product label for neutralizing and disposing of residues. Remember, using it too much can weaken fibers. Keep a record of your treatment for future reference.
Bicarbonate of soda and vinegar for scorch and smoke discoloration
Baking soda makes a gentle paste that can remove scorch and smoke marks. Use a soft brush or cotton swab to work on it lightly. Rinse well after to avoid damaging the fabric.
White vinegar can also help with burn marks. Mix it with water, apply in small amounts, and rinse right away. Be careful not to scrub too hard, as it can distort the fabric and stitches.
Cold-then-cold approach for thread bleed control
To stop thread bleed, it’s important to slow down dye movement. Place the piece flat in a shallow pan with ice or chill it in short refrigeration cycles. Watch for condensation and replace ice as needed.
Keep it cold for several days to slow down dye migration. After chilling, wash in cold water only. Avoid heat at all costs. Dry it until just damp before any finishing touches. This method is gentle and effective for controlling thread bleed.
Drying and finishing: preventing distortion and set-in problems
After washing, dry your fabric quickly to keep it stable. Lay it flat on clean towels. Use a towel sandwich to remove excess water gently.
Big or old pieces might take 24–48 hours to dry. Check the edges and folds for damp spots. Good organization helps; have a clean surface and towels ready.
Safe drying methods for flat, even results
Spread the work flat on a smooth surface. Change damp towels until it’s mostly dry. Blot gently to protect stitches and avoid rubbing.
Blocking and stretching alternatives to heat pressing
Mount on a clean board to square it without heat. Use rust-proof nails or archival pins for even tension. This method keeps thread texture better than pressing.
Stretching before framing reduces ironing later. Prepare your frames and backing for a flat piece.
When and how to carefully iron if required
If you must iron, wait until it’s slightly damp. Cover stitches with a muslin or pressing cloth. Use the lowest safe temperature and press briefly.
For sensitive fibers, choose gentle stretching over ironing. Proper finishing techniques will make your needlework last longer and look professional.
Repair techniques for physical damage and missing stitches
When your cross stitch gets damaged, handle it carefully and plan ahead. First, check the damaged spot and figure out what to do. You might need to remove threads, strengthen the fabric, or change the design. Take small steps to avoid messing up other stitches and keep your original design intact.
Removing and replacing individual stitches
Use a thin needle or stiletto to carefully lift damaged threads without pulling on the rest. Try to work from the back and cut threads close to the fabric before pulling them out. Choose a thread that matches the faded one well, like DMC floss, for the right color and shine.
If the new thread is too bright, age it a bit to make it blend better. A short lemon soak or a little sun can help. Make sure to recreate each stitch the same way as the original to keep the texture and feel right.
Repairing tears, holes, and fabric weak spots
Use a backing piece or sew-in stabilizer to support weak spots. For small holes, try to reweave the threads, then secure it with small stitches. For bigger areas, apply a fine patch on the back and stitch around it to spread out the tension.
Test any adhesive stabilizers on a scrap first, especially with old linens or bright colors. Reinforce the fix with subtle invisible mending so the front looks clean and the back does the heavy lifting.
Creative pattern adaptations if original cannot be fully restored
If a part can’t be fixed neatly, think about changing the design to include the damage. Turn the damaged area into a new border, a small design, or an embroidered detail. This way, the damage becomes a part of the piece’s charm.
Use backstitching to draw new shapes or to hide added threads. Tiny ladder or whip stitches behind the work can secure edges and create a hidden fix. This method lets you keep the piece’s essence while adding your own creative touch.
Preservation and display to prevent future damage
After cleaning and repairing your piece, think about long-term care. Keeping colors bright and fibers strong is key. Simple choices in framing, storage, and habits can prevent stains, fading, and pests.
Proper cleaning schedule and storage for cross stitch projects
Clean items before storing them for a long time. Use a light vacuum with a stocking to remove dust without harming stitches. For musty smells, apply baking soda briefly then vacuum it off. Never leave powder on fibers as it can cause discoloration.
Store finished pieces flat or rolled in acid-free tubes in breathable cotton covers. Avoid damp places like basements and attics. Use labeled, breathable boxes for easy checks without exposing to dust and light.
Frame and mat choices to avoid rust, sunlight, and chemical damage
Choose acid-free mats and archival backing to prevent yellowing and chemical breakdown. Opt for rust-proof hardware like stainless steel or plastic hangers to stop rust stains. When glazing, pick UV-protective glass to limit fading from sunlight. Add spacers to keep embroidery ventilated.
Avoid standard foam board or acidic mats that release acids over time. For museum-style display, consider conservation framing techniques and materials recommended by the American Institute for Conservation.
Organization and tools for safer stitching sessions
Keep food and drink away from your stitching area to avoid spills. Use needlework frames to secure fabric and covers to shield work-in-progress from dust and pets. Store floss in labeled boxes and test DMC and other threads for colorfastness before use.
Good cross stitch organization cuts mistakes and saves time. Use bobbins, thread cards, and a small ruler to grid fabric as needed. For long projects, dedicated cross stitch storage such as compartmented boxes helps you find colors quickly and keeps threads clean between sessions.
CROSS STITCH restoration tips tailored for beginners and advanced stitchers

Before you start, take a moment to plan. A quick check can save threads and fabric. Keep notes, photos, and any original DMC codes to track your work.
For beginners, test small areas first. Check if thread colors stay the same by dampening a scrap. Use cold water and mild detergent for cleaning. Keep your needles, threads, and scissors organized to avoid mistakes.
Learn simple cleaning methods. Blot spills right away with a white towel. Use cold water and a bit of gentle soap for stains. Lay the piece flat to dry to avoid distortion.
Beginner cross stitch steps to avoid common mistakes
- Always test colorfastness on a hidden area or spare fabric.
- Work on a clean, well-lit surface to prevent dirt transfer.
- Use a hoop or frame to keep tension even but avoid stretching too tightly.
- Label thread bundles with DMC numbers to match replacements later.
- Handle only with clean, dry hands or cotton gloves for fragile textiles.
For tougher fixes, advanced embroidery hacks can help. Use controlled oxalic acid for rust removal after testing on a sample. Try bicarbonate of soda mixes for smoke or scorch discoloration. For bleeding threads, follow a cold-then-cold approach: cold soak, cold rinse, repeat until stable.
Advanced embroidery hacks and techniques for challenging restorations
- Use rust-proof pins or nails for stretching instead of heat pressing to protect thread texture.
- Re-dye replacement threads to match aged floss when exact colors are unavailable.
- Practice repairs on a spare fabric to refine stitch tension and color blending.
- Document every step with photos so you can undo changes if needed.
- Consider archival materials for backing and mounting to extend lifespan.
Below is a quick reference comparing beginner-friendly steps with advanced methods so you can choose the right path for your project.
| Issue | Beginner Approach | Advanced Method |
|---|---|---|
| Fresh liquid stain | Blot with white cloth, cold water, mild detergent | Spot-test enzyme cleaner, then cold soak; document results |
| Rust marks | Avoid rubbing; consult before strong chemicals | Controlled oxalic acid on sample, timed applications, thorough rinsing |
| Thread bleed | Cold rinse and dry flat | Cold-then-cold technique, colorfast testing, possible re-dyeing |
| Missing stitches | Match DMC codes and replace on an unobtrusive area first | Blend re-dyed threads, use archival backing, practice on scrap |
| Stretching and finishing | Flat dry on towels, avoid heat | Stretch with rust-proof nails, avoid ironing when possible |
Resources, tools, and products to help you restore needlework safely
When you face a stained or damaged cross stitch, a compact kit is key. You’ll need gentle cleaners for everyday dirt, stronger ones for tough stains, and special items for rust or dye loss. Keeping your tools organized helps you work quickly and protect your work.
Cleaning supplies: For everyday cleaning, use a mild detergent like Woolite or a lingerie wash. For cold-water stain treatment, choose an OxiClean type product. For rust, find oxalic acid suppliers for textile conservation or crafts. Always test on a hidden area first.
Where to buy: Find cleaners at reputable craft stores, conservation suppliers, and online. Look for brands that share safety data sheets and usage guides. This helps you know the risks before treating your vintage pieces.
Essential tools: Have quality needles, spare DMC floss, and a small gridding kit. Also, get archival mounting boards, UV-protective glazing, and rust-proof nails for framing.
Organization and kit ideas: Keep a stitching box with labeled floss, a needlecase, and a small vial of vinegar and lemon. Also, have a cold storage for emergency treatments. Use vacuum nozzle stockings to clean without damaging your work.
When to consult a pro: If you’re working on valuable or very delicate textiles, seek a professional conservator. An experienced upholstery cleaner or restorer can use safe solvents and techniques to minimize damage.
Conclusion
You can save most cross stitch projects if you act quickly and follow simple tips. For fresh stains, start with cold water and gentle blotting. Then, test floss and dyes for colorfastness before washing.
Use a mild detergent and spot treatments for stains. Oxalic acid and bicarbonate work well for rust and smoke. But, be careful and follow safety steps.
When drying and finishing, stretch on a clean board with rust-proof nails. This keeps the texture right. Avoid high heat on modern threads.
For small damaged areas, remove and replace stitches with matching DMC floss. Age replacements to match the tone. If it’s valuable or fragile, get a professional conservator.
Needlework secrets for long-term care are simple. Organize your supplies, test dyes, and store pieces away from sunlight and moisture. Treat restoration as a form of cross stitch therapy.
It’s patient and methodical work that often returns a piece to use or display. With the right approach, cross stitch restoration becomes a skill. It keeps your counted cross stitch and embroidery pieces lasting for years.