You grab a tangled mending basket and vow to finish it this summer. This was my start after seeing Leenie Hobbie’s 30 Mends in 30 Days thread from summer 2023. It feels good to move the basket from the sewing table to storage and back again for a clean.
This story is about a personal journey and a guide for you. I joined a 30-day stitching challenge to see how it changes you. You’ll learn about CROSS STITCH, starting out, projects, and how it helps you focus.
At first, I was surprised by my progress: seven easy mends on day one, and small wins followed. Then, there were big projects that took up a whole weekend. I learned to manage my time with 10-minute sessions and routines to protect my stitching time.
But, there were challenges too: fixing big mistakes takes hours, spilled coffee can ruin your work, and long projects can affect your mood. By the end of the month, I had exactly 30 mends done, but there were still things to mend. The real result was better habits, skills, and calm.
Key Takeaways
- Short, consistent sessions build momentum—try 10 minutes a day for steady progress.
- CROSS STITCH and basic mending complement each other; you can learn cross stitch for beginners while repairing items.
- Plan cross stitch projects with realistic time blocks to avoid frustration from de-stitching errors.
- Use accountability—social tags like #30mendsin30days can keep your challenge on track.
- Expect emotional ups and downs; cross stitch therapy often appears as calm focus and satisfaction.
Why I Committed to a 30-Day Stitching Challenge: motivation and goals
Imagine a stash of projects and a mending basket full of clothes. Leenie faced a turning point when she cleaned her studio in late June. She had to decide: let things pile up, donate without fixing, or take action.
Leenie had three goals. She aimed to finish 30 items in 30 days to clear her space. She also wanted to learn a new mending or stitch technique each week. Lastly, she vowed to mend items for everyday use, not to throw them away.
Leenie kept a journal to track her progress. She noted the item, time spent, and difficulty level. This helped her see how long tasks took and which projects were best for short or long sessions.
Leenie made her plan doable with short routines. She set aside 10-minute stitching sessions and simple rituals to start and end. Adding these to her day helped build a habit quickly.
Sharing her progress helped her stay on track. Leenie posted daily updates and used #30mendsin30days to connect with others. She got tips on materials, troubleshooting, and new ideas for cross stitch projects.
Being part of a community offered practical advice and local meetups. Leenie found feedback on beginner techniques and ideas for advanced repairs. The community also inspired her with new ways to upcycle garments.
Leenie planned carefully to avoid mistakes. She backed up charts, labeled floss, and broke down big repairs into smaller steps. Keeping spare needles and a basic toolkit nearby helped her avoid costly mistakes.
In summary, Leenie’s motivation was a mix of practical goals and personal growth. She aimed to reduce waste and restore favorite items while improving her skills. The structure of clear goals, short sessions, and online support helped her succeed.
What You Can Expect from a Month of Stitching: realistic outcomes and timelines
Progress in stitching can feel uneven. Some days, you might fix seven things quickly. Other days, projects can take longer. This is normal and helps set realistic goals for your stitching.
Keeping a stitch journal is helpful. It logs time, materials, and challenges. Leenie used this method to complete 30 mends in 30 days. It helps you see your progress and stay organized.
Short sessions can help you stay on track. Three 10-minute blocks can be as effective as longer sessions. This makes building a stitching habit easier and reduces procrastination.
Be prepared for setbacks. Mistakes or big repairs can take time. Plan extra time for complex projects. This way, you avoid getting frustrated and keep your momentum going.
Choose between a fixed routine or a flexible rhythm. A routine is set at the same time every day. A rhythm fits around your life, like during breaks. Try both to see what works for you.
Adjust your stitching schedule with the seasons. Vacations, holidays, and daylight changes affect your time. Use good lighting or schedule tasks for when it’s brightest. This keeps your stitching schedule flexible all year.
Set small goals for each session. Aim for one seam or a small repair. Small wins add up and show progress over a month without feeling overwhelming.
CROSS STITCH and related techniques I explored during 30 days
During the challenge, you learn to mix counted patterns with simple mends. You move from quick fixes to detailed counted work that looks like small art. This section covers practical cross stitch techniques, backstitching, and why DMC floss choices are key for consistent results.

Counted cross stitch basics and how it differs from mending work
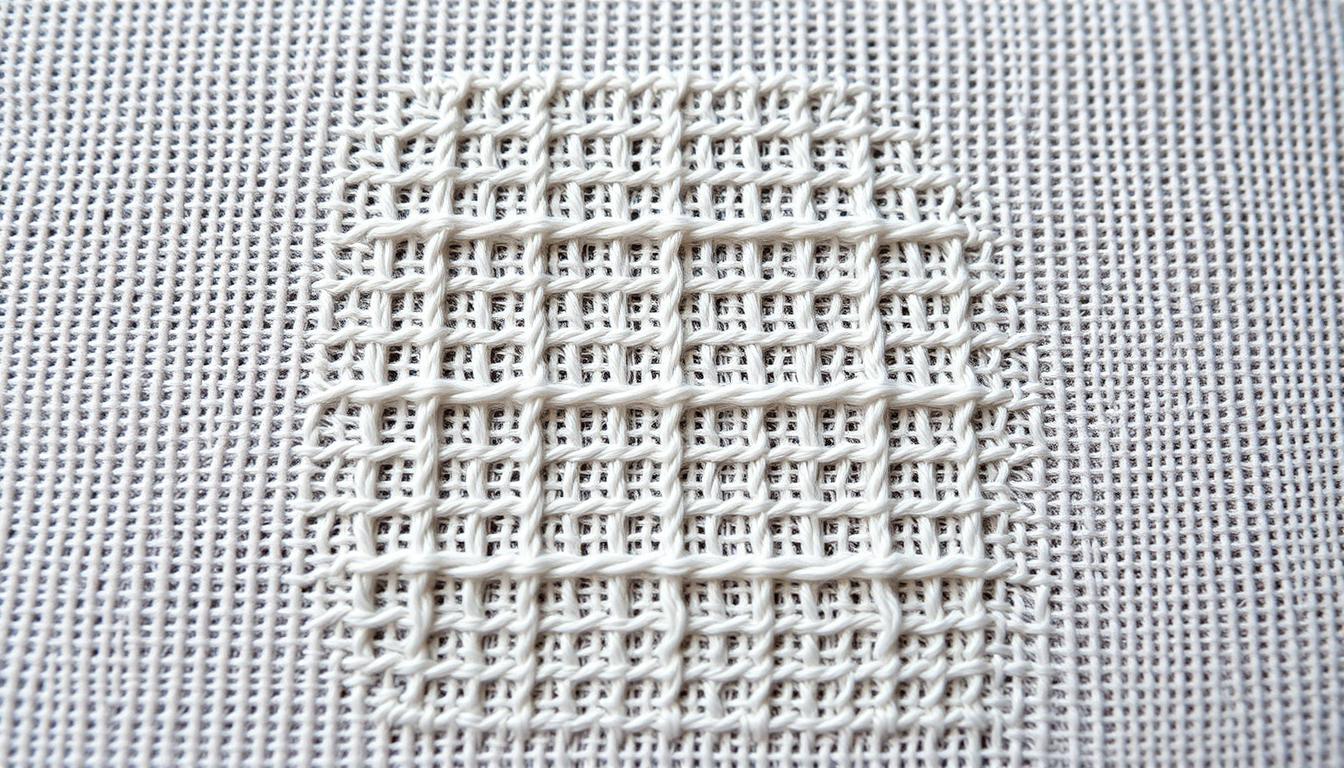
Counted cross stitch uses a grid-count fabric and a chart to follow square by square. You start with a center point, count threads, and stitch X shapes to follow the pattern. This method is different from typical mending, which focuses on rebuilding strength and shape.
Switching from repair to counted work means planning layout first. You trace a chart, back up digital copies, and test placement on scrap fabric before stitching on a garment.
Incorporating backstitching techniques and embroidery hacks for details
Backstitching techniques add outlines and fine details that cross stitch alone can’t achieve. Use a thin backstitch to define faces, leaves, or seam lines. On visible repairs, an outline can either hide a ragged edge or turn it into a finished border.
Try simple embroidery hacks like stitching a neat running stitch behind a seam for extra hold, or using contrasting backstitch to turn a repair into a deliberate design element. Small hacks save time and make a mend feel intentional.
Using cross stitch patterns and DMC floss choices for consistent results
Selecting quality thread matters. DMC floss gives predictable color and sheen, so your visible repairs match other pieces or read well on patterned fabrics. Use stranded cotton and separate the strands to match fabric weight and coverage.
Pick palettes before you start. Limit your palette to a few shades to keep projects cohesive. For multi-day counted patterns, keep printed charts and digital backups so you don’t lose progress if a paper copy is misplaced.
Practice small motifs that combine counted Xs with backstitch outlines. You’ll find cross stitch techniques that work fast for tiny appliqués and slower, deliberate methods for larger decorative mends. These blends let you repair with purpose and style.
Practical tools and organization: cross stitch tools and workspace setup
Make a tidy spot where you can find everything easily. Good lighting and a clean surface help avoid mistakes. Keep a small mending basket out so projects don’t get forgotten.
Begin with a small kit of must-haves. You’ll need sharp scissors, various needles, and strong thread for fixing things. Choose hoops or frames that fit your work size. An Ott light is crucial for late-night or detailed work.
Organize your floss for quick color access. Store DMC floss by number or color family in boxes. Label your project bags and keep each chart and fabric in a folder. Back up your charts online to avoid losing them.
Pre-gridding saves time and reduces errors. You can mark your fabric with a removable marker or use washable grid tape. This method keeps your work even and prevents big mistakes.
Have your WIPs ready for short sessions. Use bags or pouches with needles, scissors, floss, and fabric scraps. Keep a journal to track your progress and prioritize your work.
Good lighting and comfort are key. Position your Ott light right and sit comfortably. This setup reduces eye strain, speeds up your work, and lowers mistakes.
| Item | Why it helps | Tip |
|---|---|---|
| Ott light / task lamp | Improves contrast and reduces eye fatigue | Place slightly behind your dominant hand for even illumination |
| Cross stitch frames and hoops | Maintain tension for even stitches | Match frame size to project to avoid shifting fabric |
| Embroidery needles & scissors | Precise work and clean cuts | Keep a travel pair in each project bag |
| Cross stitch fabric & gridding tools | Accurate counts and fewer frogging sessions | Use removable markers or pre-grid to save time |
| Floss storage & project folders | Faster color selection and organized charts | Label folders with project name and start date |
| Zipped project bags / WIP pouches | Grab-and-go access for 10-minute sessions | Include a sticky note with the next small task |
Step-by-step how I approached common mends and cross stitch projects
Start by checking each item’s structure and wear. Look at seams, fabric weight, and decide if a patch or woven mend is best. Keep track of time in your stitch journal to pick quick fixes or plan longer projects.
Quick repairs are rewarding and fit short sessions. For buttons, remove old thread, pick matching thread, and stitch through fabric and shank. Tighten loose seams with small backstitches and knot inside the seam.
A partially ripped hem can be fixed with quick blind stitches or a short machine tack. This is great if you want to work fast.
Reattaching trims and shortening garments usually takes one sitting. Use small even stitches to reattach lace trim. For a deep neckline, I added a kick pleat with hand stitches that blend into the garment.
For more complex work, use intermediate techniques. On denim work pants, I used sashiko to anchor three large back patches. Cut patch fabric slightly larger than the hole, baste in place, then run evenly spaced sashiko running stitches.
On a rag rug with worn spots, I chose woven darning. Secure a frame around the damaged area, lay warp threads across the hole, then weave weft threads through them. Aim for a dense weave that matches the rug’s texture.
Elastic replacement can be an upgrade. Remove old elastic, measure comfortably, and thread new drawstring elastic through the casing. Finish ends with a secure knot and a tiny bar tack.
Complex restorations need planning and often other stitchers’ input. For two cotton blankets, I documented the holes, chose matching yarn, and mapped each mend in my stitch journal before starting. For a woven cotton blanket, I scheduled multi-day sessions and consulted a local textile group for best weave-matching techniques.
When a repair will take many hours, decide if a visible mending look is better than trying to fully hide the fix. Visible mends let you work faster and celebrate the repair with embroidery accents. Match thread and fabric weight, plan reinforcements, and add decorative stitches.
Use a repeatable process for every job: assess structural needs, pick patch versus woven mend, match thread and fabric, and choose visible or invisible finishes. Record materials, time spent, and technique in your stitch journal. This routine speeds future work and helps when you select beginner cross stitch motifs or dive into cross stitch for beginners patterns as complementary embellishments.
Limit de-stitching large sections unless necessary. If a restoration threatens to become a weeks-long project, break it into stages or opt for partial repair. This keeps momentum and lets you fit mends and beginner cross stitch pieces into daily habit windows.
Cross stitch patterns, project ideas, and inspiration to try during 30 days
Start a 30-day plan with small, easy projects. You can finish them in short sessions. Find cross stitch patterns for 10–30 minute blocks and upcycling ideas for clothes and home items.
Use community posts and local stitchers for support. They help keep you going and offer fresh embroidery ideas.
Beginner-friendly projects for short daily sessions
Choose simple sampler motifs, tiny florals on Aida, or mini hoop art. These projects fit into short breaks. Try a small bookmark, a stitch-on-button replacement, or a 20-stitch motif to build confidence quickly.
Upcycling and creative ideas for clothes and home
Add cross stitch or sashiko-style embroidery to patches for a design twist. Patch armholes with decorative backs or turn salvaged zippers into pouches. Use denim pockets to make hot pads or small organizers.
Leenie’s embroidered sweatshirt sleeve and a denim hot pad from jean pockets show how practical items become cross stitch projects with personality.
Where to find embroidery inspiration and community support
Join online mending and cross stitch groups for tutorials, pattern swaps, and local meetups. You’ll get real-time feedback, new cross stitch ideas, and chances to trade stitches with nearby stitchers.
Keep digital backups and printed copies of charts in waterproof sleeves. This way, you won’t lose a favorite pattern during the month.
| Project Type | Time per Session | Skill Level | Materials |
|---|---|---|---|
| Mini sampler motif | 10–20 minutes | Beginner | Aida 14, DMC floss, needle, small hoop |
| Stitch-on-button replacement | 10–15 minutes | Beginner | Button, thread, small embroidery needle |
| Denim pocket hot pad | 20–40 minutes | Beginner to Intermediate | Salvaged jeans, batting, cross stitch patterns for motifs |
| Sashiko patch on apron | 15–30 minutes | Intermediate | Contrast thread, sashiko needle, scrap fabric |
| Mini hoop art for wall | 20–30 minutes | Beginner | Mini hoop, Aida, tiny floral cross stitch patterns |
Common cross stitch mistakes and how I avoided or fixed them
Small errors can cost hours in counted cross stitch. This guide shows how to prevent and fix mistakes. It helps when a miscount or spill threatens your project.
Make counting a habit, not a one-time task. Use cross stitch gridding on your fabric. Mark the chart center before stitching. A lifeline or temporary thread can save time if you find a miscount later.
Count twice before starting a new block of stitches. When following patterns, work from clear chart reference points. This reduces the chance of big errors that need a lot of de-stitching.
Keep charts safe and backed up. Scan purchased charts and save digital copies. This protects them from spills or website outages. Store printed charts in protective sleeves to avoid moisture and smudges.
If you find a mistake, decide how to fix it based on cost and morale. Small misalignments can be fixed with visible mending or embellishment. For big mistakes, set aside time for de-stitching to avoid it taking over your week.
Use a stitch journal to break projects into smaller goals. Log each mend and its time estimate. Tracking small wins helps you stay motivated and avoid procrastination on tricky repairs.
When de-stitching, remove rows carefully and keep the fabric stable. Use a blunt needle or a seam ripper with patience to avoid snags. If repair time is too long, consider starting over and using the saved threads.
Learn from each mistake without feeling bad. Cross stitch mistakes happen to everyone. With proper gridding, chart care, lifelines, and time-boxed de-stitching, you can protect your work and enjoy the craft.
Mental and practical benefits: cross stitch therapy and habit formation
Stitching can calm your mind and improve focus. Short sessions mimic meditation. This calmness helps reduce stress and brings peace on busy days.
Every small success builds confidence. Keep a stitch journal to see your progress. This helps you form lasting habits and apply them to other areas of life.
Fixing clothes has real benefits. In a month, you can reuse dozens of items instead of throwing them away. This helps reduce the huge amount of textile waste in the U.S.
Being part of the cross stitch community changes everything. Online or in local groups, you find support, tips, and motivation. Shared projects lead to new friendships and help keep your habits going.
Here is a quick comparison to help you choose focus areas for a month of stitching.
| Focus Area | Short-Term Effect (1–4 weeks) | Long-Term Effect (3+ months) |
|---|---|---|
| Meditative stitching | Reduced daily stress; clearer focus after sessions | Improved attention span; reliable self-care routine |
| Recording in a stitch journal | Visible progress; faster skill recall | Stronger confidence; habit automation |
| Community engagement | Fresh ideas; quick troubleshooting | Lasting friendships; collaborative projects |
| Environmental mending | Fewer throws to landfill; extended garment life | Meaningful reduction in waste; ongoing resourcefulness |
| Daily 10-minute sessions | Noticeable cumulative progress | Automatic cross stitch habits and higher output |
Expect emotional, environmental, and practical rewards from a dedicated month of stitching. You’ll see calmer days, clearer goals, and a stronger connection to a global craft tradition.
Tips, hacks, and needlework secrets I learned
Shortcuts can make a long stitching challenge feel quick. You’ll find tips and hacks for busy days. These help keep your projects moving and make the process enjoyable.

Time-saving routines
Set aside 10-minute stitching slots in your day. This could be during your commute or while dinner cools. These short sessions add up and keep your projects from getting dusty.
Make a routine to start stitching quickly. Keep a project and needle minder near your chair. This way, you can start stitching without delay.
Material hacks
Use old denim pockets for hot pad backs. Save zippers for future pouches. Replace old elastic with drawstrings from old clothes for a clean fix.
Stick to quality DMC floss for your stranded cotton. Label and organize your floss by color. This makes choosing colors easier during stitching sessions.
Practical organization
Keep a journal for your stitching. Record the date, technique, materials, and time spent on each project. This helps plan future work and track progress.
Back up your charts and patterns. Store them in protective sleeves. Avoid drinking near your patterns to prevent accidents.
Fast habit tips
- Claim stitching time openly so family members respect it.
- Use project pouches to keep WIPs grab-ready for brief windows.
- Create a nightly five-minute tidy-up to maintain cross stitch organization and avoid tangled floss.
Small tools, big impact
Carry a mini kit with scissors, needles, floss, and fabric. This kit saves time by having everything you need in one place. Use color-coded bobbins and a needle book to keep supplies organized.
Journal and plan
Organize your mends by urgency and technique in your journal. Tag entries for easy reference. This helps you work on similar projects together, saving time and keeping you focused.
Why these work
These tips focus on small, repeatable actions. They save time, reuse materials, and keep projects ready for short work sessions. This leads to steady progress and more finished pieces by the end of the month.
How to plan your own 30-day stitching challenge: tools, schedule, and accountability
Begin by checking your mending basket and making a list of 30 items to mend. Mix quick fixes with longer projects to keep your momentum. Leenie kept a log of each mend, balancing fast fixes with longer work.
Choose projects that match your skill level. Start with beginner cross stitch samplers for short sessions. Set aside time for woven blanket repairs or complex restorations. Add visible mending or creative embroidery items to make repairs fun.
Gather your basic cross stitch tools before starting. You’ll need sharp scissors, needles, hoops or frames, good lighting, and labeled DMC floss. Keep backups of patterns and protective sleeves to avoid losing charts.
Establish a cross stitch routine you can stick to. Use the 10-minute method for busy days and longer blocks for tricky mends. Create a transition ritual, like brewing tea, to signal stitching time and reduce friction.
Keep track of your progress in a stitch journal. Log materials, floss numbers, techniques, and time spent on each piece. Mark every completed mend and small milestone. This record helps with future project choices and reinforces your habit.
Use accountability to stay motivated. Share your progress with hashtags like #30mendsin30days, join online mending groups, or start a local stitching meet-up. Feedback from other stitchers helps troubleshoot and keeps you engaged.
Plan for unexpected issues. Back up charts digitally, store paper patterns in sleeves, and keep a spare set of tools in a travel pouch. Protect your work from spills and sun damage so projects are ready for quick sessions.
Below is a simple checklist and schedule for your challenge. It pairs tasks with time blocks and needed tools, making it easy to adapt to your life and skill level.
| Task | Time Block | Recommended Tools | Skill Level |
|---|---|---|---|
| Inventory and 30-item list | 30–60 minutes | Notebook, phone camera, stitch journal | Beginner |
| Quick fixes (buttons, hems) | 10–20 minutes | Sharp scissors, sewing needles, thread | Beginner |
| Beginner cross stitch sampler | 10–30 minutes daily | Embroidery hoop, Aida cloth, DMC floss | Beginner cross stitch |
| Visible mending/embroidery | 20–60 minutes | Embroidery needles, colorful floss, hoop | Intermediate |
| Woven darning and sashiko patches | 1–3 hours | Sharp needles, sturdy thread, thimble | Advanced |
| Complex restoration (blanket repair) | Multiple sessions | Frames, large needles, matching yarn | Advanced |
| Weekly review and update | 15–30 minutes | Stitch journal, camera, online group post | All levels |
| Cross stitch organization refresh | 30–60 minutes | Project bags, floss boxes, labels | All levels |
Conclusion
Your 30-day stitching experiment proves that CROSS STITCH and mending can be both useful and creative. Over the month, you can fix dozens of items and learn new techniques. You can also turn small repairs into new cross stitch projects.
Keep your stitching sessions short and regular. Try ten-minute blocks with a tidy kit and an Ott light. This approach helps you stay consistent and avoid mistakes.
Don’t see mistakes as failures. Instead, view them as learning opportunities. Always back up your patterns and protect your materials from spills. This way, you can enjoy cross stitch therapy and create meaningful projects that fit your life.