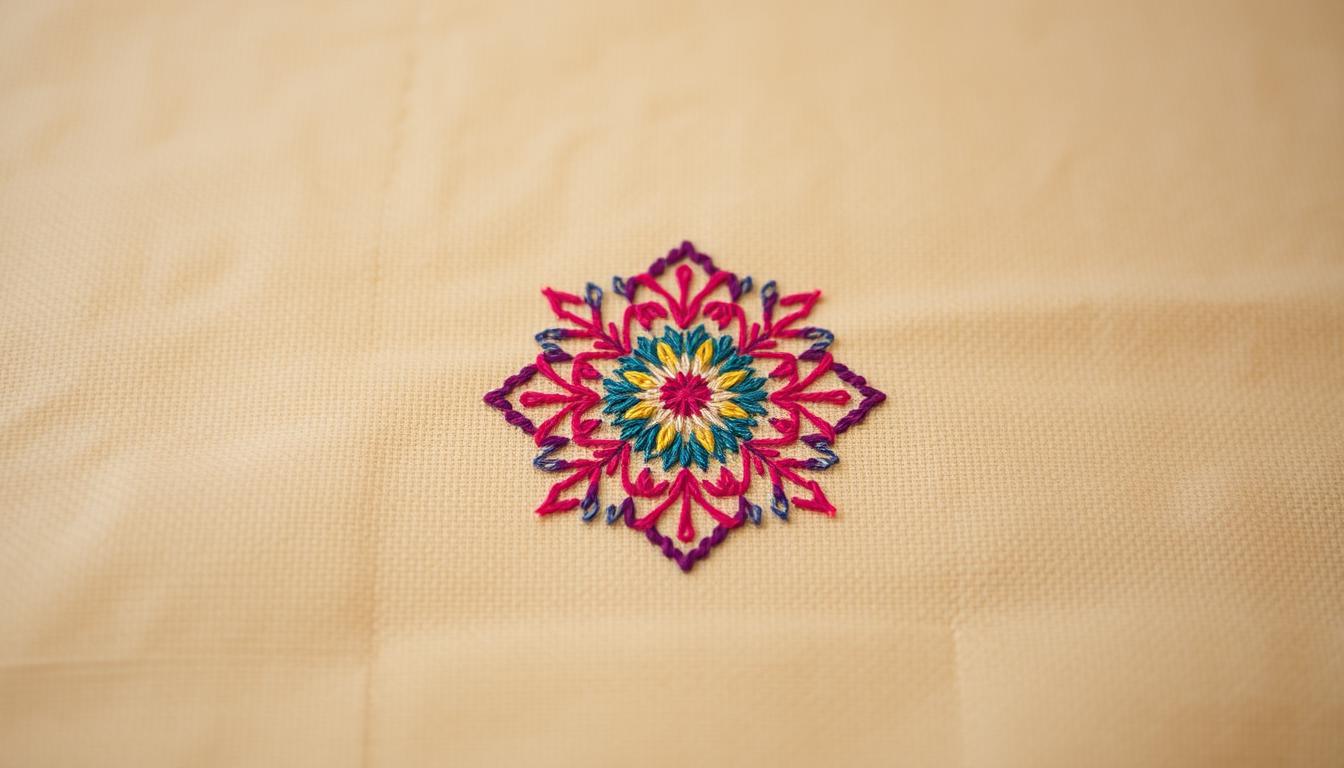
Even if you feel confident with aida or linen, mistakes can still happen. Many stitchers find miscounts deep into a project. They also see extra stitches, even with careful planning. This frustration is common, but you can avoid it with some simple tips.
Begin by following basic routines. Wash your hands before stitching, measure fabric from the center, and secure edges to prevent fraying. Use a hoop or Q-snap, choose the right needle for your fabric, and work with two strands of floss like DMC or Anchor unless a pattern tells you otherwise.
Gridding is a time-saving trick that prevents common mistakes. The 10×10 method, water-soluble markers, or thin fishing line and nylons like Easy Count Guideline help spot miscounts early. Don’t use embroidery floss as a temporary grid because it can shred and leave holes.
Frogging, or ripping out stitches, is a part of the craft. It’s not a sign of failure. Whether you need to frog for a miscount, color swap, or to reuse fabric, there are reliable techniques and aftercare steps to protect your work and keep your project tidy.
Key Takeaways
- Gridding with the 10×10 method prevents many cross stitch mistakes.
- Use water-soluble markers or thin fishing line instead of pencil or floss for grids.
- Follow basic habits: clean hands, center measuring, secured edges, and proper tension.
- Choose reliable brands like DMC and Anchor and the right needle for your fabric count.
- Frogging is normal; learn simple repair and anchoring techniques to recover cleanly.
Why Avoiding Common Cross Stitch Mistakes Will Improve Your Projects
Small errors in counted cross stitch can change your work’s look and feel. Miscounts or faint pencil lines can make motifs look off-center. They can also show through dense areas.
Clean starts, secure edges, and steady tension help keep your work crisp. This makes framing easier.
Fixing big issues takes up more time than preventing them. Frogging a block can take hours and slow you down. Pre-gridding in 10×10 blocks and checking counts often helps you move forward with confidence.
Cross stitch therapy relies on calm, focused stitching. Using the right needle, good light, and a proper hoop reduces frustration. Time-outs, asking for help, or using frogging tools make recovery easier when mistakes happen.
How mistakes affect finished appearance and durability
Misplaced stitches can create gaps in patterns and uneven coverage. Ghost lines from pencils can stain fibers and weaken the presentation. Poor tension can cause puckering, shortening the piece’s life.
Choosing proper materials from brands like DMC and Zweigart improves your work’s look and longevity.
The time cost of fixing versus preventing errors
Ripping out rows takes patience and time you could spend stitching. Preventive steps like gridding, center-starting, and double-checking counts save hours. When you must frog, tools like small embroidery scissors or a seam ripper speed up the process and limit fabric damage.
Plan before starting a big project. A brief pause to confirm placement prevents cascades of mistakes that require major rework.
Psychological benefits: cross stitch therapy and reduced frustration
Stitching should relax you. Avoidable cross stitch mistakes undermine that calm and turn a soothing hobby into a task. Simple embroidery hacks, clean hands, and good lighting keep your head clear and make sessions restorative.
Accepting that errors happen and having a clear fix plan keeps stress low. You will enjoy counted cross stitch more when tools and habits reduce the emotional cost of correcting flaws.
Miscounting and How to Stop Adding Extra Stitches
Fixing a single miscounting mistake can take hours. Start by adopting simple habits. These habits help keep your place on cross stitch patterns and prevent errors.
Best practices for counting horizontally and vertically
Count both horizontally and vertically before stitching. Work in short bursts of counting, then stitch a few rows and recount. Break large areas into smaller blocks to avoid mental fatigue.
When using paper charts, mark completed rows lightly. This helps track your progress without erasing important lines.
Use of gridding to prevent miscounts (10×10 method)
Grid the fabric in 10×10 squares that match the thicker lines on charts. Mark full lines or a small plus sign at each 10×10 intersection. This creates anchors.
You can use water-soluble pens or a removable guideline. This avoids permanent marks.
When to count multiple times and when to pause stitching to avoid errors
Double- or triple-check counts whenever a new color or motif begins. If you find an unexplained gap, stop and trace back. This prevents continuing with errors.
Pause stitching when you feel tired. Fatigue makes miscounting worse. Use a cross-stitch calculator to confirm fabric size and placement when starting big projects.
With careful counting and smart gridding, cross stitch ideas become easier. For beginner cross stitch projects, these habits reduce frogging and keep progress steady.
Gridding Techniques and Tools for Accurate Cross Stitch Patterns
Getting a clean grid makes stitching faster and cuts mistakes. You can hand-grid with a water-soluble marker so lines wash away when you finish. Avoid pencil; graphite can leave faint ghosts that show after laundering.

Hand-gridding means marking vertical and horizontal lines to match your pattern’s 10×10 boxes. Use light, deliberate strokes with a water-soluble marker and test on a scrap first. Mark the center and work outward to keep alignment true.
Thin fishing line gives a removable grid when you need physical guides across fabric. Pick a nylon or braided filament rated around 8 lbs or less so it stays taut but is easy to pull out. Colored line helps you see the grid, yet check user reviews to avoid dye transfer.
The Easy Count Guideline is a red nylon filament sold on spools for temporary gridding. It tacks lightly to fabric and removes cleanly when you finish. Don’t use embroidery floss for gridding; stitching through floss can shred fibers and make removal messy.
Pre-gridded fabric saves time and keeps your work tidy. The DMC Magic Guide offers faint red lines on 14-count white Aida in pre-cut sizes like 14″×18″. Wichelt and Zweigart provide broader choices in counts and colors, including higher-count linens and Lugana up to 32 count.
Before you grid, secure edges and confirm your fabric size from the center using a cross-stitch calculator. That step ensures pre-gridded fabric matches your design and prevents wasted material.
- Use a water-soluble marker on test fabric to confirm color removal.
- Choose thin fishing line or the Easy Count Guideline for removable, non-damaging grids.
- Pick pre-gridded fabric like the DMC Magic Guide or options from Wichelt and Zweigart when you want convenience.
Lighting, Magnification, and Ergonomics for Better Stitching
Good lighting and the right tools make a big difference in your stitching experience. They help you stitch for longer without eye strain. This guide will help you choose a stitching light, understand magnifiers, and set up a comfortable workspace.
Choosing a dedicated stitching light
Find a lighting option that fits your workspace. Clip-on lamps are great for hoops, frames, or tables. They’re easy to move around. Tabletop lamps offer stable, adjustable beams for long hours.
Floor lamps with articulating arms are perfect for larger areas or lighting multiple tools. Look for lights with adjustable brightness and color. LEDs with 3000K to 5000K match daylight or warm light. Portable lights are a must for retreats or classes.
Benefits of magnifiers and diopter lenses
Magnifiers help with high-count fabrics like 32-count or higher. You can use handheld magnifiers, desktop lenses, or clip-on diopter glass. Many prefer prescription glasses or cheaters for hands-free use.
Choose magnifier strength based on fabric count and eyesight. Higher diopters enlarge more but reduce field of view. Test different lenses before buying to ensure clarity without constant refocusing.
Maintaining posture and a sturdy surface
Keep your project at eye level to avoid neck strain. Use hoops, Q-snaps, or frames to stabilize fabric. This keeps your hands relaxed. A sturdy table and a comfortable chair with lumbar support improve ergonomics and reduce mistakes.
Magnifiers with built-in lighting encourage upright posture. They bring the work to your eyes, not the other way around. Take short breaks, stretch shoulders, and change position every 30 to 45 minutes to protect your neck and back.
If you’re new to cross stitch, invest in a basic set of tools. This includes a good stitching light and a simple magnifier. These choices make cross stitch for beginners less frustrating and more satisfying.
Thread and Needle Best Practices to Prevent Tangling and Uneven Stitches
Choosing the right needle and managing your thread are key to better cross stitch. Small changes in needle sizes, thread length, and floss brand can help. Use a hoop or frame to keep your fabric steady.
Needle sizes should match your fabric count. For high-count linens, use finer needles to avoid enlarging holes. For lower-count Aida, thicker needles make stitching easier. Always test a needle on a scrap first.
Your thread length should be about fingertip to elbow. This length helps prevent tangles and knots. If your thread tangles, let the needle hang for a few seconds to unwind. Replace frayed or split strands to avoid uneven tension.
Use two strands of floss for most cross stitch unless a pattern says otherwise. For denser coverage, use three strands on dark backgrounds. For fine details, use one strand. Secure starts and ends with small anchors to prevent loose tails.
Choose reputable brands like DMC floss for color consistency and wide availability. Anchor floss is smooth and great for long sessions. When switching brands, use a conversion chart to match colors and weight.
Avoid using embroidery floss as a gridding material. It can pierce and shred, leaving fuzz or gaps. Use thin fishing line or Easy Count Guideline for a clean fabric when you erase the grid.
Small habits prevent big problems: thread shorter lengths, match needle sizes to fabric, let the needle untwist, and use quality DMC floss or Anchor floss. These steps keep your stitches even and your projects tidy while you practice reliable cross stitch techniques.
CENTER START and Measuring Fabric to Avoid Fabric Waste
Start your cross stitch from the center of your fabric to use it wisely. This method cuts down on waste by planning margins and borders better.

To find the pattern’s center, use the triangular arrows on charts or fold printed pages. Then, mark this point on your fabric by counting squares or measuring in inches or centimeters. Make sure to mark lightly so you can see it as you stitch.
Use a cross stitch calculator to figure out how much fabric you need. It helps you pick the right fabric size and avoid wasting fabric. It also shows how much extra margin you should add for framing and handling.
Before starting, divide your fabric into 10×10 sections. You can use a removable guideline to align the pattern center with your marked center. This way, you can avoid misalignment and save fabric.
After cutting, secure the edges to prevent fraying. You can use hemming, fabric glue, or heat-activated hemming tape. This keeps your fabric intact and lets you handle it without losing inches.
Here’s a quick guide for choosing margins and edge care based on fabric counts.
| Fabric Count | Recommended Margin (in) | Edge Care Option | Use With Cross Stitch Calculator? |
|---|---|---|---|
| 14-count Aida | 3–4 | Hemming or fray check | Yes |
| 16-count Aida | 3 | Fabric glue or tape | Yes |
| 18-count evenweave | 2.5–3 | Heat-activated hemming tape | Yes |
| 28-count linen (over 2) | 3.5–4 | Hemming plus fray check | Yes |
Keeping Your Place on Charts and Organizing Cross Stitch Projects
Having a clear system saves time and reduces frustration. Use simple habits for pattern marking and project planning. These habits make it easier to pick up where you left off.
How to mark your chart: highlighting, crossing out, and digital assembly
Highlight finished areas on printed charts to see your progress easily. Bright highlighters work well on color charts. For black-and-white charts, mark one symbol at a time to keep track of colors.
Cross out finished blocks with a thin pen for precise edges. If you use a tablet, assemble pages digitally. This way, you can zoom, undo, and layer colors without harming paper.
Tips for multi-page patterns and aligning printed pages
For multi-page patterns, tape pages together before starting. Align grid lines and trim excess margins for flat pages in a binder. Shade overlaps lightly to check alignment as you stitch.
Print a test overlap to ensure symbols match across joins. If you prefer digital, export a single file and print at the exact scale. This reduces mismatch and keeps your counting accurate.
Cross stitch organization: bobbins, labels, and project planning
Store floss on labeled bobbins by color and project name. Use clear bags for skeins, needles, and scissors. Keep a small kit of thread pickers and a seam ripper in each bag for quick fixes.
Use pattern binders for assembled pages, photocopies, and notes. Add a cover sheet with thread counts and start date for easier planning. Consistent labeling saves time and lets you focus on stitching.
Fixing Mistakes: Frogging, Stitch-Backwards, and Repair Techniques
Mistakes are common. You can fix them cleanly, whether they’re new or old. This guide will help you know when to frog, use stitch backwards, and which tools to use for repairs.
Difference between recent mistakes and secured-stitch frogging
For new mistakes, stitch backwards is best. It lets you un-stitch without cutting threads. But, if stitches are tied off or spread out, you’ll need to frog the whole thing.
Techniques: stitch backwards, pull from the front, use of embroidery scissors and seam ripper
Begin with stitch backwards for recent errors. Just go back through the stitches. For short threads, pull from the front to remove them.
For bigger fixes, use a seam ripper or sharp scissors. Cut only the top thread, then pull the rest out. Use pointed scissors to avoid snags.
Cleaning up after frogging: anchoring tails, removing fuzz, and closing gaps
After frogging, hide short threads under stitches. Use a beading needle for tight spots. If there’s no thread, weave the ends under nearby stitches.
Get rid of fuzz with tweezers or a lint roller. Press the area to close holes or wash it with safe detergent. These steps make your fabric even and ready for restitching.
Design Choices and Workarounds When You Decide Not to Frog
Don’t always rip back rows for a tiny error. Think about time, stress, and the final look. Small fixes and design choices help keep the joy in stitching.
Fudging small errors: stitching over a stitch and why it can be acceptable
Stitching over a misplaced stitch can hide small errors. The area might look a bit fluffier. But most people won’t notice from a normal distance. Use this trick for errors in non-symmetrical or background areas.
Adjusting patterns and color swaps to accommodate mistakes
Make small pattern edits to balance a miscount. Swap a nearby color to blend the change and keep the design. Keep a record of any color swaps for future reference.
When leaving a mistake is fine: confetti areas and personalization
In confetti-heavy backgrounds, a stray stitch can look like part of the texture. Embrace some imperfections as intentional. This approach can add charm to your handmade work.
Keep a simple log of changes and where you made fixes or color swaps. This record helps with future projects and adds life to your cross stitch and embroidery ideas.
CROSS STITCH Tools, Accessories, and Setup That Prevent the Top Mistakes
Make your workspace perfect for stitching. Use a sturdy table at a comfy height and a bright lamp for your work. This setup cuts eye strain and reduces counting mistakes.
Choose the right frame for steady tension. Hoops and Q-snap frames keep fabric tight and stitches even. A loose hoop or warped frame causes uneven tension and extra corrections.
Use magnifiers and task lighting for high-count fabrics. A magnifier with LED light or a gooseneck lamp makes tiny holes and faint grid lines clear. Good lighting speeds your work and lowers the chance of miscounted stitches.
Essential tools for steady stitching
Hoops, Q-snap frames, and stretcher bars are key. Keep sharp embroidery scissors, tweezers, and a seam ripper nearby for quick fixes. A dedicated magnifier and a bright desk lamp improve accuracy on dense patterns.
Optional helpers that save time
Try specialty gridding thread like thin fishing line or Easy Count Guideline to add removable grid lines without permanent marks. Pre-gridded fabric from brands such as DMC, Wichelt, and Zweigart saves gridding time when the size matches your chart. Thread pickers and frogging needles speed corrections in tight spots.
Organizational tools to keep projects moving
Label bobbins with DMC or Anchor color numbers to avoid color mix-ups. Store works-in-progress in project bags to protect fabric and threads. Use pattern binders for multi-page charts so you never lose alignment between pages.
| Item | Primary Benefit | When to Use |
|---|---|---|
| Hoops | Keeps small to medium pieces taut for even stitches | Quick projects and fabric counts 14–28 |
| Q-snap | Provides uniform tension over larger areas | Large projects or high-count fabrics |
| Easy Count Guideline | Removable red filament for accurate gridding | When you need a temporary grid that won’t mark fabric |
| Pre-gridded fabric | Saves time and reduces counting errors | When available in the correct count and size for the pattern |
| Magnifier & lighting | Reduces eye strain and spotting mistakes | High-count fabric and long stitching sessions |
| Project bags & labeled bobbins | Improves cross stitch organization and prevents tangles | Multi-project storage and travel |
Plan sections before you start. Decide how long your thread will be using the fingertip-to-elbow rule and wind colors on labeled bobbins. This planning avoids tangled floss and wasted time. Keep a small kit with scissors, needle threaders, and a seam ripper ready for quick corrections.
Treat tools as part of your process. The right set of cross stitch tools and a tidy setup reduce errors and speed progress. Good organization keeps focus on stitching, not on searching for supplies.
Conclusion
Mistakes are common, even for the most careful stitchers. But, you can reduce rework by using solid cross stitch techniques. Start with gridded fabric and mark the center. Use water-soluble markers when needed.
Good lighting and a magnifier help with dense patterns. Simple tricks like securing edges and shortening thread can also help. These steps reduce tangles and uneven tension.
Frogging is a normal part of stitching. If an error is recent, pull from the front or stitch backwards. If stitches are locked in, use small scissors and patience.
Take a break if frogging frustrates you. Swap in better tools like a Q-snap or proper needle sizes. This makes fixes less painful and faster.
Keep basic habits to improve your stitching. Wash your hands, measure from center, and use two strands of floss unless the pattern says otherwise. Maintain consistent tension.
These practical steps will help beginners and experienced stitchers alike. With the right setup and a few tricks, you’ll build confidence. Enjoy more satisfying finishes and spend less time fixing mistakes.