I decided to try cross stitching without a hoop to see how it goes. I worked on several small projects to find out. This review will share my findings, tips, and steps to help you decide if you should try it too.
This guide is for U.S. readers who want to learn cross stitch. You’ll learn about tools like needles and scissors, and how to use DMC floss. I’ll also talk about fabric choices, managing tension, and the benefits of stitching without a hoop.
If you’re new to cross stitch or looking for tips, this section is for you. You’ll learn the good and bad, common mistakes, and how to fix them. By the end, you’ll know which projects work without a hoop and how to finish them well.
Key Takeaways
- You’ll learn practical methods for stitching without a hoop and when to skip one.
- This guide covers tools, fabrics, and DMC floss tips that suit handheld stitching.
- Expect advice on tension, common beginner cross stitch mistakes, and fixes.
- You’ll find ergonomic tips for stitching on your lap, in transit, or in waiting rooms.
- After reading, you’ll be able to choose projects that work well hoop-free and finish them cleanly.
Trying counted cross stitch without a hoop can change how you stitch. You get more freedom to move and stitch in tight spots. You also carry fewer supplies. This intro looks at comfort, tension, and finishing to help you decide before starting.
Comfort and portability advantages for on-the-go stitching
Handheld stitching makes your kit lighter. Without big hoops or Q-snaps, you can easily carry your fabric in a project bag. This is great for stitching during commutes, flights, or short breaks.
Stitching on your lap or in the well can be easier for long sessions. You can start and finish threads faster from the underside. This helps you stitch more without stopping to adjust hoops.
Potential effects on tension, stitch consistency, and fabric distortion
Working without a hoop can affect tension. Fabric not stretched can lead to loose Xs and uneven coverage. You need to check your stitches often to avoid mistakes like twisted threads.
Simple steps can help control tension. Anchor your fabric, use a gentle hold while stitching, and count regularly. These steps help keep your stitches even and your fabric straight.
When skipping a hoop might save time or complicate finishing
Skipping a hoop saves time and makes stitching more portable. It’s great for quick motifs and practice pieces. This method is perfect for small gifts or sampler squares.
However, finishing might be harder for display pieces. You might need to block, press, and mount your work more. Expect to spend more time on framing to get your piece ready for display.
| Factor | Hoop-Free Advantage | Hoop Advantage |
|---|---|---|
| Portability | Lightweight kit, ideal for travel and waiting rooms | Less mobile due to frame or Q-snap bulk |
| Setup Time | Quick start, minimal preparation | Longer setup but consistent tension from the start |
| Tension Control | Risk of loose or uneven stitches without frequent checks | Stable tension, even coverage, fewer cross stitch mistakes |
| Finishing | May need extra blocking, pressing, and edge work | Cleaner edges and fewer finishing corrections |
| Best Use | Quick motifs, practice, travel-friendly projects | Large pieces, professional displays, counted cross stitch with fine detail |
What You Need to Get Started: Tools, Fabric, and Floss Alternatives
Start by gathering a small kit that keeps your workspace neat and portable. This setup lets you focus on your stitches without distractions. Choosing the right tools makes your projects more fun and precise.
Essential cross stitch tools
Get sharp tapestry needles in sizes 24 and 26, small embroidery snips, and a needle threader. Use a clear pattern holder or clipboard to keep your chart in view. A compact clip-on lamp and small magnifier are great for working in dim light.
Organize your floss with a thread organizer or bobbins. This saves time and keeps colors organized. Use a magnetic stitch counter or slim notebook for easy tracking.
Choosing cross stitch fabric without a hoop
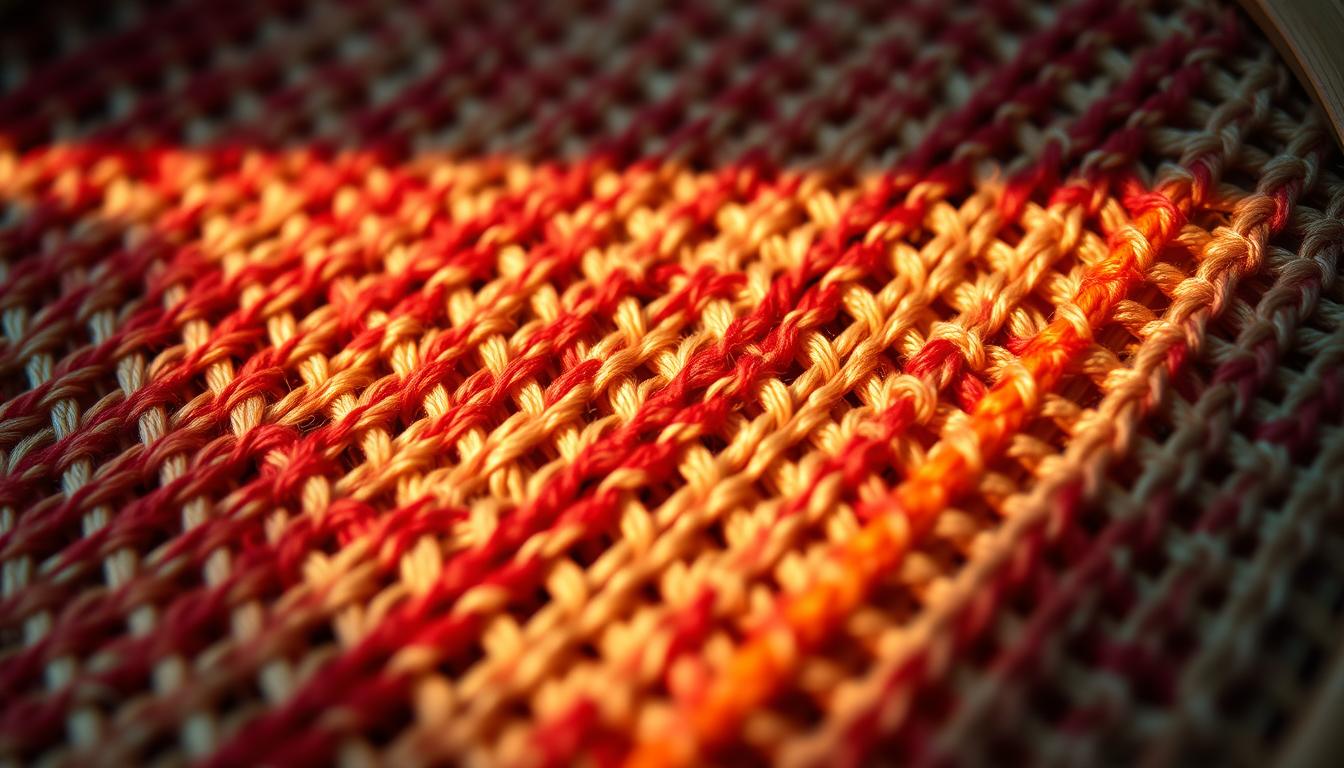
Aida fabric is easy to work with because its grid keeps stitches steady. For a finer look, evenweave fabric is better but requires careful tension. Linen fabric gives a refined look but needs edge finishing to prevent fraying.
Choose fabric count based on project size and skill level. For quick projects, use 14- or 16-count Aida. For detailed work, try 28-count evenweave stitched over two threads.
DMC floss handling and storage strategies
Separate DMC floss into individual strands and wrap them on labeled bobbins. Use 18–20 inch lengths to avoid twisting and knots. When stitching “in the well,” the underside of the fabric faces out, making thread management easier.
Secure thread tails for neat finishes. Keep a small floss organizer near your lap or in a project bag to keep skeins organized.
With the right tools, fabric, and floss routines, you can stitch confidently. These basics help you focus on your pattern and improve your technique as a beginner.
Preparing Your Fabric When Not Using a Hoop
Starting without a hoop means you need to prepare your fabric well. You want edges that don’t fray, a stable area to work on, and clear marks for easy counting. These tips help keep your fabric safe and your stitching smooth when you’re stitching by hand or on a lap board.
How to secure and stabilize fabric edges to prevent fraying
Finish raw edges to stop unraveling. A zigzag stitch on a home machine works well. You can also use Fray Check on Aida or linen for a neat edge. If you own a serger, that gives the cleanest result.
For a no-sew option, fold a small hem and baste with large running stitches. Masking tape or gaffer tape around the outer inches of the piece gives quick protection during stitching without changing fabric tension.
Using temporary adhesive, clips, or lightweight framing alternatives
Low-tack fabric tape and temporary spray adhesives stabilize small areas when you can’t clip to a frame. Binder clips or Clover Wonder Clips hold fabric to a thin cardboard or clipboard backing. This method gives you a firm surface without a hoop.
Try a lap board, clipboard mount, or a small embroidery ring used loosely as a light frame alternative. These options improve portability and keep your piece flat enough for even stitches.
Cross stitch gridding and marking techniques that work without a hoop
Cross stitch gridding saves time and reduces counting errors. Draw a light grid with a water-soluble marker or use an air-erasable pen for temporary lines. If you prefer threads, baste a removable grid in contrasting cotton every ten squares.
Mark the center and major grid lines first. That makes it easier to align motifs and prevents frequent recounting. Reliable marking supports neat results even when your fabric isn’t stretched taut.
| Method | Best Use | Pros | Cons |
|---|---|---|---|
| Zigzag machine stitch | All cross stitch fabric types | Durable, quick, professional edge finish | Requires sewing machine |
| Fray Check | Small pieces or delicate linen | No sewing, clear finish, easy to apply | May stiffen fabric near edge |
| Folded hem and basting | Portable, hand-only projects | No special tools, reversible, gentle on fabric | Takes time to baste neatly |
| Masking or gaffer tape | Quick protection while stitching | Fast, inexpensive, removable | May leave residue on some fabrics |
| Binder clips or sewing clips + backing | Handheld stability for small to medium pieces | Firm support, portable, inexpensive | Bulkier than a hoop |
| Lap board / clipboard mount | Travel and waiting-room stitching | Stable, lightweight, supports cross stitch organization | Less structural tension than a hoop |
| Water-soluble marker grid | Precise counted work without a hoop | Easy to remove, clear guidance for counting | Must avoid water contact until removed |
| Temporary basting grid | Large pieces or complex patterns | Durable during long projects, visible on all fabrics | Requires time to baste and remove |
Stitching Techniques That Work Best Without a Hoop
Working without a hoop requires a few simple habits. These habits keep your fabric flat and your stitches even. You can mimic the tension a hoop gives by supporting the cloth with your non-dominant hand behind the area you are stitching.
Shorter thread lengths help prevent dragging and tangles. This means you spend less time correcting tension and more time stitching.

Counted cross stitch works well when you divide the pattern into small blocks. Complete a 10×10 block before moving on. Work methodically across the grid so you avoid long bridging stitches that pull fabric out of shape.
Keep each strand under 18 inches. Rest your hand on a flat surface to steady your motion.
Practical backstitching tips
For neat outlining, choose flatter fabric zones and stitch slowly. Anchor the fabric under your palm or clip it to a small board to stop slipping. Follow the printed grid and use consistent stitch lengths to keep lines straight.
A calm pace means cleaner lines with fewer starts and stops.
Anchoring and finishing
Try loop-start methods when you use single strands to begin without bulky knots. When you finish, weave thread tails under several nearby stitches on the back for a secure, low-profile hold. If you stitch “in the well” with easy access to the reverse, use the underside to tuck ends neatly so the front stays flat.
Embroidery hacks for efficiency
- Hold short thread lengths to reduce twisting and maintain even tension.
- Mark a 10×10 grid with a water-soluble pen to guide progress and avoid miscounts.
- Use a small magnetic board or clip-on grip to stabilize edges when you need extra support.
These needlework secrets help you get pro-looking results without a frame. You will stitch cleaner crosses, neater outlines, and tidier backs when you adopt small sections, steady support, and smart anchoring. The right combo of these methods keeps your project portable and precise.
Managing Tension and Avoiding Common Cross Stitch Mistakes
Working without a hoop can be challenging. It tests your control over tension and exposes common mistakes. You can still produce neat work by checking tension often, fixing errors early, and adopting simple needlework secrets.
Check tension by comparing stitched Xs across a few rows. If some look loose, gently tug the last few stitches to even them. When looseness persists, remove and re-stitch the problem rows for a seamless look.
Use a small hand-held frame or lap board occasionally to mimic a hoop. That quick check helps you catch inconsistent tension before it spreads. Keep your floss lengths short to prevent twists and knots that create uneven coverage.
Typical cross stitch mistakes often come from miscounts and lost grids. Baste a temporary grid with a removable marking pen or running stitch so you avoid shifting your place. If you do miscount, unpick only the affected area rather than ripping long sections.
Puckering happens when tension varies across the fabric. Let the fabric relax, then steam-press it lightly and re-stitch the area with even pressure. For twisted or knotted floss, separate strands like DMC six-strand threads before threading and use shorter lengths.
Adopt a routine stitch order to maintain consistent coverage. Complete all bottom stitches across a section, then return to make the top stitches. Consistent finger pressure and uniform slant for every top stitch keep the surface even.
Use these cross stitch tips to reduce rework: measure progress with small checks, secure edges to limit distortion, and correct small errors early. Those habits cut time lost to large fixes and improve finish quality.
Below is a quick reference comparing common problems, causes, and fixes to help you troubleshoot on the go.
| Problem | Likely Cause | Quick Fix | Preventive Cross Stitch Techniques |
|---|---|---|---|
| Puckered fabric | Uneven tension across rows | Steam-press, re-stitch affected area | Check tension frequently; use lap board checks |
| Loose stitches | Stitching too loosely without frame | Tighten last stitches or unpick and redo | Shorter floss lengths; consistent finger pressure |
| Miscounts and shifted motifs | No grid; lost place in pattern | Baste a temporary grid; correct only needed stitches | Use removable marking pen or basting grid |
| Twisted or knotted floss | Long thread lengths and unseparated strands | Cut new short length; separate strands before use | Pre-separate DMC strands; rotate needle when needed |
| Uneven coverage | Inconsistent stitch order and slant | Rework to match slant and coverage | Stitch all bottom halves first, then top halves |
Comparing Results: Hoop vs No Hoop for Cross Stitch Projects
Stitching with a hoop, Q-snap, or freehand can lead to different results. Small pieces stitched by hand often look great after finishing. But, larger or detailed work usually needs a stable frame to keep stitches even and edges flat for framing.
Visual differences in finished pieces and framing outcomes
Work done with a hoop or Q-snap has sharper stitches and a smoother surface. This uniformity makes it easier to mount the fabric in cross stitch frames, reducing the need for puckering removal.
Hoop-free pieces might show uneven stitches and tension. You’ll need to block, press, and stretch the fabric carefully before framing to avoid distortions.
Which cross stitch projects are forgiving of no-hoop methods
Small motifs, sampler squares, ornaments, and quick gifts are okay without a hoop. Their size or stitch coverage hides minor tension issues well.
Large fields of full stitches can also hide uneven tension better than detailed, backstitch-heavy designs. If your projects have bold shapes or dense coverage, you might not need a hoop.
When a hoop or Q-snap is still recommended for professional-looking pieces
Use a hoop or Q-snap for commissions, gallery-quality work, and detailed patterns on linen or evenweave. A stable frame reduces distortion and helps maintain exact stitch counts, important for fine cross stitch frames.
For the cleanest finish on intricate designs, invest in a Q-snap or a wooden/adjustable hoop. This minimizes rework at mounting and makes framing faster and neater.
| Aspect | Hoop / Q-snap | No Hoop |
|---|---|---|
| Tension consistency | High, uniform across area | Variable; depends on hand control |
| Framing readiness | Usually requires little blocking | Often needs extra stretching and pressing |
| Best project types | Large pieces, commissions, linen | Small motifs, ornaments, dense coverage |
| Speed and portability | Moderate; frames add bulk | High; easy to carry and stitch anywhere |
| Final presentation | Cleaner in cross stitch frames with less correction | Good after careful finishing; may show minor irregularities |
Ergonomics and Stitching Comfort Without a Hoop
Working without a hoop changes how you sit and hold fabric. It also affects how you manage fatigue. Focus on your posture and use simple supports to stay comfortable. Small changes can make a big difference in your stitching comfort.
How lap positioning and handheld methods affect posture and hand fatigue
Support your forearms on a cushion to avoid hunched shoulders. Resting elbows on a pillow helps prevent wrist strain and keeps stitches even. Switch hands every 15–20 minutes to avoid repetitive motion.
Keep your project at eye level when you can. Looking down too much can tighten your neck muscles. A slight recline in a good chair helps keep your spine aligned.
Tips from experienced stitchers for comfortable stitching in waiting rooms or travel
Use short thread lengths and a small embroidery needle threader to start quickly and avoid tangles. Carry blunt-tipped needles, compact scissors, and a tiny project bag to stay organized. These tips help you stitch without a hoop, making travel stitching easier and less stressful.
Using clamps, lap stands, or stitching “in the well” ideas adapted from hoop users
Try a clamp-on frame or a lightweight lap stand for stability. A clipboard with cushioned backing is an affordable option that keeps fabric flat and helps with tension control.
Stitching in the well means holding fabric so the working side faces down. This method makes anchoring and finishing tails easier. You can adapt this by tucking fabric into your lap or a shallow tray to reduce wrist fatigue and keep even tension.
CROSS STITCH: Best Patterns and Projects to Try Without a Hoop
Working without a hoop lets you stitch anywhere, anytime. You can make small, quick designs. This keeps your stitches even and lets you try new colors with DMC floss.

Choose small samplers, single alphabets, geometric motifs, or tiny florals on 14- or 16-count Aida. These patterns have low stitch counts, keeping your tension even. You can fix mistakes quickly and finish a piece in one evening.
Quick projects for practice
Try making ornaments, bookmarks, key fobs, and patches. These small projects let you experiment with different stitches and colors. You can learn about color mixing and light placement on tiny motifs.
Seasonal and gift ideas
Make holiday ornaments, birthday tags, simple home accents, and personalized mini-frames. These ideas are great for last-minute gifts. You’ll practice counted cross stitch and create meaningful pieces.
How to plan a hoop-free piece
Look for patterns under 50 by 50 stitches for easier handling. Use a water-soluble pen or pre-count lines to stay on track. Keep threads tidy with a needle minder or clip when switching colors.
Finishing tips for small work
Turn motifs into ornaments or patches by backing with felt and hand-stitching the edges. Press gently to remove creases. Short projects help you practice finishing without getting overwhelmed.
| Project | Size (approx) | Best Fabric | Why It Works Hoop-Free |
|---|---|---|---|
| Ornament | 40 x 40 stitches | 14-count Aida | Small circle, easy to hold and finish as a hanging piece |
| Bookmark | 20 x 80 stitches | 16-count Aida | Long, narrow shape stays flat and is simple to frame with felt |
| Key fob | 24 x 48 stitches | Evenweave or 14-count Aida | Compact, durable, and great for testing DMC floss blends |
| Mini sampler | 30 x 30 stitches | 14-count Aida | Practice alphabet, motifs, and simple borders in a short session |
| Patch | 35 x 35 stitches | 14-count Aida | Easy to back and sew onto clothing or accessories |
Finishing and Framing Your Piece When You Didn’t Use a Hoop
After finishing a handheld project, a quick finishing routine can enhance its look. First, check for puckers, stretched areas, or uneven tension. Fixing these small issues now saves time later when displaying your work.
Blocking and pressing techniques to remove any tension marks
For pieces that can handle water, gently hand-wash them with mild soap and cool water. Lay them flat on a clean towel and roll to remove excess moisture. For quicker smoothing, use a steam iron on the reverse with a pressing cloth.
Keep the heat low and lift the iron instead of sliding it. This prevents crushing raised stitches.
Mounting strategies to keep fabric flat in frames or hoops post-stitch
Use acid-free mounting boards to prevent damage over time. Stretch the fabric evenly and secure it with lacing or long stitches across the back. Lacing helps pull out distortion and restore a square shape.
If you mount on a backing, glue only where necessary. Use archival materials for lasting results.
Cross stitch frames and alternative display ideas for hoop-free work
Traditional cross stitch frames give a crisp, gallery-ready finish. For a more relaxed look, float the piece in a frame so the edges show against a backing. Mounting cross stitch on a canvas creates a modern silhouette.
Smaller motifs look great in ornament frames, shadow boxes, or sewn items like pillow fronts. Tiny imperfections add charm to these displays.
Organization and Project Workflow Without a Hoop
Stitching without a hoop means you need to organize differently. You’ll need to store tools, mark fabric, and move through projects in new ways. Good organization keeps you focused, saves time, and prevents floss tangles. Use compact solutions to keep your work tidy and portable.
Carry a small project bag with essentials like bobbins, a pattern sleeve, scissors case, and needle wallet. Use a clipboard or an iPad with a stylus app to mark your progress. These habits make your cross stitch workflow smooth and reduce frustration.
Keeping patterns, floss, and fabric organized when you stitch handheld
Sort floss on numbered bobbins and store them in a clear box. Keep active threads in a small organizer or pouch in your project bag. Fold fabric over a lightweight backing board to protect edges and keep it flat.
Clip your pattern to a clipboard or use magnetic clips on a lap board. Mark the center and major lines on both paper and fabric. These steps improve organization and save time when stitching on the go.
Gridding alternatives and counting tips that speed progress and reduce errors
Use temporary pens or a basting grid to mark every ten stitches. Attach a removable adhesive grid to a backing board for stability without a hoop. Count from marked centers and major grid lines to avoid mistakes.
Focus on checking intersections instead of every stitch. This method minimizes errors and keeps your rhythm steady. It works well for both Aida and evenweave fabrics when stitching handheld.
How to plan your stitching sessions for consistent progress and mental benefits
Divide sessions into 20–40 minute blocks with simple goals like one color block or rows. Short sessions keep you focused and reduce fatigue. Track your progress visually to feel a sense of accomplishment.
Keep a simple log to note time, page or grid reached, and color changes needed. This record improves your workflow and keeps you motivated while enjoying the calming benefits of stitching.
| Task | Tool | Benefit |
|---|---|---|
| Floss storage | Labeled bobbins in clear box | Quick color find, fewer tangles |
| Pattern marking | Clipboard or tablet with stylus | Resume fast, fewer mistakes |
| Fabric stability | Backing board or removable adhesive grid | Flat stitching surface without hoop |
| Counting aid | Temporary pen or basting grid | Safer counting, fewer mis-stitches |
| Session planning | Timed blocks and progress log | Consistent progress and mental clarity |
Therapeutic and Creative Aspects of Stitching Without a Hoop
Working without a hoop makes needlework softer. You can stitch anywhere, like on the couch or in a coffee shop. This makes cross stitch therapy easy to fit into your day.
How hoop-free stitching supports calm focus
Stitching without a frame feels less formal. This makes it easier to make stitching a part of your daily routine. You might find your breathing slows, stress lessens, and you focus more on each stitch.
Ways hoop-free work fuels creative exploration
Without a frame, you can try new things. You can change fabric sizes, use odd shapes, and mix cross stitch with embroidery. This freedom leads to new colors and techniques.
Balancing technique with relaxed practice
Beginners should focus on steady stitches and simple designs. Use hoop-free time to build confidence and enjoy stitching without stress. Save hoops for projects needing tight tension.
- Short sessions: Try stitching for five to twenty minutes to keep your mind calm.
- Mini experiments: Use small motifs and DMC blends to explore new ideas without big risks.
- Switch when needed: Use a hoop for projects needing exact tension for framing or gifts.
Stitching without a hoop mixes calm with creativity. It can be both soothing and inventive if you let go of perfection and embrace discovery.
Conclusion
Hoop-free CROSS STITCH offers big benefits: it’s easy to carry, comfy, and lets you be creative. It’s perfect for beginners and great for projects you can take on the go. But, you need to keep an eye on tension and make sure your stitches are even.
For small pieces or when you’re just starting out, hoop-free is the way to go. It’s also good for quick designs. But, for bigger or more detailed work, a hoop or Q-snap is better. They help keep your stitches even and your work looks amazing.
Here are some tips to make your hoop-free projects look great: make sure your fabric edges are secure, organize your floss, and grid your pattern. Work in small sections and use short thread lengths. And don’t forget to plan how you’ll block and mount your work at the end. Follow these tips, and your hoop-free projects will look just as good as those stitched in a frame.