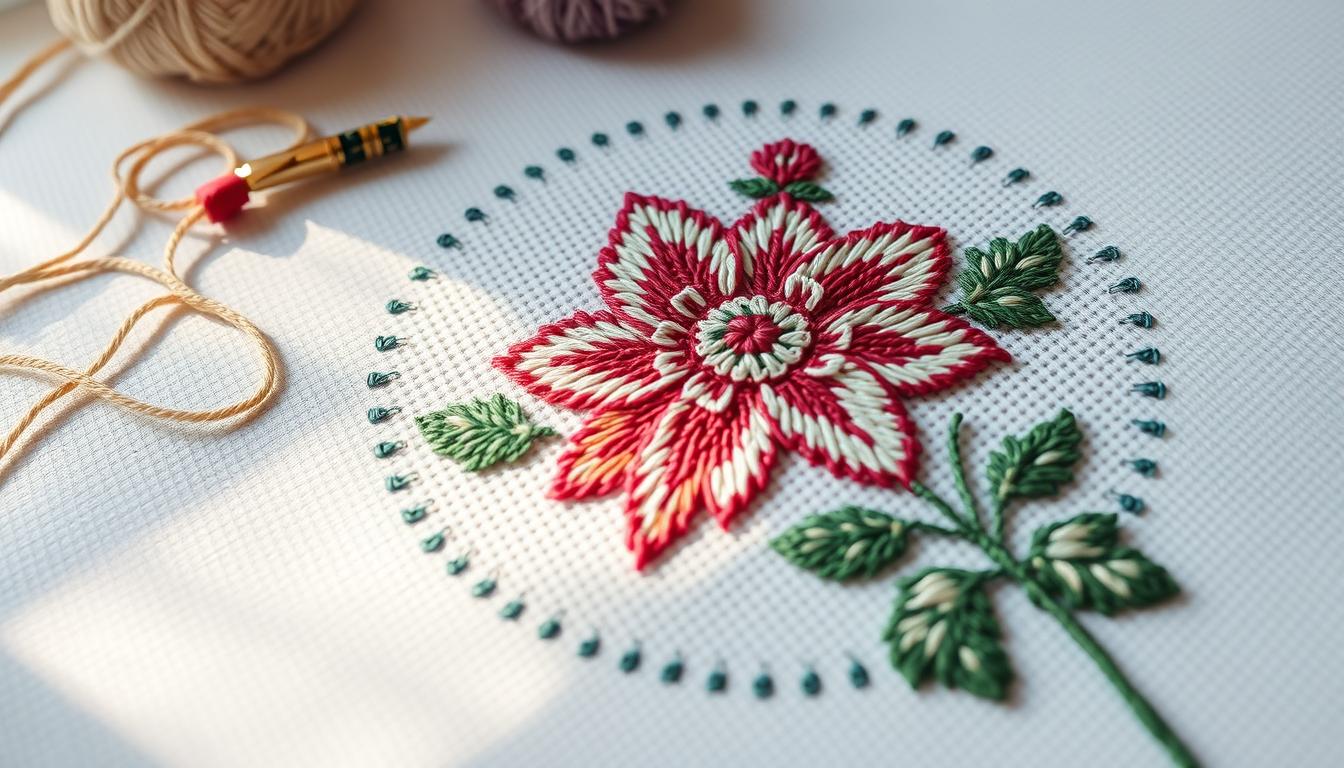
Cross stitch is a type of embroidery that uses X-shaped stitches on fabric like Aida or linen. You use a grid chart to create patterns, from classic samplers to modern designs. Starter kits from brands like DMC and Dimensions make it easy to begin.
When starting, focus on small projects. Use a 14-count Aida, a good hoop, and quality DMC floss. Many find it calming and enjoyable, perfect for stitching with tea and music.
This guide covers the basics of cross stitch, useful tips, and essential tools. You’ll learn how to pick fabric and threads, manage floss, and keep your stitches even. Start simple and you’ll soon move to more complex patterns.
Key Takeaways
- Cross stitch is counted-thread embroidery worked on fabrics like Aida or linen.
- Begin with a 14-count Aida, an embroidery hoop, and DMC floss for best results.
- Starter kits are ideal for beginner cross stitch because they include patterns and supplies.
- Keep stitches even and use simple cross stitch tips to avoid common mistakes.
- Regular practice turns small projects into the skills needed for complex designs.
What is CROSS STITCH and why it’s perfect for beginners
Cross stitch is a way to make pictures on fabric using X-shaped stitches. You follow a chart and color key to place each stitch. This makes it easy for beginners to learn.
The craft has a long history, starting with folk traditions. Now, you can find many designs, from old to new, to inspire your projects.
Definition and history
Cross stitch is a type of embroidery that uses X stitches on fabric. It has been used for centuries to decorate items. Today, it’s made easy with standard materials like Aida cloth and charts from DMC.
Counted cross stitch vs. other embroidery forms
Counted cross stitch uses a grid and chart for precise stitching. This is different from surface embroidery, which is freehand. It’s great for beginners who want clean, repeatable patterns.
Benefits: relaxation, creativity, and cross stitch therapy
Stitching helps you focus and relax. Many use it as therapy to reduce stress. It’s a way to feel accomplished with each small project.
Beginner kits make it easy to start. They come with everything you need to learn stitches and make small projects. This approach helps you grow your skills quickly.
Stitching also boosts your creativity. You can mix colors and patterns to make unique items. Joining communities and workshops keeps you inspired and motivated.
| Feature | Counted cross stitch | Surface embroidery |
|---|---|---|
| Fabric type | Aida, linen, evenweave | Varied fabrics, often non-even weave |
| Pattern following | Charted graph with color key | Outline or freehand drawing |
| Skill entry point | Beginner cross stitch kits suitable | Requires freehand control and practice |
| Common stitches | Full cross, half-stitch, backstitch, French knot | Satin stitch, stem stitch, chain stitch |
| Therapeutic benefits | Strong—repetitive motion aids cross stitch therapy | Moderate—creative focus, less predictable rhythm |
Essential cross stitch supplies and recommended tools
Start with a compact kit that covers the basics and builds confidence. A clear list of core items keeps your first projects smooth and enjoyable. Below you will find must-have materials, helpful extras, and buying tips to avoid frustration and wasted money.
Must-have items for getting started
Choose a 14-count Aida fabric for a forgiving stitch size. Pair it with blunt-tipped embroidery needles in sizes 24–26. Use an embroidery hoop or frame to keep fabric taut and stable while you stitch. Follow patterns that list DMC floss colors to match charts exactly.
Keep sharp, small scissors dedicated to stitching. A clear pattern or chart, a simple hoop, and quality DMC floss are the backbone of a stress-free beginning. These cross stitch tools reduce counting mistakes and make your work neater.
Nice-to-have cross stitch tools that speed progress
Consider a needle minder to hold needles securely when not in use. A threader saves time on threading multiple strands. Add a clip-on light for evening stitching and a small magnifier if you work on denser fabrics.
Stitch scissors, a thimble for comfort, and a bobbin organizer for your skeins keep your workspace tidy. These embroidery hacks cut down on frustration and help you enjoy longer sessions without strain.
Buying tips: why quality matters
Buy reputable brands such as DMC or Anchor for colorfast, smooth threads. Cheap skeins bought in bulk often tangle, feel rough, and lose vibrancy. Investing in DMC floss ensures consistent color matching to patterns and easier stitching.
When choosing needles, buy a range of sizes rather than one cheap pack. Select a hoop size slightly larger than your main working area to avoid sliding and creasing. If you shop kits, pick ones that list DMC floss and include clear charts.
- Core cross stitch supplies: pattern, Aida, needles, hoop, DMC floss.
- Helpful cross stitch tools: needle minder, threader, clip-on light, magnifier.
- Buying rule: prefer quality skeins over the cheapest option for smoother stitching.
Use these cross stitch tips to set up a reliable kit. Organize floss on bobbins, test a small sample before committing to a large piece, and replace worn tools as needed. Good supplies and smart tools let your creativity shine without needless interruptions.
How to choose the right fabric: Aida, linen, and evenweave
Choosing the right cross stitch fabric is key. It affects your project’s look and feel. You need a fabric that fits your skill level, pattern detail, and expected size. Here are tips to help you pick the best fabric and avoid mistakes.
Understanding Aida counts and what’s best for beginners
Aida is great for beginners because its holes are clear. Aida counts show how many stitches are in one inch. Lower counts mean bigger holes and stitches.
Start with 14 count Aida for a good balance. For bigger holes, try 8–10 count. For finer details, go for 16 or 18 count. Choose based on your pattern and desired size.
When to use linen or evenweave and how they affect stitch size
Evenweave has the same threads in both directions. This makes stitching and shading easier. It’s easier than linen but offers a refined look.
Linen gives a classic, textured look. It’s a bit harder for beginners but worth the effort. Linen stitches appear smaller than on Aida.
Preparing and finishing fabric edges to prevent fraying
Fraying can ruin your project. Seal edges before stitching. Use masking tape or a zigzag stitch on a sewing machine for a lasting fix.
Iron your fabric gently to remove creases. Don’t fold it to avoid creases. Press subtle folds or use water-soluble pens to mark the center. These steps prevent fraying and keep your project neat.
How to read a cross stitch pattern and color key

A clear pattern is like a roadmap for stitching. It has a square grid, a legend with symbols, and a color key. The key lists DMC color codes and yardage. Use the grid to plan and count blocks, avoiding mistakes.
Symbols, legend, and DMC color codes
Each symbol on the chart matches a color name and a DMC code. The legend shows full names, numeric DMC codes, and stitch counts. Keep a printed copy or a screenshot for quick reference.
Grid lines, center marks, and counted cross stitch counting methods
Charts show bold lines every ten squares for counting. Start at the center mark to align your work. When counted cross stitching, count from a marked reference and use temporary gridding.
Using printed charts vs. digital/color charts for tracking progress
Printed charts let you mark finished stitches. Digital charts offer zooming, color toggling, and check tools. Choose what fits your habits and consider both.
- Mark the center of both fabric and pattern before you start.
- Use cross stitch gridding on the fabric to match the chart’s ten-square blocks.
- Track colors by DMC color codes and mark off each area as you finish it.
| Chart Element | What to Look For | Practical Tip |
|---|---|---|
| Symbols legend | Symbol, color name, DMC color codes | Keep a separate copy clipped to your hoop |
| Grid lines | Blocks of 10 with bolded lines and center arrows | Use erasable water-soluble pens to grid fabric |
| Color charts | Black-and-white and color versions | Use color prints for visualization, B&W for marking |
Break the job into small steps when reading patterns. Count carefully, follow the legend, and use DMC color codes for thread choices. This method keeps your progress steady and reduces mistakes while enjoying counted cross stitch work.
Thread management and DMC floss techniques
Good thread habits make stitching faster and neater. DMC floss skeins have six strands. Many patterns use two strands for each stitch.
Mastering strand counts, the right thread length, and secure starts is key. This will make your stitching smoother.
Separating strands and typical strand counts for projects
To separate strands cleanly, use the knees trick. Hold the skein between your knees and pull a strand gently. This method prevents loops and knots.
For most Aida projects, use two strands. Backstitching often needs one strand. Keep unused floss rolled or on a bobbin to protect its color and sheen.
How to cut and manage thread length to avoid knots and tangles
Cut thread about elbow-to-fingertip for standard work. Shorter lengths reduce tangles and wear. For metallic floss and blended pieces, cut 10–12 inches to limit fray.
To avoid knots, lay a short tail along the back and stitch over it. Secure thread tails under a few stitches rather than tying a knot.
Blending threads and adding metallic strands for special effects
For subtle highlights, blend threads by pairing two strands of your base color with one metallic strand. DMC Light Effects metallic floss adds sparkle without overwhelming texture.
Blend colors to create soft gradients or to add shimmer on focal areas. Use labeled bobbins with DMC codes so you can reproduce blends later.
Store floss on bobbins or in labeled pouches to keep shades organized. Avoid cheap threads that snag; premium DMC floss offers smoother glide and consistent color. Small, steady choices in separating strands, managing cross stitch thread length, and blending threads will lift the finish of your project.
Hooping, tension, and stitching posture for consistent results
Getting a neat finish starts with a well-fitted hoop and steady habits. Use an embroidery hoop or a frame that matches your project size. Tighten the outer hoop and check it as you stitch. Fabric should give slightly when you pull thread, but never sag or stretch out of shape.
Using an embroidery hoop or frame to keep fabric taught
Place fabric smoothly between hoop layers and pull from the edges to remove wrinkles. Re-tighten as you work, especially after several hours. Try different hoop sizes and a table stand for longer sessions to reduce hand fatigue and keep consistent coverage.
Maintaining consistent stitch tension to avoid puckering or loose stitches
Keep stitch tension steady by making each cross the same way every time. Start with the same diagonal direction so rows line up neatly. If stitches feel tight, loosen slightly on the next ones. If they feel loose, take up a bit more thread. Small adjustments prevent puckering and produce smooth fabric drape.
Ergonomic tips: lighting, sitting position, and avoiding strain
Work in natural light when possible. Use an adjustable task lamp or a clip-on light for evening sessions to cut eye strain. Sit upright with shoulders relaxed and forearms supported. A lap stand or table mount helps keep your project at eye level.
Take short breaks every 30–45 minutes. Stretch fingers, wrists, neck, and shoulders to reduce repetitive strain. Adopt ergonomic stitching routines to stay comfortable and improve your cross stitch techniques over time.
Basic stitches every beginner should master
Start with a few reliable stitches and you will see steady progress. Mastering the foundation will cut down on common cross stitch mistakes and make your finished pieces look crisp. Below you will find clear steps and tips to build confidence with full cross stitch, backstitching techniques, French knots, and simple finishes for tidy backs.
Full cross stitch: direction and consistency
Full cross stitch is the backbone of most patterns. Make the first diagonal from the lower-left to the upper-right, then complete the X with the return diagonal. Keep that return direction consistent across your work for a smooth surface.
Work all first diagonals across a row when you can, then come back to finish the opposing diagonals. This method reduces twisting and avoids forcing stitches to share holes, a frequent cause of cross stitch mistakes.
Half-stitches and outlining
Half-stitches are useful for shading and soft edges. They take less thread and speed up areas meant to look subtle. Place them with the same diagonal direction used for your full crosses so the texture reads clearly.
Use backstitching techniques to define shapes and add crisp lines. Stitch around motifs after the crosses are complete. Choose a single direction for your backstitches and keep tension even to avoid puckering.
French knots and tiny details
French knots add dots and texture for eyes, flower centers, or accents. Keep your thread short and wrap the needle one or two times. Hold the wraps while you pass the needle back through the fabric to keep the knot snug and neat.
Keeping the back tidy and finishing tips
Short thread lengths reduce tangles and messy backs. Secure tails by weaving the needle under a few existing stitches instead of tying knots. This method lowers bulk and sits flat when framed.
Before you finish, check for loose threads and trim ends close after securing. Practice consistent stitch direction, tidy thread paths, and short lengths to prevent common cross stitch mistakes when mounting or framing your work.
- Tip: If a row feels uneven, check stitch direction first. Correcting direction early saves time.
- Tip: Practice French knots on spare Aida to learn tension control.
- Tip: Use the same backstitching techniques for outlines on matching motifs to keep style uniform.
Starting a new project: preparing fabric, finding the center, and starting rows
Before you start stitching, iron your Aida gently to remove wrinkles. Lay it flat and fold it twice to find the center. Make sure this point matches the chart arrows or center marks on your pattern.

Mark the center lightly with a water‑soluble pen or a removable thread. Place your hoop so the center is near the middle. Tighten it, and re‑tighten as you stitch to keep the fabric even.
Start stitches without knots by leaving a two‑inch tail on the back. Stitch over it with your first rows. Use the loop method only with even numbers of strands. Carry the tail under the first few crosses to secure it.
Choose between row stitching or block stitching before starting. Row stitching looks tidy and keeps stitch direction consistent. It might need more color changes. Block stitching reduces thread changes and suits large areas of the same color.
Use simple habits to avoid mistakes: count twice before stitching, grid your fabric lightly, and check your pattern legend. If you find an error, remove only the affected stitches. This saves time and keeps your fabric intact.
When switching between row stitching and block work, hide thread tails and match your stitch direction. Use a highlighter or a sticky note to track your progress. These steps make your project smoother and more enjoyable.
| Task | Quick Tip | Why it helps |
|---|---|---|
| Finding center | Fold fabric, align with chart arrows | Keeps motif centered, avoids offset errors |
| Hoop and tension | Tighten, recheck every 20–30 minutes | Prevents puckering and uneven stitches |
| Starting stitches | Leave a 2″ tail and stitch over it | Secures thread without knots |
| Row stitching | Work consistent diagonals, then return | Creates uniform appearance across rows |
| Block stitching | Complete color areas before moving on | Reduces thread changes and speeds progress |
| Avoiding mistakes | Grid fabric, count twice, use pattern legend | Minimizes miscounts and rework |
Color changes, organization, and cross stitch gridding strategies
Begin with a clear plan to keep your work neat and efficient. Small habits can save a lot of time and prevent mistakes. Use simple systems for thread, counting, and color placement to enjoy stitching more.
Efficient methods to switch colors and hide tails
When changing colors, secure tails by running the needle along the back. This traps the tail under nearby stitches. Match the tail color to the area next to it to reduce show-through on light fabrics.
Work in short thread lengths to avoid knots. Change hues only when necessary to limit waste. Use color-coded charts to visualize progress and plan color runs.
Gridding your fabric with temporary markers or threads to reduce counting errors
Gridding your fabric cuts down on counting mistakes. Use removable markers, erasable pens, or lightweight basting thread to mark 10×10 squares. Many charts already have 10×10 blocks; mirror those lines on your fabric.
Grid only as much as you need. Remove basting threads as you complete an area to keep the back tidy. If you prefer digital planning, map color zones in a spreadsheet to check coverage before you stitch.
Organizing floss, bobbins, and project bags to streamline work
Good floss organization speeds up your work. Wind DMC floss on labeled bobbins with the DMC number visible. Store related skeins in small project bags so each kit stays complete and protected.
Keep a short project journal with pattern notes, start and finish dates, and any color swaps. This log helps when you pause and return. Plan color usage in a spreadsheet to estimate how much of each shade you need for a tidy finish.
| Task | Recommended Method | Why it helps |
|---|---|---|
| Color transitions | Run tail under back stitches; match tail color | Prevents show-through; secures thread without knots |
| Counting accuracy | 10×10 gridding with basting thread or marker | Reduces miscounts and saves time redoing areas |
| Floss storage | Labeled bobbins and project bags | Makes supplies easy to find and protects skeins |
| Thread length | Use shorter lengths; finish before switching shades | Less tangling and reduced floss waste |
| Project planning | Spreadsheet for color placement and inventory | Helps estimate floss needs and visualizes progress |
Apply these cross stitch tips to build a workflow that fits your style. Small steps in cross stitch organization and careful cross stitch gridding will keep your projects tidy and reduce frustrations with color changes and loose tails.
Working with patterns, kits, and creating your own designs
Starting a new project can feel overwhelming. You have a choice between ready-made cross stitch kits and building a pattern from scratch. Kits give you everything in one box: pattern, Aida, needles, and DMC floss. This removes guesswork so you can focus on stitching and learning techniques.
Benefits of beginner-friendly kits
Kits are designed to match skill level and project size. You get a clear legend, DMC color codes, and yardage estimates. This clarity reduces mistakes and speeds up progress. Kits also introduce you to common materials so you know what to buy later for independent projects.
Where to find free and paid patterns
You can find free cross stitch patterns from reputable sources like DMC, LoveCrafts, and The Spruce Crafts. Hobbycraft and Etsy host many paid patterns from independent designers. Use Pic2Pat or Photo-stitch services if you want to convert photos into charts. Look for patterns with a clear grid, readable legend, and DMC codes to ensure quality.
How to evaluate pattern quality
A good pattern shows center marks, grid lines, and a full symbol key. Check for consistent symbol contrast and clear backstitch instructions. If a designer provides floss yardage and stitch counts, you will avoid running out of thread mid-project. Community reviews help identify reliable shops and designers.
Using tools to make custom motifs
You can make simple designs with cross stitch design tools or a basic spreadsheet. Set square cells and use fill colors to map stitches. Spreadsheets let you tweak spacing, lettering, and motifs quickly. For photographic projects, Pic2Pat produces workable charts you can refine by hand.
When to choose paid patterns or kits
Complex images and multi-page charts often work better as paid patterns or full kits. These come with tested color blends and clear instructions. If you are experimenting with custom messages or unusual fonts, draft them in a spreadsheet first before committing to fabric.
Community support and next steps
Join forums and social groups to get feedback on patterns and sellers. Other stitchers can recommend reliable sources and suggest cross stitch ideas for seasonal gifts or home décor. Use community feedback to refine your use of cross stitch design tools and to select the best kits for your skill level.
Finishing, framing, and display ideas for completed cross stitch projects
Once your cross stitch is done, a few steps can turn it into a wearable gift or art for your wall. First, think about how you want to show it off. This will help you choose the right mounting, backing fabric, and cleaning method.
Hoop finishing vs traditional framing
Hoop finishing is easy and keeps your project looking handmade. Just tighten your fabric in a hoop, trim the edges, and sew or glue the tail to keep it in place. You can add a ribbon or small hanger for hanging.
For a more polished look, try traditional framing. Stretch your piece over foam or mounting board, use a backing fabric, and consider professional framing for glass and matting.
Washing, pressing, and preparing pieces
Before cleaning, wash your hands and test if the colors will stay. Most cross stitch can be washed in cool water with mild soap. Gently swish it, don’t wring, and rinse until the water is clear.
Let your piece dry flat on a towel to keep its shape. Iron on the back with a cloth and low heat to protect the floss. Use steam only if the colors are stable.
Backing choices and mounting techniques
Choose a backing fabric that matches your design and protects the stitches. Muslin and lightweight cotton are good choices. For more support, mount on acid-free board and cover the back with fabric or tape.
For hoop finishing, secure the edges with running stitches or hot glue. For framed pieces, use lacing or professional stretching to keep it tight and prevent sagging.
Creative display ideas
Use dissolvable Aida to sew designs onto clothes, towels, or bags. Tack the Aida in place, stitch through both layers, then rinse away the Aida to leave just the embroidery.
Make pillows, patches, or personalized gifts from your cross stitch. Create a hoop gallery of small motifs, mount seasonal pieces on wooden boards, or add stitched trims to clothes for a personal touch.
These finishing steps turn your cross stitch into a treasured item. They protect your work and show off your skill.
Conclusion
Cross stitch is a fun and rewarding craft. It uses basic tools like Aida fabric, a hoop, and DMC floss. By mastering techniques like stitch direction and tension, your work will look better and have fewer mistakes.
Begin with kits and quality materials. Then, try different fabrics and colors as you get better. Keep track of your progress in a journal. Use tools like Pic2Pat or spreadsheets to plan your designs.
Join stitcher communities for inspiration and support. Add good habits like ergonomics and breaks to your routine. Whether you’re doing small projects or creating custom pieces, needlework will make learning fun and help you grow.