Cross stitch charts are like tiny maps. Each symbol tells you which color thread to use and what stitch to make. Learning to decode these symbols helps you avoid mistakes.
Symbols represent floss colors, stitch types, and special techniques. The legend or key shows which symbol matches which DMC or other floss numbers. Always check the pattern’s legend before starting.
Designers choose symbols randomly, so the same mark can mean different colors. Organizing your floss by symbol makes stitching easier. Use a pencil to mark the chart and track your progress.
Learning basic terms like Aida, evenweave, count, and floss helps beginners. Start with simple patterns and use these tips to build confidence. This way, you’ll fix fewer errors and enjoy stitching more.
Key Takeaways
- Symbols are a visual code mapping every stitch to color and technique in counted cross stitch.
- Always consult the pattern legend; symbols are not universal across designers.
- Organize and label DMC floss by symbol before you begin to avoid confusion.
- Use highlighting and pencil marks to track progress and prevent cross stitch mistakes.
- Beginners should pick simple patterns and practice basic stitches to build confidence.
Why Cross Stitch Symbols Matter: Purpose and Practical Meaning
When you start a pattern, symbols guide your every move. They tell you which color to pick, the stitch to use, and when to switch techniques. Clear symbols keep your work tidy and prevent confusion when similar colors are next to each other.
What symbols mean on a pattern: simple marks carry big information. A full cross looks like an X or a filled square. Half-stitches are shown as slashes like / or \. Fractional stitches use ¼, ¾ or small triangles.
Backstitch lines are solid or dashed lines, sometimes ending in a dot. French knots are small bullet points. Blended floss has its own multi-colored box with a symbol inside.
How symbols help you read the legend and match DMC floss numbers: the legend pairs each symbol with a brand and number, often DMC floss. This key lists color names and any special stitch notes. Trusting the legend helps you avoid color mistakes and follow the designer’s vision for texture and tone.
Symbol-driven efficiency: preventing mistakes and saving time. Marking finished areas with a highlighter or pencil helps track progress. Parking threads and organizing bobbins in legend order cuts down re-threading. Tape a copy of the legend to your work area so you don’t keep flipping pages.
Practical tips to reduce errors: label your bobbins with the symbol that matches the floss number. Use a daylight lamp or magnifier to read small charts. Pre-sort DMC floss in numerical or symbol order to speed stitching sessions. These habits lower the chance of cross stitch mistakes and keep the project moving.
| Symbol Type | Typical Mark | What It Means | Why It Helps You |
|---|---|---|---|
| Full Cross | X or filled square | Standard stitch using full strands of floss | Provides solid color fields and clear coverage |
| Half & Fractional | /, \, ¼, ¾, triangle | Partial stitches for curves and detail | Improves shape and detail with less bulk |
| Backstitch | Solid/dashed line, dotted ends | Outline or detail line; follow backstitching techniques | Adds definition and refines edges |
| French Knot | • | Small raised knot for eyes or dots | Delivers texture and small focal points |
| Blended Floss | Multi-colored box with symbol | Two or more threads combined in one stitch | Creates subtle shading and unique tones |
| Legend Mapping | Key/table | Matches symbol to brand and number (e.g., DMC floss) | Prevents color-swapping mistakes and confusion |
Common Cross Stitch Symbols and What They Mean
When you start with cross stitch patterns, you’ll see a few basic symbols. An X or a filled square means a full stitch over two threads. Slashes like / or \ show a half stitch, which helps with quick shading.
Quarter and three-quarter shapes, like ¼ or ¾, are for fractional stitches. They fit into corners or curve around shapes. Dotted or solid lines are for backstitch outlines and fine details.
A French knot, shown as •, adds tiny raised dots, eyes, or texture. Designers use multi-coloured boxes or symbols to show blended colours. This means using two strands of different DMC numbers together.
Some designers use letters or numbers instead of graphics. This makes charts cleaner and easier to follow. Charts can have many similar marks, so check them carefully before stitching.
Modern patterns may include start and end dots on outlines. This helps when you join long runs of stitching. Knowing about full stitches, half stitch, and fractional stitches helps you read patterns faster.
Terms like confetti and parking explain how to handle motifs and long threads. This keeps your work neat and efficient. If one symbol can match different DMC numbers, check the legend for the right floss.
How to Read a Pattern Legend: Step-by-Step for Beginners
First, find the legend on your chart. It’s usually at the side or bottom. The legend shows what each symbol means, like a floss number or stitch type. Learning this helps you feel more confident in your stitching.

Locating the legend and interpreting symbol-to-floss mappings
Look for a grid of symbols next to numbers like DMC 310. Each row shows the symbol, the DMC floss number, and sometimes a color name. Mark your chart and legend before threading your needle to avoid color mix-ups.
When a legend lists two numbers together, it means blending two strands. Write notes on your pattern to remember which symbols use blends.
Understanding special notations: fractional stitches, blended floss, and beads
Fractional stitches have tiny icons for orientation. Triangles or slashes show quarter and three-quarter placements. Practice these on scrap fabric to see how they work on detailed areas.
Blending is shown as paired DMC floss numbers or a notation like “blended.” Keep these pairs together on a thread card. Beads and specialty supplies have size and color notes. Add beads after main cross-stitch blocks to avoid snagging.
Tips for using the legend while stitching counted cross stitch
Tape a copy of the legend near your hoop for quick reference. Highlight or shade symbols on the chart as you finish areas to prevent repeats. Park threads at the edge of your work to reduce re-threading when symbols are close together.
Double-check adjacent symbols before stitching a run of the same color to avoid confetti and misplacement. Small habits like these save time and keep your projects tidy.
Symbols That Indicate Stitch Techniques: Backstitching Techniques and Knots
Chart legends use simple marks to tell you which cross stitch techniques to use. Solid, dashed, or dotted lines usually mean backstitching techniques for outlines and fine details. Dots at line ends can show where to start or stop a backstitch so your edges stay neat.
You will do backstitching after completing full crosses to define shapes, add text, or create thin lines. The legend often notes whether to use a single strand or multiple strands. Pay attention to strand count and stitch direction to keep lines smooth and even.
A French knot symbol often appears as a filled dot and signals raised texture for eyes, flower centers, or small highlights. The legend should specify thread type and number of wraps. Practice on scrap fabric to get consistent tension and avoid loose or overly tight knots.
Beads and textured stitches are listed separately in many legends. They are usually stitched after the main work and include bead color and finish. Following exact floss numbers and bead listings helps you match texture and color across the project.
Good lighting and a sharp needle make precise backstitching and knots easier. Try railroading for flat, professional-looking lines when using multiple strands. Test French knot wraps and fractional stitches before working on your main piece to prevent surprises.
Keep a small key or sticky note of the most-used symbols at your hoop. That quick reference saves time and reduces errors while you follow cross stitch techniques. Use these cross stitch tips to refine your process and protect the delicate textures that make needlework secrets visible in the finished piece.
Tools and Hacks to Decode Symbols Faster: Embroidery Hacks and Organization
Reading tiny symbols gets easier with the right tools and habits. Start by improving visibility and comfort. This way, your eyes and hands work well together without getting tired.
Use a daylight lamp and an adjustable magnifier to make symbols clear on both pattern and fabric. Good lighting cuts down on mistakes and speeds up counting. A needle minder keeps your needle in sight and saves time when you pause to read a busy chart.
Choosing the right frame and tension is key. Q-Snap frames and split-hoop systems keep fabric flat. This makes symbols line up across stitches, helping you match grid marks and avoid mistakes in detailed areas.
Cross stitch tools that simplify symbol-reading
Choose a daylight lamp with adjustable color temperature to match printed charts. Clip-on magnifiers with hands-free mounts are great for long sessions. A magnetic needle minder by DMC or Tulip keeps needles handy and prevents accidental pricks.
Organizing DMC floss and labelling for faster workflow
Pre-wind DMC floss on plastic bobbins or floss cards and label each. Keep bobbins in order to avoid re-threading often.
Store often-used colors on a floss ring, and less-used shades in boxes. Label boxes with symbol and DMC floss number. This way, you can quickly find the right thread without checking the legend.
Gridding, highlighting, and marking charts to avoid confusion
Match cross stitch gridding on fabric to the printed chart using a 10×10 water-soluble pen or temporary thread. This visual grid helps you find symbols quickly and reduces backtracking.
Highlight completed areas on printed charts as you go. For busy sections, mark problem spots and consider using multiple needles. Keep a small taped copy of the legend near your workspace for quick reference.
| Problem | Tool or Hack | Why it Helps |
|---|---|---|
| Tiny, hard-to-read symbols | Daylight lamp + adjustable magnifier | Improves contrast and clarity to speed symbol recognition |
| Lost or dropped needles | Magnetic needle minder | Keeps needles on your fabric or hoop so you don’t pause to search |
| Frequent floss changes | Pre-wound DMC floss bobbins and floss rings | Reduces re-threading and keeps legend order at hand |
| Counting errors on large pieces | Cross stitch gridding with water-soluble pen or thread | Creates a visible 10×10 guide to align pattern and fabric |
| Confetti stitching and many color jumps | Parking method or multiple needles | Minimizes time lost switching colors and prevents tangles |
| Keeping track of progress | Highlighters, pencil marks, taped legend | Helps you quickly spot completed areas and planned next steps |
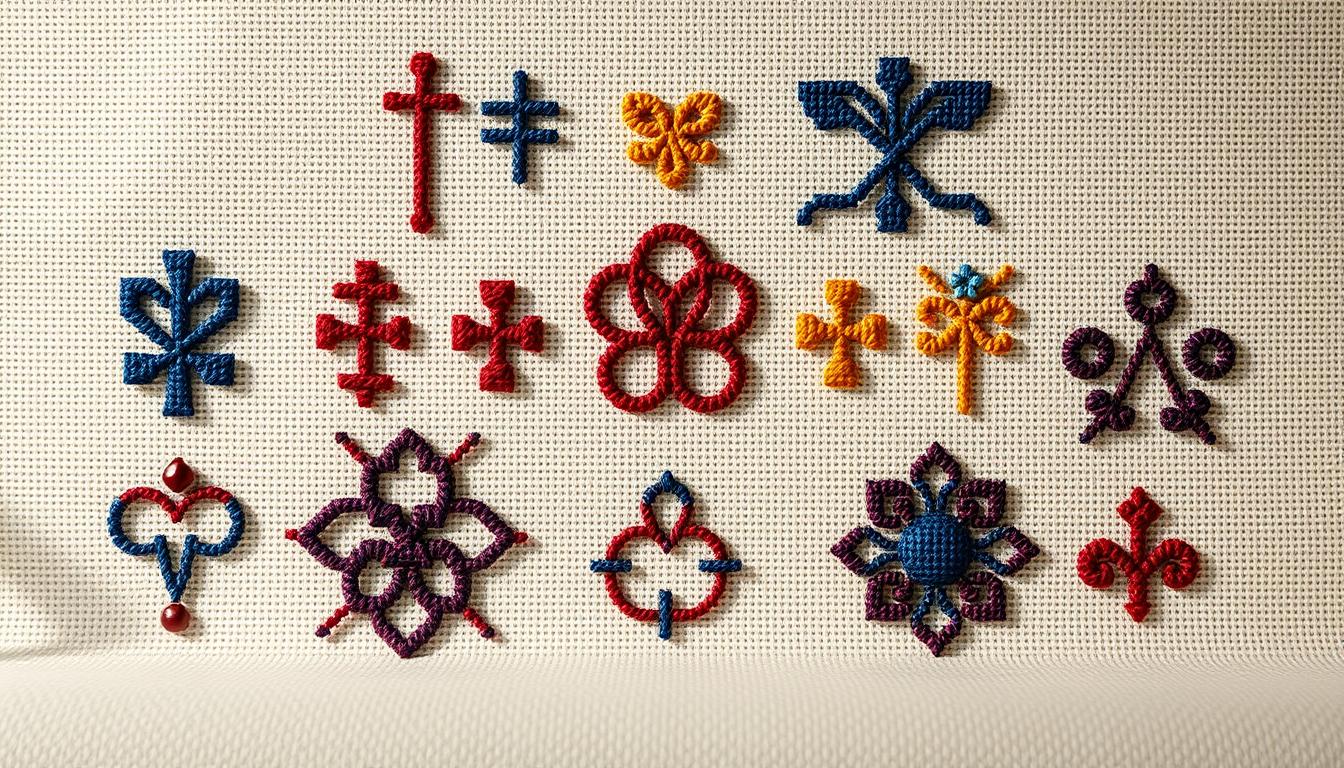
CROSS STITCH Patterns: Why Designers Use Different Symbol Sets

When you start a new pattern, you might notice the symbols first. They can vary a lot, from tiny pictures to letters or shapes. The goal is to make it easier for you to stitch without mistakes.
Designers choose symbols based on the chart size. Small charts need simple symbols that don’t get mixed up. Big kits can use more detailed icons because they have more space.
For patterns with many colors, designers pick symbols that are easy to tell apart. This helps your eyes stay focused during long stitching sessions. It also helps with techniques like blending colors or using partial stitches.
Switching between patterns can be hard because each uses different symbols. Always check the legend before starting to stitch. This ensures you understand the symbols correctly.
For publishers, choosing symbols is also important. They consider magazine layouts, print quality, and digital app needs. Designers aim to make symbols clear and unique, especially when colors are complex.
When buying a kit, look at the sample chart or legend. Choose patterns with symbols that you find easy to read. If you prefer clear symbols, look for patterns with color boxes or large, spaced-out marks. For detailed designs, compact symbols can save space without making it hard to read.
| Design Factor | Typical Symbol Set | Effect on Pattern Readability | What It Means for Your Technique |
|---|---|---|---|
| Large, full-color kit | Color-filled boxes, simple icons | High readability, quick scanning | Works well with mixed cross stitch techniques and blended floss |
| Compact chart for magazine | Letters, small geometric marks | Moderate readability; may need magnifier | Requires careful counting and attention to fractional stitches |
| Complex palette with many shadings | Highly distinct, custom pictograms | Improved clarity despite many symbols | Reduces color mistakes during advanced techniques |
| Digital pattern app | Vector icons optimized for zoom | Readable at multiple scales | Allows toggling layers for specialty stitches and backstitch guides |
| Indie designer style | Unique artistic symbols | Variable readability; depends on legend design | May require time to learn symbol sets before stitching |
Beginner Cross Stitch Tips to Avoid Symbol-Related Mistakes
Starting a new project can feel like deciphering a secret code. Choose patterns with a small color palette and mostly full crosses. Brands like DMC and Dimensions offer kits with printed legends and labeled floss, making it easier for beginners.
Choosing beginner-friendly projects
Look for projects with clear grids and simple designs. Opt for charts with fewer symbol types and lots of the same color. This reduces mistakes in confetti areas.
Common symbol mistakes and how to correct them
Misreading symbols and using the wrong color in confetti areas are common errors. Always check the legend before stitching a new symbol. Use good lighting and a magnifier to keep symbols clear. Highlighting completed squares helps you stay on track.
Safe frog ripping techniques
If you need to rip out stitches, do it slowly with a seam ripper or small scissors. Cut a stitch in the middle and pull threads towards the knot line to avoid fraying. Practice ripping on scrap fabric to build speed and confidence.
Practice exercises to build skill
Start with small charts to practice finding the legend and matching DMC floss. Try short drills focusing on fractional stitches and half or quarter crosses. Use scrap fabric to practice French knots and backstitching, improving your tension and placement.
Tools and habits that save time
Label bobbins with symbol marks and store floss by number. Lightly grid your fabric and highlight symbols on a printed chart as you complete them. These habits help you make steady progress and reduce errors.
| Task | Why it helps | Quick tool |
|---|---|---|
| Choose small palette patterns | Fewer symbols reduce confusion in confetti areas | Beginner-friendly kits from DMC |
| Highlight completed squares | Keeps your place and prevents mistaken stitches | Highlighter or erasable marker |
| Practice ripping on scrap | Builds confidence in frog ripping without harming projects | Seam ripper and small scissors |
| Drills for fractional stitches | Improves accuracy for half, quarter, and three-quarter stitches | Small chart with fractions marked |
| Label bobbins with symbol | Makes matching symbol to floss faster during stitching | Bobbins, labels, and permanent pen |
Creative Ways to Use Symbol Meaning in Your Projects and Cross Stitch Ideas
Symbols on a chart can guide more than color placement. They can turn small marks into creative choices. These choices shape mood, texture, and presentation. Use motifs and color meaning to turn a simple pattern into a project with purpose.
Start by picking motifs with emotional weight. A heart, leaf, or anchor reads at a glance. It can anchor embroidery inspiration for a gift or a personal piece. Choose calming palettes—soft blues, muted greens, warm neutrals—when you intend cross stitch therapy.
Those color choices influence how the stitching feels while you work. Smaller motifs keep sessions short and meditative. Larger motifs invite longer practice and deeper relaxation.
Reassigning symbols lets you create fresh cross stitch projects from familiar charts. Swap DMC shades tied to a single symbol to explore new palettes. Try floss blends by stitching two strands of different colors together for subtle gradients.
Always update your legend when customizing patterns. Test altered floss blends on scrap fabric so you can judge texture and color fidelity before committing.
Mix in specialty stitches tied to symbol cues to change surface texture. Use backstitching for definition, French knots for raised points, and fractional stitches for smooth curves. These choices affect the final hand of the fabric.
Heavier embellishments may need deeper cross stitch frames or spacers to avoid squashing beads and knots. Plan framing options early so your finishing matches stitch density and embellishment height.
Careful finishing preserves your work. Follow DMC floss care guidelines when washing and pressing. Air-dry stitched pieces flat to maintain shape. If beads or knots are present, consider matting or a shadow box to protect them.
Proper framing choices let your design read as intended and keep texture intact for years of display.
Use the small reference table below to compare quick approaches for different goals when you pick symbols and techniques.
| Goal | Symbol-driven Choice | Stitch/Floss Tip | Framing Options |
|---|---|---|---|
| Soothing, meditative piece | Simple motifs, soft symbols for color areas | Two-strand floss blends in muted DMC shades | Flat frame with single mat to reduce glare |
| Textured focal point | Symbols indicating beads, knots, or specialty stitches | Add French knots and backstitch outlines for pop | Deep frame or shadow box to protect embellishments |
| Gift with personal meaning | Iconic motifs with color symbolism | Test customized floss blends on scrap first | Traditional frame with protective glazing |
| Practice and skill building | Reassign symbols to try new colors and techniques | Label updated legend and try fractional stitches | Simple hoop display or low-cost frame for study |
Conclusion
Learning cross stitch symbols and the pattern legend changes how you stitch. Knowing what each symbol means helps you avoid mistakes, work faster, and get cleaner results. This knowledge makes more complex stitches seem less scary.
Start by choosing a simple cross stitch pattern with fewer symbols. Sort your DMC floss by the legend and label each thread clearly. Use tools like a daylight lamp, magnifier, and needle minder to reduce eye strain and keep your work smooth.
Practice fractional stitches and knots on scrap fabric. Add small exercises to your routine. Always check the pattern legend because different designers use different symbols. This habit helps prevent many mistakes.
Keep reading charts, labeling floss, and stitching short projects to get better at symbol decoding. With regular practice, your confidence in cross stitch will grow. This will open the door to more complex designs and new projects.