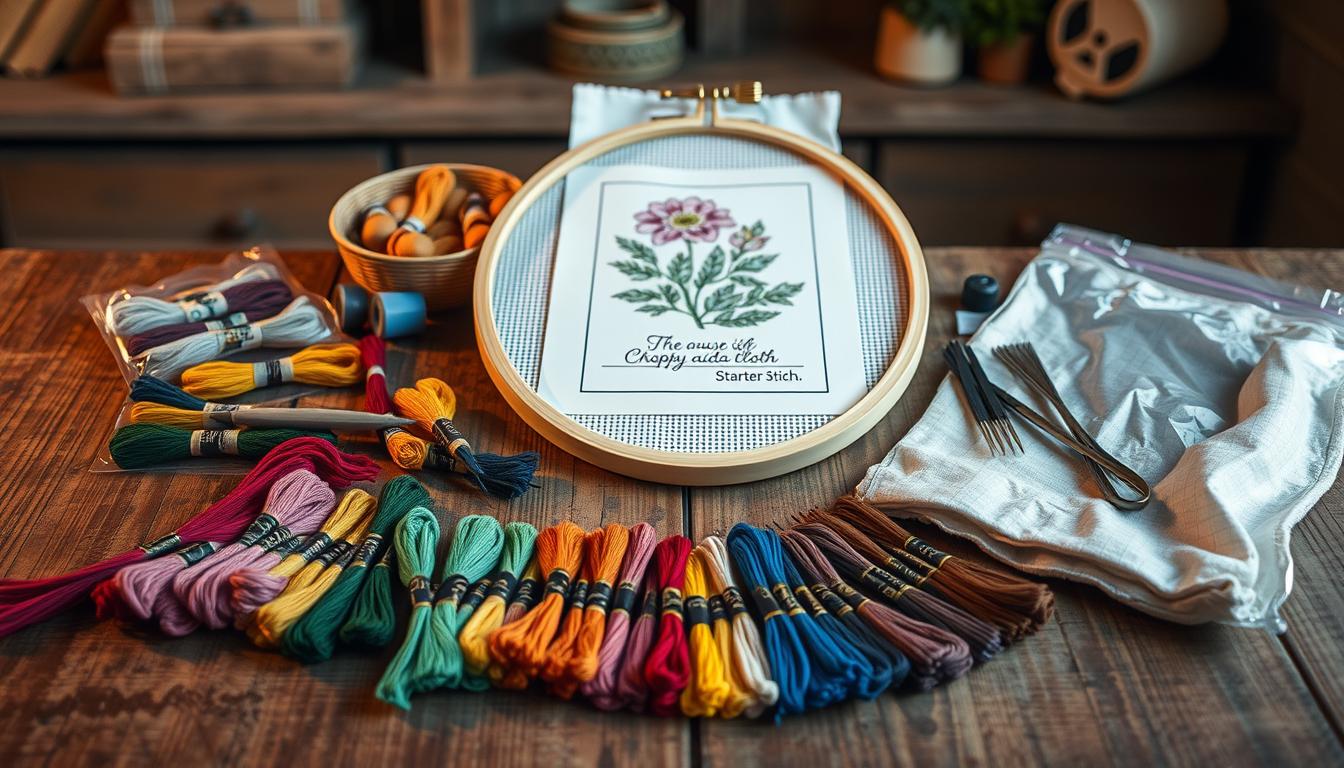
Starting CROSS STITCH is easy with the right kit. A good starter kit has pre-cut Aida fabric, embroidery floss, tapestry needles, and a clear chart. This makes it easy to follow along without worrying about fabric count or thread colors.
Beginners should start with small projects, like 6×6 to 8×10 inches. Kits can be counted or stamped, making it easier to place designs. Many kits also come with an embroidery hoop and QR codes for video tutorials, which is great for learning.
You don’t need a lot of tools to start. The basics include fabric, stranded cotton, needles, a hoop, scissors, and a pattern. Look for brands like Zweigart for fabric and DMC for floss. They offer reliable quality for your first projects.
Good tools make stitching more fun and less tiring. Start with a solid kit and learn the basics. Then, add ergonomic lighting and accessories as you get better. These upgrades will help you stitch longer and more comfortably.
Key Takeaways
- A complete cross stitch starter kit should include Aida fabric, DMC floss, tapestry needle(s), and a clear pattern.
- Choose beginner cross stitch projects sized around 6×6 to 8×10 inches to stay motivated.
- Counted kits use blank fabric and a chart; stamped kits print the design on fabric for easier stitching.
- Start with core tools: fabric, thread, needles, hoop, scissors, and a simple pattern.
- Invest in trusted brands like Zweigart and DMC and add lighting or ergonomic tools as you progress.
Why Start Cross Stitch and How a Starter Kit Helps
Starting cross stitch can be a calming, creative way to relax after a long day. Many find it helps lower stress and improve focus. Plus, you get to create something beautiful to share or keep for yourself.
Starter kits make it easier to get started by providing everything you need. They include fabric, threads, and needles, along with clear instructions. This means you can focus on learning stitches without worrying about what materials to buy.
Benefits of cross stitch as a hobby
Cross stitch helps improve concentration and provides a creative outlet. It also enhances fine motor skills and color planning. The repetitive motion of stitching can calm your mind.
As you complete projects, you build confidence. Small achievements, like finishing a simple design, encourage you to tackle bigger ones. Many find it a great way to take a mindful break in their busy lives.
How a complete starter kit removes guesswork for beginners
Complete kits include everything you need, from fabric to needles, so you don’t have to guess what to buy. Look for kits labeled as beginner-friendly. They use simple stitches and patterns to help you learn.
These kits come with clear instructions and a labeled floss card. This saves time and money by avoiding mistakes in material selection. Working with consistent materials helps you develop the skills needed for neat stitches.
Counted cross stitch vs stamped cross stitch: which is best to start with?
Counted cross stitch uses a blank grid and a chart to guide you. It’s the traditional method and great for beginners. It teaches you to read patterns and place stitches accurately.
Stamped cross stitch has the design printed on the fabric, making it easier to start. However, it may use finer fabric, which can be challenging for beginners. Some kits use this method for a simpler start.
If you want to learn pattern reading and build skills, start with counted cross stitch. For a quicker start with a visual guide, try stamped cross stitch. Many kits tell you which method they use, helping you choose the right one for you.
What Essentials Your Starter Kit Must Include
Start with a clear list of basics to avoid wasting time and money. Your starter kit should have the right cross stitch fabric, reliable thread, the right needles, and a readable pattern. These items help you learn needlework secrets faster and set you up for success.
Fabric: why Aida (14 count) is ideal and options for Evenweave/linen
Aida is a favorite for beginners because its woven grid makes counting easy. A 14-count Aida has a clear hole pattern that matches most beginner cross stitch patterns. This makes it easier to see each square, reducing mistakes and building confidence.
If you prefer a smoother look, choose Evenweave or linen. Remember, Evenweave stitches over two threads, so a 28-count Evenweave is the same size as Aida 14 count. Brands like Zweigart and DMC offer quality cloth; Zweigart often has an orange selvedge for quick ID.
Embroidery floss: DMC floss and why thread quality matters
Good floss makes your project look crisp and prevents color shifts. DMC floss is an industry standard because it’s consistent and labeled with color numbers that match charts. DMC also offers specialty lines like Étoile and Variations for sparkle or subtle shading.
Avoid cheap floss that frays, knots, or varies in dye lot. Pre-sorted, labeled skeins save time and reduce frustration. If your kit includes DMC floss, you can trust color accuracy and reliable coverage.
Needles: tapestry needle sizes and selecting the right one
Choose blunt tapestry needles so they slide between threads without splitting fibers. Size matters: size 24 works well for 14-count Aida and 28-count Evenweave. Pick size 26 for 16-count Aida and size 28 for 18-count fabric. Milward and similar brands are dependable choices.
Bring a small pack of assorted sizes in your kit so you can adjust for different fabrics. A needle with a generous eye makes threading multiple strands of DMC floss easier.
Pattern/chart and clear instructions for beginner cross stitch patterns
Look for charts with a clear legend that maps symbols to thread numbers. High-contrast printing, distinct symbols, and quality paper improve readability when you stitch for long periods. Beginner kits should include step-by-step diagrams and a simple stitch guide.
Helpful extras include written tips on starting and finishing threads and QR codes that link to video tutorials. A chart that matches the included DMC floss and lists fabric recommendations completes the kit.
Cross Stitch Tools That Make Stitching Easier
Choosing the right tools makes stitching more fun and less tiring. A few essential cross stitch tools can speed up your work, protect your fabric, and keep your colors organized. Here, you’ll find comparisons and tips to pick the best tools for your projects.

Hoops, snap frames, and scroll frames manage tension differently. Wooden hoops are warm and gentle on fabric. Q-Snaps keep tight and stay in place during travel. Scroll frames are great for large projects because you roll the fabric instead of refitting it often. Choose a frame that fits your project size and stitching style.
Needle minders use magnets to keep needles safe when you set your work down. They prevent lost needles and add a fun touch. A grime guard is a simple elastic strip that protects fabric from oils and dirt. Needlebooks store spare needles neatly and are portable for classes or meetups.
Sharp, precise scissors are key for neat ends and clean backstitching. Embroidery stork scissors are a favorite for their accuracy. Add a scissor fob to find your scissors quickly, and use a sheath to protect the tips. Thread keepers, whether wooden cards or small labeled baggies, prevent tangles and make color changes faster.
Good cross stitch lighting reduces mistakes and fatigue. Choose a daylight-spectrum lamp aimed at your work to reveal true colors. Magnifiers help with fine-count fabrics or dark backgrounds. For long sessions, consider cross stitch stands or a lap or floor stand in solid wood to free your hands and ease posture.
Below is a comparison to help you decide which tools suit your needs based on project size, portability, and care requirements.
| Tool | Best for | Pros | Cons |
|---|---|---|---|
| Wooden Hoops | Small to medium projects | Comfortable grip, gentle on fabric, classic look | May loosen over long sessions, can mark fabric if overtightened |
| Q-Snaps | Portable work, tight tension needs | Holds tension well, lightweight, easy to snap on/off | Off-brand versions may loosen; square frame limits rotation |
| Scroll Frames | Large projects and long-term pieces | Rolls fabric to expose only working area, stable tension | Bulkier to store and less portable |
| Needle Minders | Any project where you set needles down | Prevents lost needles, decorative options available | Rare risk of weak magnet on heavier needles |
| Grime Guard | Heirloom or unwashable fabrics | Protects from hand oils and dirt, inexpensive | Must fit snugly to stay effective |
| Needlebooks | Travel and storage | Keeps needles organized, compact | Limited capacity for large needle collections |
| Embroidery Scissors & Fobs | Precision cutting and tool tracking | Sharp cuts, fobs prevent loss, protective sheaths available | Small size means easy to misplace without a fob |
| Thread Keepers / Floss Boards | Small or large color counts | Prevents tangles, speeds thread changes, labels help | Wooden cards limit color capacity; boards require space |
| Cross Stitch Lighting & Magnifiers | Finer counts, dark fabrics, long sessions | Reduces eye strain, reveals true colors, improves accuracy | Quality lamps can be an investment; magnifiers add weight |
| Cross Stitch Stands | Hands-free stitching, large projects | Improves posture, frees both hands, steady surface | Take floor space, initial setup can feel bulky |
Cross Stitch Organization and Project Prep
When you start a new kit, take a few minutes to check everything. Look at the fabric, floss, needle, chart, and extras against the list. Put each kit in a project bag or clear box to keep things together.
Gridding your fabric and marking the chart can help avoid mistakes. Use a washable marker or basting thread for a grid on Aida. For charts, mark stitches with a pencil to erase and reuse.
How to unbox and inventory your kit
Sort items into piles: fabric, pattern, needles, floss. Match DMC numbers on the floss to the legend. Put small items and spare needles in a tiny pouch.
Gridding, marking your chart, and using a pencil or removable marker
Use a temporary grid before starting. A washable fabric pen is good for fine grids. Baste lines for a grid that comes out easily. Keep a pencil with your chart to mark areas as you finish them.
Floss organization: bobbins, baggies, and floss boards
Wind floss onto bobbins and label them. Group similar shades in small bags or a box. Use floss boards to keep lengths untangled and visible.
Project bags and portable setups for stitching on the go
Choose project bags with clear windows for easy viewing. Pack a travel kit with a small hoop, scissors, needle minder, and bobbins. Include your current chart, fabric, and a travel light if needed.
CROSS STITCH Techniques to Learn First
Start with a few focused skills to make your projects look polished. Good cross stitch stitches begin with consistent tension and stitch direction. When each full cross follows the same path, the fabric stays flat and the color reads smoothly.
Practice making neat full crosses by bringing the needle up at the bottom-left, down at the top-right, up at the bottom-right, and down at the top-left. Keep each pass the same tightness. This habit changes the texture of your finished piece and reduces puckering.
Backstitching techniques give outlines and small details sharpness. Read the chart legend to know which lines use one strand or two. Use a slightly looser tension for backstitch lines so they sit on top of the crosses without pulling the fabric.
Learn clean ways to start and finish threads without knots. Weave short tails under the backs of nearby stitches on the wrong side. That method keeps your work tidy and lowers bulk. When threads feel stubborn, use a needle threader or a drop of Thread Heaven as a simple embroidery hacks trick.
Railroading and laying tools help make every stitch Instagram-worthy. Separate the two plies of floss and lay them around the needle as you bring it through the fabric. A small laying tool or a smooth pin helps keep plies parallel before you complete the second half of the cross.
Below is a quick reference to compare these core skills and simple cross stitch tips you can try during your next session.
| Skill | Why it matters | Quick tip |
|---|---|---|
| Full cross stitches | Creates even coverage and a smooth surface | Keep stitch direction consistent and steady tension |
| Backstitching techniques | Defines shapes and adds fine details | Follow chart symbols and use correct strand count |
| Starting and finishing threads | Produces a neat backside and reduces bulk | Weave tails under existing stitches; avoid knots |
| Railroading and laying | Makes stitches lie flat and look uniform | Separate plies, use a laying tool, and smooth before closing |
| Embroidery hacks | Speed, neatness, and easier threading | Try thread conditioner, needle threaders, and pinning tools |
| Cross stitch tips | Small habits that improve every project | Consistent tension, tidy thread starts, and regular breaks for your eyes |
Common Beginner Cross Stitch Mistakes and How to Avoid Them
Starting out, you’ll face some challenges. Small habits can lead to big problems like mistakes or errors in charts. These tips help you spot issues early and keep your work neat.

Misreading the chart and losing your place
Charts can be overwhelming. Use a grid, highlight completed areas, or place a clear magnetic board under your pattern to mark rows. Start with patterns that show skill levels and simple color blocks.
Pulling stitches too tight and fabric puckering solutions
Pulling yarn too tight causes fabric puckering. Hold a relaxed tension and test a stitch on scrap Aida first. A hoop or Q-Snap keeps the fabric flat while you work.
If puckering appears after you finish, steam lightly or block the piece if the materials allow. Handle gently to avoid distorting stitches.
Thread fraying, tangling, and how to handle poor-quality floss
Poor floss leads to fraying and knotting. Choose trusted brands like DMC for smooth strands and consistent dye lots. Separate strands before threading and use Thread Magic or beeswax to tame fuzz.
Trim split ends and replace damaged lengths rather than forcing them through fabric holes. Clean scissors and a small lint roller help clear tiny fibers.
Frogging safely: using thread picks and seam rippers without damaging fabric
When removing stitches, take your time. Cut threads close to the fabric with sharp scissors or use a seam ripper to free dense areas. Avoid yanking; tugging can widen Aida holes.
Work from the back when possible, lift threads gently with a pick, and clear loose bits with adhesive or a lint roller to keep the cloth tidy.
| Problem | Cause | Quick Fix | Prevention |
|---|---|---|---|
| Cross stitch chart errors | Misreading symbols or color keys | Double-check key before starting | Use grid overlay and mark progress |
| Fabric puckering | Tight tension or uneven hooping | Relax tension; re-hoop if needed | Practice consistent tension on scrap fabric |
| Thread fraying | Poor-quality floss or rough handling | Trim frayed ends; use conditioner | Buy DMC or other reputable brands |
| Frogging damage | Pulling threads through holes | Cut close and remove gently | Use proper tools: picks, sharp scissors, seam ripper |
| Losing place | Busy patterns and no marking system | Use highlighter or magnetic marker | Work in small, numbered sections |
Choosing the Right First Project and Pattern Ideas
Start with a project that’s easy but still teaches you something. Small samplers, short quotes, tiny florals, and simple shapes are great for beginners. They help you practice different stitches and color changes.
Seasonal motifs like Christmas ornaments or Easter bunnies are also good choices. They give you a sense of accomplishment and keep you motivated.
Begin with a project size of 6×6 to 8×10 inches. This size is easy to handle and makes finishing your project feel rewarding. Stick to three to five colors to keep things simple. A well-planned color scheme helps you stay focused and makes progress faster.
Look for patterns labeled as beginner-friendly. Cross Stitch Crazy, Cross Stitcher, and The World of Cross Stitching often have these. Etsy is also a great place to find unique patterns from indie designers. Local needlework stores let you see the materials up close.
When choosing where to buy your kits, consider the support and quality. Brands like DMC, Zweigart, Milward, and Elbesee are trusted. Online shops with good customer service or local stores with expert advice are good choices. A cross stitch subscription can also provide a steady flow of new projects and ideas.
Think about making gifts or seasonal items as you learn. Ornaments, tea towels, and small framed pieces are great for practicing finishing techniques. Doing short projects repeatedly helps you get faster and more confident. It also builds a collection of patterns you enjoy.
Helpful Extras and Embroidery Hacks to Level Up
Small tools and smart habits can make your stitching faster and keep your projects neat. Try some embroidery hacks to make hard techniques easy. The right extras protect threads, help with beading, and make dark fabrics easier to work on.
Thread conditioners, needle threaders, and thimbles
Use Thread Magic or a small beeswax bar to cut fuzz and make long strands slide through Aida. A light coat on metallics stops snagging and reduces fray.
Needle threaders save time with short or slippery floss. Thimbles protect your finger when weaving ends or pushing through layered fabric.
Waste or water-soluble canvas for stitching on garments
Want to stitch on shirts or denim? Waste canvas gives a stable grid you remove by dampening and pulling threads. Water-soluble canvas dissolves in water for a clean finish on delicate garments.
Both let you transfer counted designs to clothing without distorting the fabric. Test on a scrap to check hoop marks and wash behavior first.
Beading needles and supplies for projects with beads
For beadwork, use slim beading needles such as the Big Eye Beading Needles by Beadalon. Their narrow profile fits tiny seed beads and passes cleanly through stitches.
Pair beading needles with YLI invisible thread when you need near-invisible joins. The thread can be fussy, so work slowly and keep a magnifier handy.
Storage hacks, magnetic boards, and lightboxes for tricky fabrics
Good cross stitch storage keeps WIPs ready to pick up. Use floss boards, project bags with vinyl windows, and compact organizers to avoid tangles.
A magnetic board holds needle minders, patterns, and small tools where you can see them. A lightbox backlights dark fabrics so holes show clearly while you stitch.
| Extra | Why it helps | Recommended use |
|---|---|---|
| Thread conditioner | Reduces fuzz, eases sliding, prevents tangles | Long threads, metallics, large coverage areas |
| Waste / water-soluble canvas | Adds temporary grid for stitching on garments | Shirts, denim, uneven fabric |
| Beading needles | Fits tiny beads, passes through tight stitches | Embellished designs, bead borders |
| Magnetic board | Organizes tools, holds patterns and needle minders | Workstation setup, display during stitching |
| Lightbox | Backlights fabric holes, improves accuracy on dark cloth | Dark Aida, linen, evening stitching |
| Cross stitch storage | Keeps projects neat, prevents floss mix-ups | Multi-project organization, travel |
Conclusion
Start your CROSS STITCH journey with a beginner kit to avoid confusion. Choose 14-count Aida, DMC floss, and tapestry needles for a solid base. Begin with simple designs like samplers or small flowers to keep you excited.
As you get better, add tools that make stitching easier. Good hoops, frames, and proper lighting help a lot. A needle minder also protects your work. Keep your supplies organized with bobbins, baggies, and a project bag.
Mistakes are part of learning. Don’t worry about them. Practice reading charts, managing tension, and frogging. Work in good light and keep your stitches even. Use trusted brands like DMC and Zweigart for quality materials.
With time, patience, and the right kit, your stitching will improve. Enjoy the small victories and keep practicing. Your hobby will be both fun and calming.