Choosing the wrong fabric count can turn a peaceful hobby into chaos. Fabric count affects stitch size, finished size, and pattern detail clarity. Swapping a 14-count Aida for 18-count or using a fine evenweave instead of a mid-range cloth can distort your design.
Before you start stitching, think like a developer. Gather data, test, and verify. Measure threads per inch, note your pattern’s stitch count, and consider DMC floss coverage. This way, you can avoid problems by checking the pattern’s recommended count and making a small swatch.
This article will guide you on how to avoid cross stitch mistakes and fix projects gone wrong. You’ll learn step-by-step checks, swatch testing methods, simple conversion math, and software aids. These tips will help keep your cross stitch projects neat and professional, whether you’re a beginner or tackling a detailed sampler.
Key Takeaways
- Fabric count directly affects stitch size and finished dimensions in CROSS STITCH.
- Collect data first: pattern stitch count, fabric threads per inch, and floss coverage.
- Make a test swatch and grid the fabric to spot cross stitch mistakes early.
- Use conversion math and software to adapt patterns without losing detail.
- Mid-range counts are often best for cross stitch for beginners to avoid overcrowding or blur.
Why fabric count matters for counted cross stitch and embroidery projects
Choosing the right fabric count is key to your cross stitch’s look and stitching ease. It connects the design chart to your finished piece. If you pick the wrong count, your stitches might not match the pattern’s size or detail. Before starting, make sure your pattern, fabric, floss, and tools match.
What “fabric count” actually means
Fabric count shows the threads or squares per inch. For Aida, count the squares you see. So, 14-count Aida has 14 stitches per inch. For linen and evenweave, count the threads in both directions. Linen’s weave is irregular, so adjust slightly when stitching.
How fabric count affects stitch size, finished dimensions, and detail
The size of your finished piece depends on the count. For example, a 140-stitch wide pattern on 14-count Aida becomes 10 inches wide. Switch to 18-count, and it shrinks to 7.8 inches. Choose a count that fits your design’s detail and framing plan.
Lower counts like 11–14 make stitches larger and pieces bigger. They’re great for beginners and easy to see from afar. Higher counts, like 28 or 32, allow for finer details. These are needed for small motifs and detailed shading, requiring magnifiers and finer tools.
Differences between evenweave, Aida, linen and how they relate to fabric count
Aida has clear, square cells for easy counting. It’s best for 11–18 counts. Evenweave has equal thread counts in both directions, making it predictable for stitches and threads. Linen has a natural, textured look but counts threads with slight variations.
Thread choice affects count. For example, two strands of DMC on 14-count Aida works well. On 28-count evenweave, one strand over two threads might be better. Mismatched strands can cause holes or overfull stitches. Always test a small swatch when changing fabric or count.
| Fabric Type | How Count Is Measured | Typical Counts | Best Uses |
|---|---|---|---|
| Aida | Squares per inch (visible grid) | 11, 14, 16, 18 | Beginners, bold charts, easy counting |
| Evenweave | Threads per inch (equal warp and weft) | 25, 28, 32 (worked over two threads) | Fractional stitches, detailed shading, reproduction work |
| Linen | Threads per inch (irregular weave) | 28, 32, 36 | Textured finishes, traditional samplers, heirloom work |
Measure twice, think like an engineer. Get precise stitch counts, decide on the size, test floss, and choose the right fabric and tools. These steps help avoid surprises and let your cross stitch shine.
Common chaos: How the wrong count wrecks your cross stitch patterns
Choosing the wrong fabric count can turn a peaceful cross stitch project into chaos. Before starting, check how the pattern and fabric will work together. Think of the pattern as a blueprint and the fabric as the grid that scales it.
First, look at the finished size. A design made for 18-count on 14-count fabric will be about 29% larger. This can mess up your plans for framing and mats, and affect where motifs and appliques go.
Small patterns and detailed shading need high fabric counts to stay sharp. On counts like 11–14, details blend and the image gets fuzzy. You might want to change thread colors, but too many on high counts make stitches bulge, and too few on low counts look sparse.
High-count fabrics also have their challenges. Big motifs and filled blocks can feel too tight. Backstitch outlines meant to be bold might look thin. Small details and blended threads can be hard to work with or disappear.
Many mistakes happen when the fabric count is wrong, only discovered after hours of work. Make a quick mock-up to check for problems early. This way, you can fix issues before they get worse.
For beginners, the wrong fabric count makes learning harder. Start with a mid-range Aida to avoid size issues. If problems arise, you can adjust by changing thread counts, adding borders, or re-centering motifs instead of starting over.
Practical cross stitch tips to identify the right fabric count before you start
Choosing the right fabric count saves time and keeps your project looking great. Always read the designer’s notes first. They often suggest specific counts and strand numbers.
Many patterns give options like 14-count Aida with 2 strands or 28-count evenweave with 1 strand. These details help you keep the finished size the same, even if you change fabric types.
Make a small test swatch before you start. Stitch a 20×20 or a key motif with the exact DMC floss and strand count you plan to use. Measure the area to find stitches per inch.
Check how the stitches cover, blend colors, and shade up close and from afar. This step is crucial.
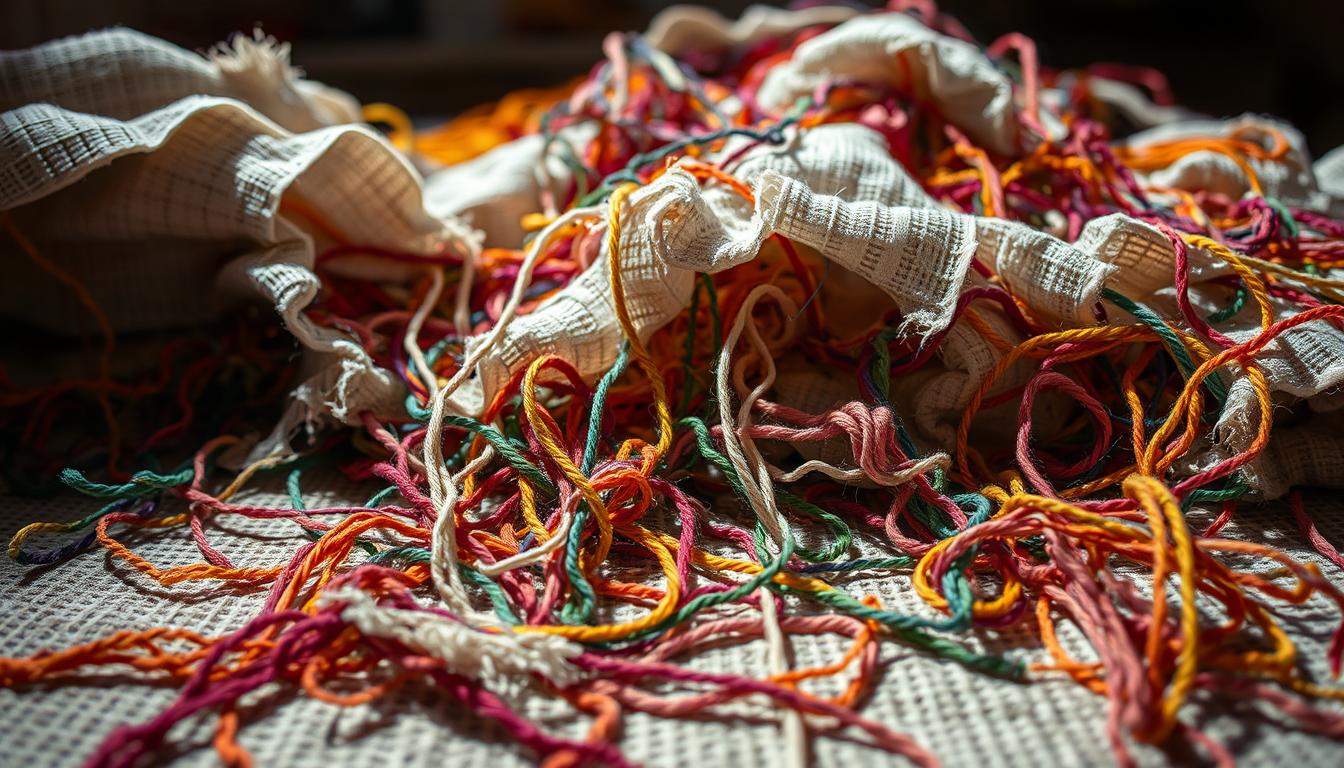
Label each swatch with fabric type, count, needle size, and strand number. Keep them in a swatch book for future use. This habit improves your organization and saves time.
Use cross stitch gridding to see how the full piece will look. You can baste a grid with thread, mark with a water-soluble pen, or use software like Pattern Keeper. A quick phone photo or a magnifier shows if fine details work at the chosen count.
Get the right tools before starting. Use thread organizers, labeled bobbins for DMC floss, a good needle selection, and a reliable frame or hoop. These tools make counting easier and reduce mistakes when testing different counts.
If a pattern offers alternatives, do the math. Stitching over two fabric threads on evenweave halves the visual stitch size compared to Aida of the same count. Use your swatch measurements to adjust strand counts for the right coverage.
Keep a quick checklist for each new project. Include recommended counts, tested swatch results, chosen thread count, and any grid or marking method used. Clear notes make it easy to replicate results later and improve your cross stitch organization with each project.
How the wrong fabric count affects stitching techniques and backstitching techniques
When you add details like outlining, fabric count can really change how your work looks. The choice of thread, needle, and stitch type affects the look of backstitching and cross stitch techniques.
On low-count Aida, a single-strand backstitch can look too thick and take over the design. But on high-count evenweave, the same line might be almost invisible. You can adjust the thread count to fit the fabric; use two strands on 14–18 count and one strand on 28–32 where it’s clearer.
If the backstitch is too bold, try using a stem stitch or a narrow outline stitch. This change keeps your lines sharp without hiding your shading or texture.
Fractional stitches and blended threads
Fractional stitches are useful on mid to high counts for curves and small angles. But they’re hard to use on very low counts because the weave doesn’t support them well. On the other hand, very high counts might make quarter stitches unnecessary; full crosses can show enough detail.
Blended threads, like mixing two DMC shades, create smooth gradients and avoid harsh lines. Use them for portraits, florals, or soft backgrounds. But avoid blending on small projects where it can make tension uneven. Always test blends on a swatch first.
Adjusting tension and needle size
The right needle depends on the threads per inch. Size 24 tapestry needles work well for common 14–18 Aida. For 28–32 evenweave, use smaller needles to go through the finer weave without tearing. Test different needle sizes on scraps to find the best one.
Tension is key on high-count fabrics; stitches should be light to avoid distortion. On low-count fabric, keep a slightly firmer tension to keep shapes and prevent puffing. You can adjust the number of strands to balance coverage and weave compression.
| Fabric Count | Recommended Needle | Backstitch Strand Count | When to Use Fractionals/Blends |
|---|---|---|---|
| 14–18 Aida | 24 tapestry needle | 1–2 strands | Fractionals only for tight curves; blends useful for gradients |
| 20–25 evenweave | 26 tapestry needle | 1–1.5 strands (use judgment) | Fractionals helpful; blends smooth color transitions |
| 28–32 evenweave/linen | 28–30 tapestry needle | 1 strand | Fractionals often unnecessary; blends for subtle shading |
| Low-count specialty fabric | 22–24 tapestry needle | 2–3 strands | Avoid fractional stitches; blends can add unwanted bulk |
Think of needle, tension, and stitch choice like tuning a graphics pipeline. Choose matching components and tweak parameters to avoid visual artifacts. This approach helps you achieve predictable results and keeps cross stitch therapy enjoyable.
Impact on cross stitch for beginners and beginner cross stitch projects
When you start, you want to win quickly to feel confident. Mid-range Aida, like 14-count or 16-count, has clear holes and easy-to-read grids. This makes your stitching size just right, and your tools and materials will match well.
Choosing mid-range Aida reduces frustration and speeds up learning. The visible weave makes it easier to place stitches and backstitch lines. This is crucial for beginners who want to progress smoothly in their projects.
Why beginners should often start with mid-range Aida counts
14-count Aida fits most standard needles and 2-strand floss guidelines. You can see each hole clearly without a magnifier. This clarity makes counting faster and practice sessions more rewarding.
16-count Aida offers a finer finish while keeping stitches easy to handle. Both counts let you test ideas without getting stuck in tiny, error-prone work.
Common cross stitch mistakes novices make with fabric count
Misreading a pattern’s recommended count is a big mistake. Using the wrong count changes the finished size and can blur details.
Beginners often skip making a swatch and gridding. This can lead to mismatched sizes or lost motifs when trimming. Another common error is using the wrong number of strands, making stitches too thin or too thick.
Not leaving enough fabric for finishing is another practical mistake. You might plan a hoop or frame but find there’s no extra fabric for mounting.
Simple embroidery hacks to rescue a beginner project gone wrong
If you catch a fabric count issue early, adjust the strand counts. Reduce strands for a lighter stitch on low-count fabric. Add strands for better coverage on higher-count cloth.
Change the backstitch strand count to sharpen outlines. A single-stranded backstitch works well on 14-count, while two or three strands pop on larger counts.
To fix size issues, add a decorative border or mat. A wide fabric border can turn an oversized motif into a beautiful pillow top or wall hanging.
Basting and re-centering the motif saves alignment mistakes. For small errors, repurpose the piece into smaller projects like bookmarks or ornaments.
Keep a simple project notebook to avoid repeat errors. Note fabric count, DMC numbers, needle size, and stitch counts. Logging these details mirrors engineering best practices and prevents recurring cross stitch mistakes across future projects.
CROSS STITCH: adapting patterns, scaling designs, and conversion tips
Changing fabric or resizing a motif in counted cross stitch requires a clear plan. Start with a simple plan, choose the right tools, and test before starting a full project. This process involves math, visual decisions, and practical swatches.

How to convert a pattern from one count to another without losing composition
Use the basic formula: new finished size = (stitch count ÷ new fabric count). For example, a 140-stitch-wide design on 14-count yields 10 inches. Move that same stitch count to 28-count and stitch over two threads to match the 10-inch visual size. If you change counts without adjusting stitches, expect shifts in finished dimensions and layout.
Compute a target fabric count that keeps finished size acceptable. If you can’t match the count, reduce or increase stitches per motif proportionally. Sketch critical motifs on graph paper and measure how many stitches each element needs to retain balance.
When to change stitch types for preservation of detail
Higher counts may require fractional stitches to preserve curves and subtle shapes. If you move from 14-count to 32-count, replace large full crosses with quarter and half stitches where needed to keep soft edges. Lower counts force simplification. Remove some tiny fractional details and use blended threads to imply shading instead.
Swap in backstitch to regain lost definition. Adding a few extra backstitch lines can clarify outlines and facial features. For busy areas, you can substitute backstitch for groups of tiny stitches to keep readability without crowding the fabric.
Using software and manual math for safe pattern resizing
Try cross stitch software such as PCStitch, WinStitch, or Pattern Keeper to preview conversions and test cross stitch scaling. These programs let you resample, change counts, and view how fractional stitches and backstitch will render at different sizes.
Work manually as well. Calculate pixels-per-inch by dividing stitch count by intended inches. Draw reduced motifs on graph paper and make small test swatches of problem areas. Treat conversion like refactoring code: run a small test, evaluate artifacts, and iterate until the visual outcome matches your intent.
Practical caveat: complex conversions often introduce visual artifacts. Expect to adapt shading, simplify tiny details, and tweak stitch choices. A single swatch can save hours of rework by revealing whether your pattern conversion and cross stitch techniques will hold up at the new scale.
Tools, organization, and setup to prevent fabric count chaos
Begin by setting up your workspace for focus. A clean area, good lighting, and a checklist can prevent errors. Keep your cross stitch tools and supplies close to avoid distractions.
Essential gear for steady stitching
Use tapestry needles in sizes 24–28 for Aida and evenweave. Choose blunt tips for Aida and sharp needles for linen. Wooden hoops and Q-Snap frames offer different tensions; pick what works best for your fabric.
For long projects, consider scroll frames or adjustable stands. They reduce wrist strain and keep tension even. Add a task light and magnifier for high-count work to protect your eyes and maintain stitch quality.
Practical cross stitch organization tips
Label fabric swatches with type, count, and dye lot before storing. Sort DMC floss by number on bobbins or in boxes. Tag each set with the project name.
Make a swatch book for needle size, number of strands, and tension notes. This helps reproduce results without guessing, mirroring professional asset tracking.
Gridding, marking, and using cross stitch frames
Grid your fabric in 10×10 blocks to reduce miscounts. Use water-soluble pens, basting thread, or pre-gridded Aida for quick accuracy. Secure fabric in frames to prevent distortion and counting errors.
When using a hoop or frame, ensure the weave is flat and grid lines are square to pattern symbols.
Checklist and preventive steps
Pre-wash fabrics when needed and add generous margins before cutting. Keep a checklist for fabric count, DMC floss numbers, needle size, and hoop choice before stitching. Mark your pattern start point and match it to the labeled swatch to avoid starting in the wrong place.
Troubleshooting and fixes when you already started on the wrong fabric count
Starting a project on the wrong fabric count can feel like a setback. But, you can fix most mistakes with calm, practical steps. Here are ways to test, decide, and repair without wasting hours or undoing work you want to keep.
Altering stitching approach mid-project: spacing and thread adjustments
If the design looks bulky on a low-count fabric, try reducing the number of strands. Use two strands instead of three to cut visual weight. On a high-count fabric where gaps show, add a strand or use a paired strand for denser coverage.
Change your fill method to affect texture and coverage. Switch to Continental or long stitches to cover more ground with fewer crosses. Thicken or thin backstitch lines to restore contrast and definition.
Always trial each change on a small, hidden area before applying it across the piece. This prevents compounding the problem and gives you confidence in the new approach.
When to frog unpick versus when to adapt and salvage
Use this rule of thumb: frog unpick if the motif is clearly mis-scaled or compositionally wrong. If the main subject is too large or small to sit well in the design, unpicking is often the cleanest fix.
Adapt when the issue is mostly cosmetic: slight size differences, spacing quirks, or minor color placement. If you’ve already invested many hours, and framing or added elements will mask the issue, choose salvage to preserve effort.
Practical cross stitch salvage options: re-centering, re-scaling, and adding borders or backgrounds
Re-center a motif by repositioning the fabric in the hoop and extending plain stitches or small filler motifs around the edge. That creates breathing space without touching the original work.
Add decorative borders, mats, or appliqué fabric to change the perceived size and balance. Background fills or embroidered trims work as support points that tie the composition together.
For extreme mismatches, repurpose the stitched portion into smaller items. Cut and finish into coasters, ornaments, bookmarks, or mixed-media panels. Those cross stitch ideas turn an error into a new product.
Think of salvage like mesh editing: add sections and support points. Extra borders act as new sections. Strategic backstitches and trims serve as support points that realign the visual structure.
| Problem | Quick Fix | When to Frog Unpick | Salvage Options |
|---|---|---|---|
| Bulky look on low-count fabric | Reduce strand count; use Continental stitches | If motif loses proportions | Thin backstitch, add narrow border |
| Gaps on high-count fabric | Increase strands; use paired strands for fill | If detail becomes unreadable | Background fill, decorative trims |
| Motif off-center | Reposition fabric in hoop; add plain stitches | If placement ruins composition | Re-center, add mats or appliqué |
| Scale mismatch | Adjust framing or add border to balance size | If scale destroys subject relationship | Re-scale with added zones or create smaller items |
| Lost outline or definition | Thicken backstitch or change thread type | If lines cannot be recovered | Strategic backstitching, trims, or mixed-media accents |
Use simple embroidery hacks to test changes quickly. Keep notes of which strand counts and stitch styles you tried. That record makes future cross stitch fixes faster and sharpens your eye for fabric choices.
Creative workarounds and embroidery inspiration after a fabric count mistake
Turn a fabric count slip into a fresh project with a little imagination. View the error as a design constraint. This mindset opens up embroidery inspiration and new cross stitch ideas without wasting your stitches.

When a motif ends up too large, add a wide fabric border. Finish it as a decorative pillow or cushion cover. A tiny motif becomes striking in a deep mat and small frame. These simple pivots create polished results from imperfect starts.
Try mixed-media solutions to hide or celebrate the mismatch. Appliqué the stitched piece onto a linen tote, sew it into a quilt block, or mount it on canvas and add paint or fabric collage. Combining textiles with beads and paint expands your options and sparks fresh cross stitch ideas.
You can use bold backstitching techniques to sharpen lost edges and improve readability. Swap DMC stranded cotton for perle cotton or metallic thread in outlines to produce strong contrast. Vary strand counts to make lines thicker or finer and guide the eye around the design.
Trims and surface stitches work well to reframe a piece. Add lace, ribbon, or a couching row to create a new margin. Beads or French knots near the perimeter can distract from scale issues while adding texture and polish.
Repurpose finished panels into useful items when size is off. Options include pincushions, coasters, eyeglass cases, tea cozies, ornaments, and greeting cards. Small pieces make charming appliqués on tote bags or pockets. These choices salvage effort and create functional art.
Think of mistakes as part of cross stitch therapy. Working through a redesign reduces frustration and keeps you stitching. Keep swatches and notes so future projects benefit from the lesson, like version control for craft projects.
Below are quick, actionable ideas you can try:
- Oversized sampler → pillow with coordinated border and piping.
- Too-small motif → framed mini with dramatic mat and painted backing.
- Lost detail → heavy backstitching techniques with metallic or perle cotton.
- Mismatched panel → mixed-media tote or quilt block with appliqué.
- Finished fragment → ornaments, coasters, or greeting cards.
These approaches keep your work useful and inspiring. Treat each miscount as a prompt for creative exploration and new cross stitch ideas rather than a setback.
Conclusion
Fabric count is key in counted cross stitch. It determines the finished size and detail level. It also decides which techniques are best.
Before starting, check the pattern’s recommended count. Make a small swatch with the DMC floss and fabric count. Then, grid the fabric to see how the design will look. These steps help avoid surprises and keep your project on track.
If you make a mistake, consider the cost of fixing it. You might adjust spacing or change backstitching. Adding borders or trims can also save your work without undoing hours.
Use software or simple math to convert counts when needed. Keep fabrics and labels organized. This makes sure everything matches your plan. Keeping things neat saves time.
Every project is like a small engineering task. Gather data, test with a swatch, and monitor your progress. Adjust tension or needle size as needed. Follow these tips for any project, from beginner to advanced.
With careful prep and creative fixes, you’ll keep your patience and enjoy stitching. These tips will help you through any project.