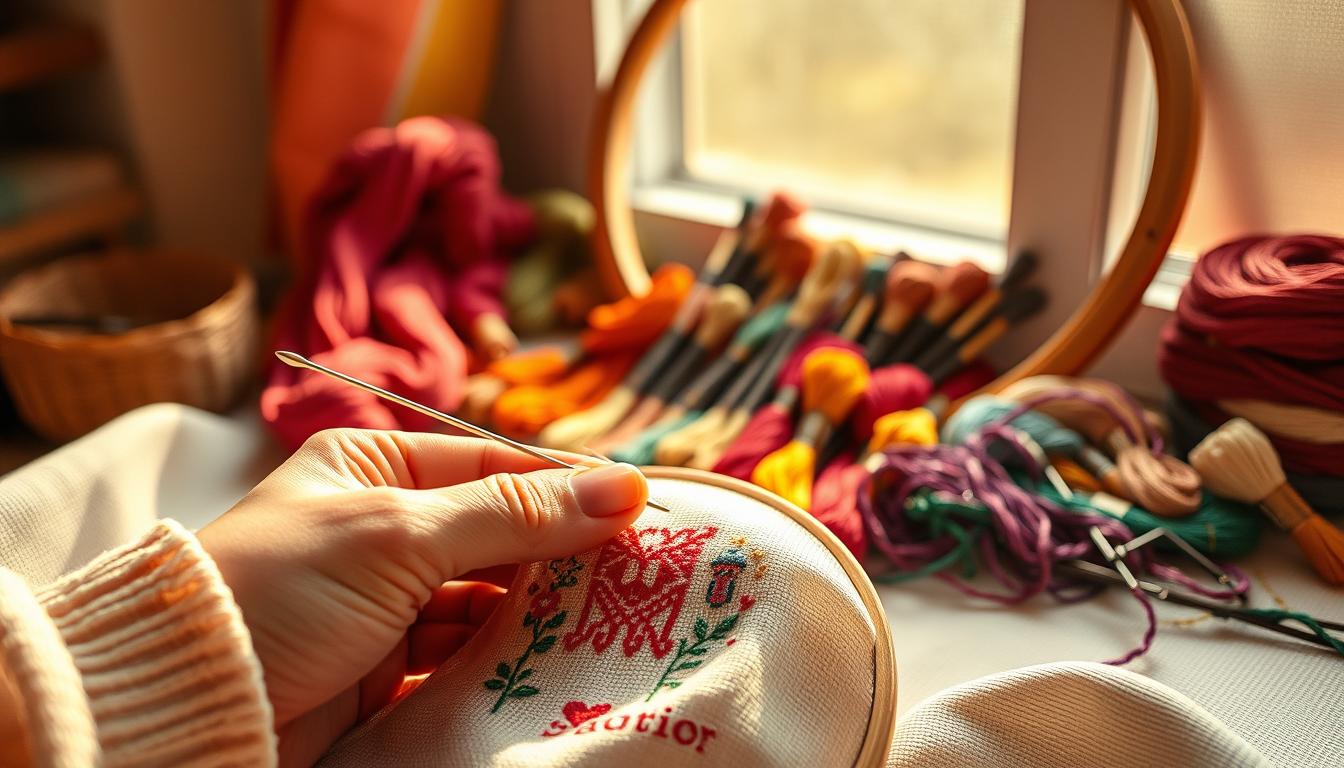
This classic method involves half- and full-cross stitches. It also includes a reliable anchoring step and strategic gridding. It’s been around for over a century but still works great with today’s tools like DMC floss organizers and modern embroidery hoops.
Using this 100-year-old trick in counted CROSS STITCH makes counting mistakes less common. It also helps keep thread tension steady, makes backstitch outlines cleaner, and reduces puckering.
This technique is great for anyone, whether you’re just starting out, working on improving your stitches, or aiming for the best finish. It’s not about tricks, but a practical way to work and manage thread. This makes repetitive stitching faster and more accurate.
In this article, you’ll find lots of cross stitch tips, techniques, and inspiration. We’ll explore where this method comes from and why it’s still better than shortcuts. You’ll learn the basics, how to do it step by step, and how to avoid common mistakes. We’ll also share helpful hacks, routines for beginners, project ideas, and advice on tools and joining the embroidery community.
Key Takeaways
- The trick uses a specific order of half- and full-stitches plus a secure anchoring method for tidy starts and ends.
- It reduces counting errors by combining strategic gridding with consistent stitch direction.
- You’ll get more even tension and less puckering when you follow the sequence.
- The method complements modern tools like DMC threads, needle minders, and quality hoops.
- This technique suits beginners through advanced stitchers and speeds repetitive work while improving finish quality.
What is the 100-Year-Old Stitching Trick and why it matters for cross stitch
The trick is a simple way to make counted work cleaner and faster. It was created because of poor lighting, coarse linen, and variable dyes. This made stitchers look for ways to cut down on mistakes and fabric wear.
The method’s roots go back to samplers and household linens in late 19th- and early 20th-century Europe and North America. Samplers were used in classrooms to teach girls about stitch order, tension control, and efficient sequences. These habits were passed down, becoming reliable routines in cross stitch history.
Origins and history of the technique
Samplers made stitch order standard and taught novices to count fabric threads accurately. Early stitchers preferred organized runs of identical stitches. This approach reduced rework and saved thread when dyes faded or threads frayed.
Household textiles and dress embellishments needed durability and repeatable results. So, consistent patterns emerged across regions. The technique evolved from the need to work accurately under imperfect conditions.
Why traditional methods still beat shortcuts
Traditional stitching enforces consistent stitch direction and even tension. This results in smooth surfaces and clear diagonals, favored by designers. Shortcuts may speed up progress but lead to twisted threads and uneven coverage.
These flaws make backstitch outlines hard to trace. You might save time at first but then spend more correcting mistakes. Sticking to traditional techniques reduces long-term rework and keeps your fabric flat, even on fine 28- or 32-count Aida and linen.
How this trick integrates with modern cross stitch tools
The trick works well with today’s essentials: DMC stranded cotton, blunt tapestry needles, Q-snap frames, and magnifiers. Using DMC floss with separated strands and maintaining tension ensures predictable coverage. Ergonomic needles reduce hand strain while keeping the stitch direction consistent.
Digital patterning apps and PDF gridding tools make planning easier. You can map color changes and grid lines before stitching. This complements the trick’s emphasis on order. Use modern hoops or frames to protect tension and follow cross stitch tips like consistent stitch direction and regular gridding checks.
CROSS STITCH basics you need before trying the trick
Before diving into the 100-year-old stitching trick, get familiar with the basics. Knowing the right tools and practicing with DMC floss will save you time and improve your work. Start with simple projects and test techniques on scraps before tackling a full piece.
Essential supplies
Choose DMC stranded cotton for its color consistency and wide availability. For Aida 14-count, split six strands to use two for most work. Store skeins on bobbins or floss cards to avoid tangles. Use blunt tapestry needles in sizes 24–26 to prevent snagging. Keep sharp scissors, a bright task light, and a magnifier handy.
Tools for comfort and accuracy
Use a Q-Snap or wooden hoop to hold your cross stitch fabric steady. Water-soluble pens and removable gridding tape help mark large patterns. Pattern holders or clips keep charts readable while you stitch. These tools cut frustration and speed up your progress.
What counted cross stitch means
Counted cross stitch follows a chart that tells you where each X-shaped stitch goes. You count fabric squares or threads rather than trace a design. This method keeps motifs precise and repeatable, unlike surface embroidery that draws lines on fabric.
Why the trick suits counted work
The trick improves uniform stitch direction and even filling, which is crucial in counted cross stitch. Consistent diagonal placement and tidy rows make large motifs look clean and professional. You’ll notice fewer gaps and neater blocks of color when you stitch methodically.
Picking the right fabric
Aida (11–18 count) is best for beginner cross stitch because squares are easy to count. Evenweave and linen suit experienced stitchers who want finer detail. Fabric count affects finished size: higher count gives smaller stitches and tighter detail.
Managing thread tension
Thread tension should be snug without pulling the weave. Too tight causes puckering. Too loose leaves gaps and uneven texture. After a few stitches, release the hoop to see if the fabric lies flat. If it distorts, ease your tension and retry.
Quick tests before you start
Stitch a small sampler on scrap cross stitch fabric to check how many strands to use and what tension looks best. Confirm that stitches sit uniformly and diagonals match. This brief rehearsal prevents costly errors on larger projects.
| Item | Recommendation | Why it matters |
|---|---|---|
| DMC floss | DMC stranded cotton, 2 strands for Aida 14 | Consistent color, easy splitting, wide availability |
| Needles | Tapestry needles size 24–26; embroidery needles for backstitch | Blunt tips prevent fabric snags; sharp eye for detail work |
| Fabric | Aida 11–18 for starters; evenweave/linen for detail | Count affects stitch size and finished design dimensions |
| Hoop/Frame | Q-Snap or wooden hoop | Keeps fabric taut and reduces distortion while stitching |
| Lighting & tools | Bright lamp, magnifier, sharp snips, water-soluble pen | Improves accuracy, reduces eye strain, makes gridding simple |
Step-by-step how-to: applying the trick to your next project
Begin with a clear plan and a tidy workspace. This guide will help you prepare your pattern, use cross stitch gridding, and execute uniform stitches. You’ll also learn how to add crisp outlines with backstitching techniques.
Preparing your pattern and cross stitch gridding
Start by finding the center of your cross stitch pattern. Lightly mark the fabric center with a removable pen. Make sure the pattern center aligns with the fabric center for precise placement.
Divide the fabric into 10×10 blocks to avoid counting mistakes and speed up your work. Use a washable marker, pre-marked Aida, or a plastic grid template. Digital apps with grid overlays can also help with precise placement.
Organize your DMC floss by symbol and number. Label your bobbins or small bags and create a color key for quick changes. Keeping your colors organized saves time and prevents mistakes.
Executing the stitch: posture, tension, and consistency
Work each block in the same order. Start with the lower diagonals, then move to the upper diagonals. This method ensures even coverage and avoids twisting.
Stick to one top stitch direction for the entire piece. Choose either bottom-left to top-right or bottom-right to top-left. This keeps the surface looking unified.
Keep your posture upright and shoulders relaxed. Use a stand or hoop to bring your work to eye level, avoiding hunching. A magnifier helps with small counts to reduce eye strain.
Regularly check your tension. Smooth the fabric, check stitch angles, and adjust strand separation if stitches are too bulky. Fixing small tension issues early prevents bigger problems later.
Finishing touches and backstitching techniques for crisp outlines
Do your backstitching after completing all crosses. Use one strand of DMC for fine lines or two strands for bolder outlines. Backstitch lines look better when the crosses beneath are consistent.
Secure thread ends by weaving under previous stitches or using tiny waste knots hidden on the back. Avoid visible knots on the front to keep your work clean and professional.
Apply these finishing tips: smooth the fabric, trim stray fibers, and step back to view your work. These steps enhance details and make lettering stand out.
| Step | Action | Why it helps |
|---|---|---|
| 1 | Find and mark centers of fabric and pattern | Ensures correct placement and reduces rework |
| 2 | Grid fabric in 10×10 blocks | Reduces miscounts, speeds stitching |
| 3 | Sort and label DMC floss by symbol/number | Saves time during color changes and maintains accuracy |
| 4 | Work consistent half-stitches across blocks, then finish crosses | Prevents twisting and creates uniform tension |
| 5 | Maintain upright posture and use a stand or hoop | Reduces fatigue and preserves stitch quality |
| 6 | Check tension and adjust strand separation | Keeps stitches even and prevents puckering |
| 7 | Backstitch after all crosses, use one strand for fine lines | Produces crisp outlines and clean lettering |
| 8 | Anchor ends by weaving under stitches | Secures threads invisibly and looks professional |
Common cross stitch mistakes this trick helps you avoid
Small habits can make a big difference in counted cross stitch. This trick helps you work steadily, reducing common mistakes and saving time. Here are some quick tips to follow while stitching.
Miscounting stitches and pattern errors
Gridding your fabric helps avoid miscounting by providing clear points of reference. Work one square at a time to catch mistakes early. This way, errors don’t spread over a large area.
Always double-check your counts. Use a contrasting thread or a removable marker to mark finished blocks. This method makes it easy to verify patterns as you stitch: rows and blocks naturally check themselves.
Uneven tension and puckering prevention
Keep your stitch direction consistent and finish paired half-stitches in order. This prevents uneven tension. A steady rhythm keeps your cross stitch even across the piece.
When crossing long floats, ease up on your grip. If the fabric weave is too loose, try a higher-count fabric. Use a Q-snap or stretcher bars to keep the fabric tight without over-tightening the hoop.
If you notice minor puckering after finishing, gently wash and block the piece flat. This relaxes the fibers and evens out small tension issues.
Thread fraying and color bleeding solutions
Thread fraying is caused by old floss, long lengths, or frequent needle rubbing. Use high-quality DMC floss and trim frayed ends before threading.
Keep each strand to about 18–24 inches. Short lengths reduce fraying and keep colors vibrant during long stitching sessions.
Test for color bleeding before starting. Pre-wash linens or stitch a swatch and wash it with a color catcher for delicate fabrics. Follow DMC care instructions when washing finished pieces to prevent color bleeding.
Embroidery hacks and needlework secrets that complement the trick
Small changes in your process can save time and keep your work neat. These embroidery hacks focus on organization, tension control, and simple tools. They help speed up repetitive stitching. Use them with the 100-year-old technique for cleaner results and less frustration.
Quick organization tips for floss and patterns
Label bobbins with DMC numbers and store them by project in a floss organizer box. Keep a tote with pre-sorted skeins so you never hunt mid-stitch. For printed charts, mark progress with highlighter tape or sticky notes to avoid miscounts.
Digital stitchers should try Pattern Keeper for Android or MacStitch alternatives to mark symbols. Use a binder with plastic sleeves for pattern pages to protect them and keep pages in order. These cross stitch organization moves cut setup time and reduce errors.
Frame and hoop choices to reduce distortion
Choose Q-snap or scroll frames for large pieces to spread tension evenly. Wooden hoops work for small projects but can dent fabric if overtightened. Pick a frame size that supports the whole working area rather than stretching a tiny patch.
Use waste canvas or fabric bands under hoops to cushion and prevent marks. Consider a Stitchette or Millenium stand for long sessions to preserve posture and steady tension. Proper cross stitch frames protect your fabric and keep stitches uniform.
Using simple tools to speed up repetitive sections
Keep a needle threader, Thread Heaven, and yarn needles close at hand. A laying tool helps with long floats and keeps threads tidy. Clip-on lights reduce eye strain during long blocks of color.
Use magnetic boards or highlighter tape to mark rows when filling repetitive blocks. A stitch counter or row marker saves time on large repeats. These cross stitch tools and cross stitch tips make repetitive work faster and less tiring.
How beginners can master the trick: cross stitch for beginners
Learning cross stitch can be fun and easy. Start with small projects and focus on rhythm, not speed. This way, you’ll build confidence and avoid common mistakes.

Begin with simple designs to get the hang of it. DMC or Dimensions kits and Etsy patterns are great for beginners. Look for patterns that are 50–100 stitches square, like small samplers or simple designs.
Beginning-friendly cross stitch patterns to practice on
Choose patterns with simple shapes that repeat. This helps you focus on stitch order and tension. Pre-gridded Aida kits make it easier to learn without worrying about pattern transfer.
Stepwise practice routines to build muscle memory
Start with short daily practice sessions of 10–20 minutes. Then, do a 30-minute session on a 10×10 block. Repeat the same motif several times to improve your sequence.
Try drills to improve your skills. Change threads between color blocks and practice clean starts and ends. When you’re steady, move to finer fabrics for more detailed work.
Common beginner pitfalls and how the trick prevents them
New stitchers often struggle with miscounts, uneven stitches, and messy starts. The trick helps by setting a predictable order and making counting easier.
Mistakes can be fixed. Use a stitch ripper or scissors to remove short sections and re-stitch. Working on small blocks helps limit the impact of mistakes.
| Problem | How it appears | Practice to fix it | How the trick helps |
|---|---|---|---|
| Miscounting | Pattern gaps, shifted motifs | Work 10×10 blocks and mark completed areas | Predictable stitch order creates easy checkpoints |
| Inconsistent stitch direction | Uneven surface, visible slant | Repeat single-direction rows for 10 minutes daily | Enforces the same final look for each cross |
| Uneven tension | Puckering or loose stitches | Practice on scrap Aida, tightening and releasing until even | Sequence reduces abrupt thread pulls that distort fabric |
| Sloppy thread starts/ends | Loose tails and knots on back | Practice neat anchoring techniques and short joins | Trick encourages small, repeatable anchors that hold securely |
Creative cross stitch ideas and projects using the trick
Start with small, quick projects to show off the trick. Ornaments around 40–80 stitches square are perfect for the holidays. Hoop art from 3 to 6 inches offers bold designs without a big time commitment. Mini samplers of 100–300 stitches are great for practicing lettering, making captions sharp.
Finishing touches make your pieces look professional. Use felt and ribbon hangers for ornaments. Insert designs into frames or shadow boxes for instant gifts. These steps help your cross stitch projects look ready for the store.
Personalized gifts benefit from neat stitches and even tension. Monogrammed towels, newborn name samplers, and pet portrait keychains are great for small projects. The trick helps keep initials clear and shading smooth in compact designs.
When giving gifts, show you care. Gently wash and block finished pieces. Place samplers in simple frames or sew them into small pillows. Include care instructions so the recipient knows how to keep the colors and texture bright.
Experiment with different techniques to explore new designs. Counted crosses for filled areas and backstitching for edges and details work well. French knots for eyes, straight stitches for stems, and tiny satin stitches for highlights add depth to your work.
The trick helps stitches sit flat and look professional. Try mixing 14- and 18-count fabrics in a coordinated display. Keep the same stitch discipline for a cohesive look.
Adapt classic motifs into smaller formats for gift tags, bookmarks, and ornament inserts. Use simple patterns to test color combinations before starting a bigger project.
Tools, materials, and organization for consistent results
Your workspace is key to success. Keep your cross stitch tools and materials close for more stitching and less searching. A clean kit helps you work faster and keeps DMC floss safe from tangles and dust.
Needle choices
For most Aida counts, use tapestry needles sizes 24–26. Size 28 is best for fine linen. Choose nickel-plated needles for smooth stitching. If you’re allergic to nickel, try gold-eye or gold-plated needles for comfort and durability.
Floss and small-item storage
Store DMC floss on printed bobbins with DMC numbers. Use stackable boxes for active projects. For travel, use zip pouches labeled by project to keep threads separate. Add color swatch cards to quickly match hues without searching through skeins.
Long-term care
For finished pieces, use acid-free envelopes or plastic containers to prevent yellowing. Add silica gel packets to control humidity in storage totes. Keep works-in-progress in clear boxes so you can easily see what you need.
Frames, hoops, and tension
Choose Q-snap frames, scroll frames, or lap frames to keep fabric flat and tension even. These frames reduce distortion and make stitching consistent. Protect framed work with dust bags or reversible frames for easy cleaning.
Securing fabric
Avoid overtightening to prevent stretching. Use fabric tape on raw edges to stop fraying. Rotate your frame or hoop periodically to even out wear and prevent groove lines in the fabric.
Pattern prep and labeling
Print a color chart legend and tape it inside a project folder for reference. Highlight completed symbols with a simple check system. For large palettes, group colors into sections and label bobbins by symbol and DMC number to cut down on mistakes.
Project checklist
- Fabric cut size and waste allowance
- All DMC floss colors with bobbin labels
- Needles, hoop or frame, and fabric tape
- Backing, finishing supplies, and storage container
Follow these steps to protect your materials and keep your projects moving. Good cross stitch organization makes every stitch more enjoyable and reduces surprises mid-project.
The therapeutic and community benefits of mastering the trick
Learning a reliable stitching method changes everything. It moves from frustration to a smooth flow. The repetitive motions and focus create a calm state, reducing stress and improving concentration.
As you practice, your fine motor skills and hand-eye coordination improve. This is especially true with small cross stitch projects.

How stitching improves focus and reduces stress
Studies show that focused needlework calms the mind. It involves tasks that need attention but are low-demand. Mastering a trick reduces mistakes and saves time, making it more calming.
Stitching also boosts physical skills. It strengthens dexterity and coordination. These improvements make starting cross stitch feel less scary and more fulfilling.
Sharing progress: social media, stitch groups, and inspiration
Sharing your work builds connections. Sites like Instagram and Pinterest offer embroidery inspiration. Facebook groups and Reddit’s r/CrossStitch are great places to share and get help.
Use hashtags like #crossstitch to find patterns and join stitch-alongs. Joining SALs keeps you motivated and helps you finish projects.
Teaching the trick to others: workshops and cross stitch therapy
You can teach beginners at Michaels, community centers, libraries, or online. A good lesson includes a demo, practice samplers, and materials for students.
Needlework is used in therapy for elders and mental health. Group sessions help build social ties and offer cognitive and emotional benefits. Teaching your method boosts confidence, grows the community, and helps others practice at home.
Conclusion
The 100-year-old stitching trick is a simple yet powerful technique. It makes your CROSS STITCH look and feel better. It ensures your stitches go in the same direction, helps you keep the right tension, and reduces mistakes.
For beginners, start by getting the right supplies. You’ll need DMC floss, tapestry needles, and the right fabric. Try it on a small project first to get the hang of it.
Use a grid to help you count correctly and keep your floss tidy. Mount your work in a hoop or frame to avoid distortion. Join a stitch group or share your work online to learn more and get tips from others.
Begin with simple patterns and gradually move to more complex ones. Use these techniques together to improve your skills. Start a small project this week and share your progress. Return to this trick whenever you want your work to look cleaner.