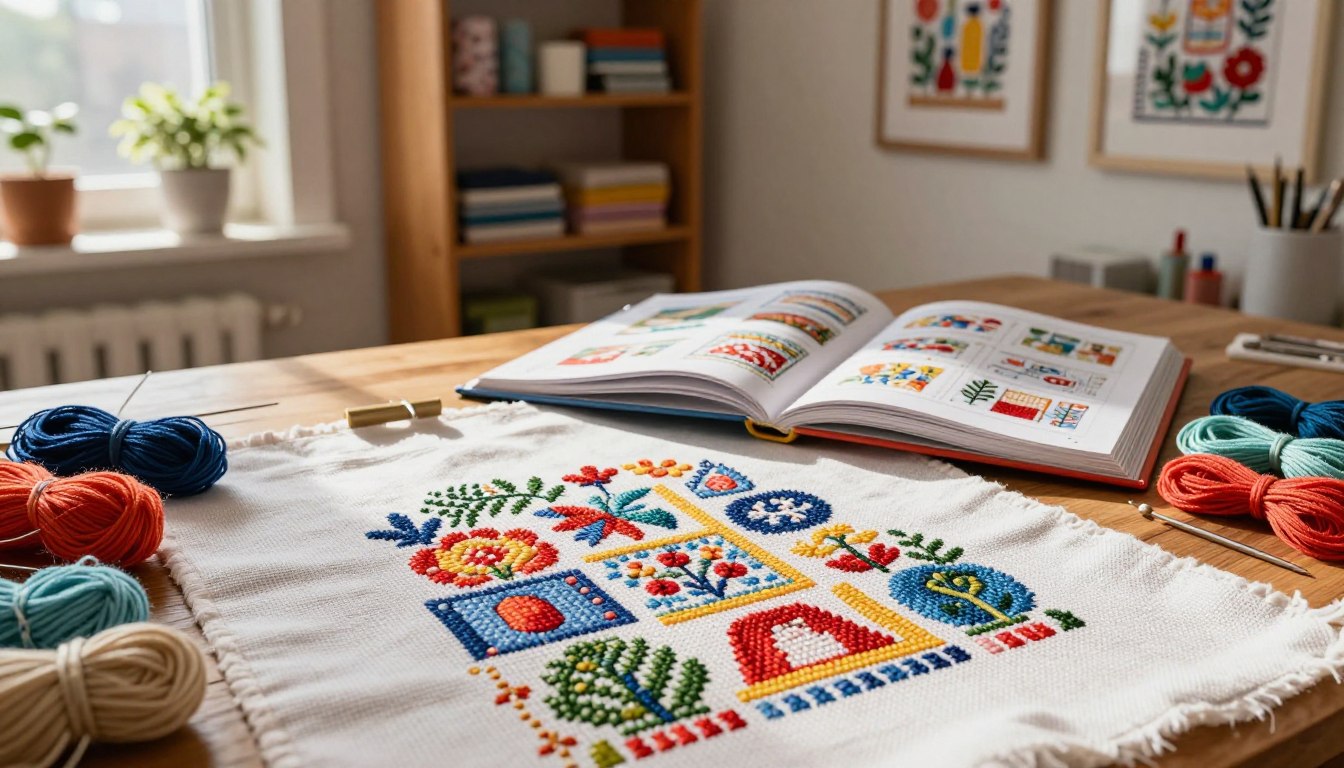
Learning to read a cross stitch pattern can make it easy and fun. A pattern is like a map with squares for each stitch. Symbols or colors show which thread to use.
Whether it’s a printed page or a digital file, the chart tells you everything you need to know. It shows how many stitches to do, the size of your finished piece, and a key for thread colors.
Patterns vary from simple to complex. Simple ones might have just a few symbols, while more advanced ones have many. Good charts also explain special stitches and how to finish your work.
Tools like Pattern Keeper and Cross Stitch Saga make it easier. They let you zoom in, track your progress, and avoid mistakes.
With a few tips, you’ll feel confident in your cross stitch skills. Learn the legend, match your fabric to the pattern, and keep your thread count consistent. This article will guide you through reading symbols, preparing materials, and using tools. Soon, cross stitch will be a fun and reliable hobby for beginners.
Key Takeaways
- Patterns are grids where each square equals one stitch and symbols map to thread colors.
- Printed and digital formats both show stitch count, finished size, and a thread key for DMC or Anchor.
- Beginner cross stitch charts use fewer symbols; complex counted cross stitch may use many more.
- Use apps like Pattern Keeper for zooming and tracking to reduce counting errors.
- Match fabric count and strand usage to the pattern to achieve the intended finished size.
Understanding Cross Stitch Patterns and Why They Matter

When you pick up a pattern, you get a map of the finished piece. Cross stitch patterns show a grid where the white spaces represent fabric. Symbols or color blocks mark each stitch. This grid tells you exactly what to stitch and where to place specialty details.
What a cross stitch pattern actually is
A pattern is a schematic that translates an image into individual crosses on fabric. In counted cross stitch, you count squares on the pattern and match them to squares on the fabric. The center is usually marked with arrows or lines so you can align the design to your cloth before you start.
How grids, symbols, and color blocks translate to stitches
Gridding divides the design into manageable sections. Symbols tie to a legend with thread numbers and strand counts. Filled shapes tend to indicate darker tones while outlined symbols show lighter shades. Color blocks speed up stitching of full-coverage areas and reduce eye strain when you work for long periods.
Printed vs digital patterns and why format matters for readability
Printed charts give you a tactile reference you can mark with highlighters. Digital patterns let you zoom, pan, and toggle layers on a tablet. Choose the format that matches your workflow so you cut down on counting errors and make your cross stitch projects smoother.
Key dimensions: stitch count, finished size, and fabric requirements
Stitch count tells you the number of crosses across and down. Combine that number with fabric count to find the finished size. For example, a 100 x 100 stitch design on 14-count fabric yields a different size than on 16-count material. Patterns note fabric recommendations so you avoid running out or misplacing the design.
Use these basics to plan materials and time. Clear reading up front saves you from ripping out rows and restarting. It opens more room for creative cross stitch ideas in future projects.
Decoding Symbols, Legends, and Thread Keys for CROSS STITCH
First, find the legend on your pattern. Match each symbol to its thread number. Legends guide you from printed grids to stitches. They list DMC floss numbers, strand counts, and alternate brands like Anchor or Madeira.

Common symbol types
Patterns use circles, squares, triangles, lines, letters, and numbers for colors. Filled shapes are darker, and outlined shapes are lighter. When many colors are together, designers use letters or numbers for clarity.
Reading the legend
Match symbols to DMC floss numbers and note strand counts. Most full crosses use two strands, and backstitch uses one. Legends also list alt brands for when DMC is not available. For kits, compare the legend with thread holders to place threads correctly.
Color-coded and multi-color charts
Color charts reduce errors. Work by color family in multi-color sections. Use removable highlighter tape to mark areas finished and avoid miscounts. Keep a legend copy beside your hoop and mark colors as you finish them.
Create an enlarged reference sheet
Make a copy of the legend for easier use. Create a personal sheet with symbols, DMC numbers, and notes on strand counts or specialty stitches. Label your floss organizer with DMC numbers and use stickers for quick selection.
Practical cross stitch tips and embroidery hacks
Enlarge small symbols if they’re hard to read. Keep a separate key for specialty stitches like fractional crosses or French knots. Use a bright lamp and magnifier for dense charts. These tips help with accuracy and reduce mistakes.
Preparation and Tools: Set Up Your Workspace and Avoid Cross Stitch Mistakes
Begin with a calm, well-lit area to keep your eyes fresh and stitches even. Set up a comfy chair and a small table for your scissors and needle minder. Have a magnifier or adjustable lamp ready for detailed work on high-count fabrics.
To find the fabric’s center, fold it both ways. The point where the folds meet is the middle. Match this spot to the pattern’s center mark, usually marked with arrows or bold lines. This helps avoid off-center stitching and saves fabric.
Essential tools make your sessions easier. Carry sharp scissors, various needles, a needle minder, and a compact magnifier. Use a floss organizer or bobbins for DMC and other brands. Good lighting and a cushioned hoop or frames help keep tension even and prevent strain.
For better organization, use simple systems that suit you. Try removable highlighter tape for marking rows without harming paper charts. Magnetic boards keep charts flat and let you track progress with magnets. Keep a binder with pattern copies, thread notes, and progress photos for quick access.
Choose the right fabric count for your skill and design. Fourteen-count Aida is a good starting point for many. It offers a balance of visibility and detail. Eleven-count is for chunkier stitches and faster work. Sixteen- or eighteen-count needs finer work and often a magnifier. Follow the pattern’s thread recommendations, usually two strands on 14-count, for correct coverage.
Organize threads and tools to save time during your project. Use labeled bobbins or a thread card for DMC numbers. Store spare needles and scissors in a small case. Digital apps can help with marking if you prefer tablet charts, while printed backups should be in your binder.
Have a small emergency kit with spare needles, a needle threader, and matching thread. Regular prep and neat organization reduce mistakes and make stitching more fun.
Reading Techniques, Specialty Stitches, and Advanced Chart Skills
Begin every project with a solid plan. Find your fabric center and set up your hoop or Q-snaps. Decide if you’ll work from the center out or by color blocks.
Choose a consistent stitch direction and keep your strand counts the same. Most cross stitch uses two strands for full crosses and one for outlines.
Work strategies
Use the center-out method for precise placement. Work one color family at a time to cut down on thread changes. Mark finished areas with removable markers or a printed copy to pause and pick up where you left off.
Specialty stitches
Fractional stitches require corner or diagonal marks on charts. Practice half, quarter, and three-quarter stitches on scrap fabric first. French knots are shown as dots; use a small, steady wrap of thread to keep them neat.
Use one strand for most backstitching techniques to get crisp outlines.
Preventing and correcting errors
Counting mistakes and symbol confusion are common. Reduce them by checking a ruler or overlay every ten stitches. Enlarge tricky chart areas on paper.
When you must undo work, frogging with a seam ripper or needle saves fabric if you pull gently along the thread path.
Digital tools and apps
Use Pattern Keeper or tablet reading apps to zoom, highlight, and track progress without wearing the paper pattern. Many apps let you sync notes across devices and mark completed sections. Digital magnification helps with fine counts and prevents misinterpretation of symbols.
Stitching can be like therapy by keeping sessions short and focused. Break large blocks into 20- to 30-minute stints to maintain even tension and reduce fatigue. Small, steady habits protect your work from errors and make advanced chart skills feel natural.
Conclusion
Learning to read patterns boosts your confidence and saves time. It helps you avoid frustration when starting cross stitch projects. By understanding grids, legends, and fabric counts, you make fewer mistakes.
Preparation is key: find your fabric’s center, organize your threads and tools, and ensure good lighting. Use tips like working from the center out and stitching by color family. This helps you work faster and avoid mistakes.
Mastering chart interpretation and specialty stitches is crucial. Using tools like Pattern Keeper or a tablet can also help. Keep notes on thread substitutions and finishing steps for perfect results.
Apply these steps to all your cross stitch projects. From small samplers to intricate pieces, you’ll create beautiful frames. These frames showcase your skill and care.