Ever thought you could turn a simple sketch into a stitched keepsake with just a needle and threads?
Embroidery is a craft that’s easy to learn. This beginner guide shows you need only a few supplies and basic stitches like running stitch and backstitch.
Think of embroidery as drawing on fabric with thread. This guide and video tutorials make it easy. Just pick a simple pattern, learn to transfer it, and practice threading your needle.
Many start with a free sampler pattern. They find it’s okay to make mistakes and fix them. Embroidery is affordable and easy to start, with beautiful results from patience and practice.
Key Takeaways
- Embroidery is an affordable, low-barrier craft you can start today.
- Core beginner stitches let you complete simple projects quickly.
- Basic supplies and one good pattern are enough to begin.
- Mistakes are fixable—practice builds confidence fast.
- This embroidery guide covers how to embroider, hooping, and simple finishing steps.
Why you should start embroidery as a beginner
Embroidery is a welcoming craft for beginners. You only need a few tools to start, and it’s easy to learn. This makes it perfect for a hobby that fits into your busy schedule.
Benefits of learning embroidery
Embroidery helps you relax and focus while creating something special. It improves your fine motor skills and patience. Plus, you can make personalized gifts.
Starting with small projects helps you see your progress fast. This keeps you excited to continue.
Low cost and low barrier to entry
Starting is easy on your wallet. You’ll need quilting cotton, a hoop, some DMC floss, and basic needles. This low cost lets you try embroidery without spending a lot.
You can also teach others easily, which is great for sharing your hobby.
Creative possibilities compared to other crafts
Thread offers unique ways to create with line, color, and texture. You can start with simple designs and move to more complex ones. This flexibility lets you grow your skills and tackle new projects.
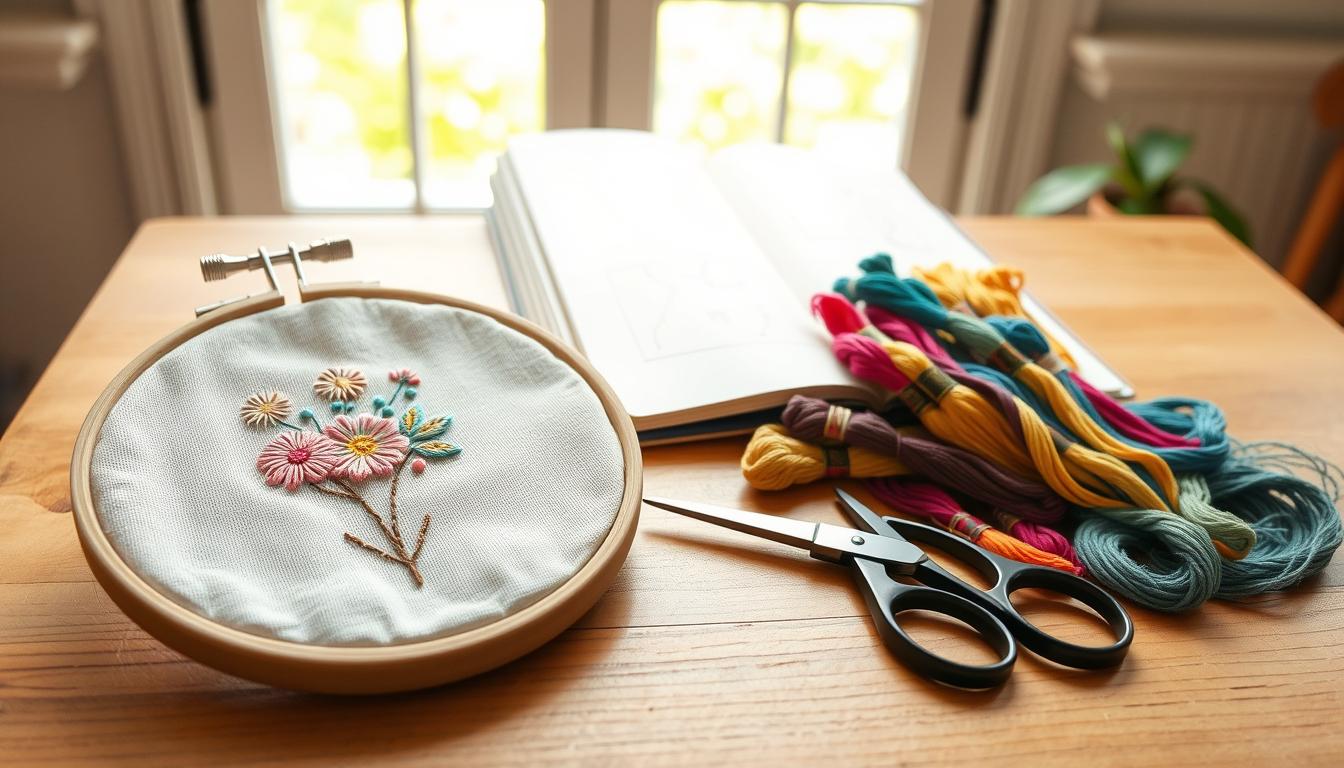
Embroidery essentials: supplies you need to begin
Start with a compact kit that covers core needs: a piece of fabric, a needle, thread, a hoop, and simple tracing tools. These embroidery essentials let you practice stitches without overwhelm. Choose a light work area and keep supplies within reach for easy embroidery sessions.

Pick fabric for embroidery that is smooth and closely woven so stitches sit clearly on the surface. Quilting cotton and evenweave linen are excellent starter choices. Avoid Aida cloth if you plan freehand hand embroidery.
Buying a quarter yard gives you enough material for several samplers.
Choosing the right embroidery needles matters for neat work. Look for needles labeled for embroidery or sharps in sizes 7 and 9. Those sizes pass through woven cotton and linen easily without splitting fibers. A small assortment pack covers most beginner projects and lets you experiment with thickness.
Embroidery floss affects texture and color. Stranded cotton floss is the standard choice. Each skein has six strands you can separate to get the right weight. DMC thread is a trusted brand for consistent dye lots and color range. Skip craft floss made for bracelets; it can be fluffier and harder to control.
Hoops, scissors, tracing tools complete your basic embroidery supplies. A 6-inch hoop gives a firm workspace and portable tension. Small, sharp embroidery scissors deliver clean cuts and prevent frayed thread ends. For pattern transfer, use a lightbox or masking tape with a water-soluble pen to avoid permanent marks.
| Item | Why it helps | Beginner recommendation |
|---|---|---|
| Fabric for embroidery | Provides stable ground for stitches and shows detail | Light quilting cotton or evenweave linen, 1/4 yard |
| Embroidery needles | Needle size affects ease of stitching and fabric protection | Sharps or embroidery needles, sizes 7 and 9 |
| DMC thread | Reliable color matching and smooth stranded cotton | Assorted skeins, separate strands as needed |
| Hoops scissors tracing | Hoop keeps tension, scissors trim ends, tracing transfers patterns | 6-inch hoop, pointed embroidery scissors, water-soluble pen or lightbox |
| Extras | Make practice easier and protect work | Needle threader, small pincushion, spare hoops |
Embroidery: basic stitches every beginner should learn
Start with a short study of embroidery basics to build confidence. Simple stitches give quick wins and teach tension, spacing, and rhythm. Use practice swatches and a hoop to keep fabric steady while you learn each stitch clearly.
Running stitch and why it’s the easiest
The running stitch is the most basic way to make straight, even lines. It trains your eye for regular spacing and helps you control stitch length. As you repeat this stitch, your speed and uniformity improve fast.
Backstitch for clean outlines
Backstitch gives crisp outlines that look polished on letters and shapes. Keep each stitch the same length and pull with steady tension so lines stay even. This stitch is a must when you want clear edges and readable text in your work.
Split stitch, stem stitch, and variations
Split stitch and stem stitch add a twisted, rope-like look that works well for stems and curved lines. Stem stitch should slightly overlap to form a neat left-leaning line. Split stitch produces a solid, textured outline for organic shapes.
Satin stitch for filled shapes
Satin stitch fills small areas by placing stitches closely together so fabric does not show through. Short, parallel stitches work best on narrow shapes. Adjust stitch length to match the curve and press lightly from the back when finished.
French knots, lazy daisy, and texture stitches
French knot gives tiny, raised dots for centers and texture. Practice winding and tightening the thread to avoid slips. Lazy daisy forms petal shapes with a loop secured by a tiny anchoring stitch. Try a mix of knots and detached chains to add dimension.
Keep practice short and daily. Start with running stitch and backstitch, then add satin stitch, French knot, and lazy daisy as you gain control. Repetition builds muscle memory and makes more complex motifs easier.
| Stitch | Use | Difficulty | Tip |
|---|---|---|---|
| Running stitch | Quick outlines, basting, texture | Beginner | Keep even spacing for a neat row |
| Backstitch | Sharp outlines, lettering | Beginner | Pull each stitch snug, not tight |
| Split stitch | Textured outlines, fills | Intermediate | Split the thread for a braided look |
| Stem stitch | Curved lines, stems | Intermediate | Overlap slightly to form a twisted line |
| Satin stitch | Filled shapes, smooth surfaces | Intermediate | Use short parallel stitches for curves |
| French knot | Dots, centers, texture | Intermediate | Keep tension steady while wrapping |
| Lazy daisy | Petals, leaves | Beginner | Anchor the loop with a small stitch |
How to embroider by hand: step-by-step starter lesson
First, gather your supplies and choose a simple design for your first project. You’ll need fabric, needles, an embroidery hoop, scissors, and a water-soluble pen. This setup helps you focus on learning the stitches.

Preparing and stabilizing your fabric
Use a fabric that’s easy to needle, like cotton or linen. Use masking tape, pinking shears, or a zigzag stitch to keep edges from fraying. If your fabric is too thin, add a stabilizer to keep it taut.
How to transfer a pattern to fabric
Place the pattern under your fabric and hold it with tape. Use a light source to see the lines better. Try a water-soluble pen, chalk, or soft pencil. Pick one that washes out easily and suits your project.
Hooping fabric and achieving even tension
Start by loosening the hoop screw. Place the inner hoop flat and put your fabric on it. Press the outer hoop down and then tighten the screw a bit. Pull the fabric tight in all directions until it’s drum-tight. Tightening the screw fully will keep it smooth.
Threading the needle, separating floss, and starting/ending threads
Cut a piece of floss that’s long enough to avoid tangles. Separate the strands to get the right thickness. Use the loop-start method or tie a small knot to begin. To end, weave the tail through stitches on the back or tie a tiny knot out of sight.
Practice project ideas for beginners
Start with a small design that uses basic stitches. Try a simple heart, initial, or flower. Focus on keeping your stitches even and your starts and ends neat. Short projects help you build confidence and improve your skills.
| Task | Recommended Tools | Tip |
|---|---|---|
| Prepare fabric | Cotton or linen, stabilizer, pinking shears | Secure edges to stop fraying before you begin |
| Transfer pattern | Lightbox or window, water-soluble pen, masking tape | Trace with fabric right side up for accuracy |
| Hooping fabric | Embroidery hoop, flat surface | Make fabric drum-tight to avoid puckering |
| Thread and floss | Six-strand cotton, needles, small scissors | Separate floss strands to control stitch thickness |
| Starting/ending threads | Needle, tail weaving | Use loop start or weave tails for a neat finish |
| Practice focus | Sampler patterns, simple motifs | Short projects build skill faster than long ones |
Finishing and caring for your embroidery project
After stitching, a few steps will keep your work looking great. Choose a finish that matches your piece and how you’ll use it. Proper care and finishing make a big difference in how long it lasts and looks.
Hoop framing is a simple way to display your work. Trim excess fabric and tighten the hoop for even tension. Add a neat backing to hide raw threads. For a clean back, use felt or a cotton circle to prevent snagging.
Mounting on canvas is good for bigger pieces like botanicals. Stretch the fabric over a stretcher bar, staple the back, and finish the edges. This method protects your stitches and makes framing optional.
For clothes, use an iron-on backing to protect embroidery. Pick a lightweight interfacing made for clothes. Apply it on the wrong side to avoid irritation and protect stitches during wear.
When washing embroidery, be gentle with colors and fibers. Hand wash in cold or warm water with mild detergent. If dye runs, keep rinsing until it’s gone. Use a color catcher to prevent transfer. Gently sponge out stains to avoid damaging stitches.
After washing, roll the embroidery in a towel to remove moisture. Lay it flat to dry on a breathable surface. Avoid direct sunlight to protect delicate threads. Let it dry fully before finishing to prevent mold or distortion.
Pressing embroidery helps restore shape and protects texture. Press when the fabric is slightly damp. Place face down on a towel, cover with a thin cloth, and press with the iron’s point. For heavy texture, press from the back with padding to keep dimension.
Choose careful finishing to protect your work’s look and function. A table below compares common finishes and care tips to help you choose the best for your project.
| Finish | Best for | Backing option | Care tips |
|---|---|---|---|
| Hoop framing | Small wall pieces, quick displays | Felt circle or cotton backing | Keep out of direct sun, dust gently with a soft brush |
| Canvas mount | Larger art pieces, gallery-style | Stapled edge with fabric fold | Hand wash before mounting, press lightly from back |
| Professional frame (under glass) | Heirloom pieces, delicate threads | Acid-free mat and backing board | Avoid moisture, occasional vacuuming of frame |
| Clothing finish | Shirts, jackets, wearable items | Iron-on interfacing or sew-in backing | Use gentle cycle or hand wash, fasten garments before washing |
Conclusion
You’ve learned that starting embroidery is easy with a few supplies and a simple pattern. Begin with basic stitches and tools. Remember, embroidery is a journey, one stitch at a time.
Mistakes are normal and can be fixed. So, focus on making progress, not being perfect.
Begin with small projects and simple stitches. Practice running stitch, backstitch, and satin stitch until they become second nature. Once you’re more confident, try making DIY gifts, lettering, appliqué, or hoop backing.
Embroidery is affordable and fun. With regular practice, you’ll get faster and better. You might even sell or give your creations away. Use this guide to stay on track, practice often, and enjoy the calming art of stitching.