Ever wondered why a simple stitch can turn a thrifted shirt or plain pillow into something fancy?
Embroidery combines design and craft, making your DIY projects special. With basic skills, you can add unique touches like monograms or patterns. This way, you can give old clothes a new life.
Learning about embroidery patterns lets you customize items like tote bags or table runners. You can start with simple stitches and then move on to designing your own patterns. Or, use software to make machine-friendly files for quicker results.
Stitching is not just about looks; it’s also good for your mind. The steady motion of needlework can calm your mind and boost creativity. Plus, it’s a way to upcycle, making gifts and home decor that are both personal and eco-friendly.
When you start, look for pattern libraries, online tutorials, and craft blogs. The Embroiderers’ Guild of America (EGA) is also a great resource. They offer free patterns and tips for both newbies and seasoned stitchers.
Key Takeaways
- Embroidery transforms ordinary DIY items into personalized, boutique-style pieces.
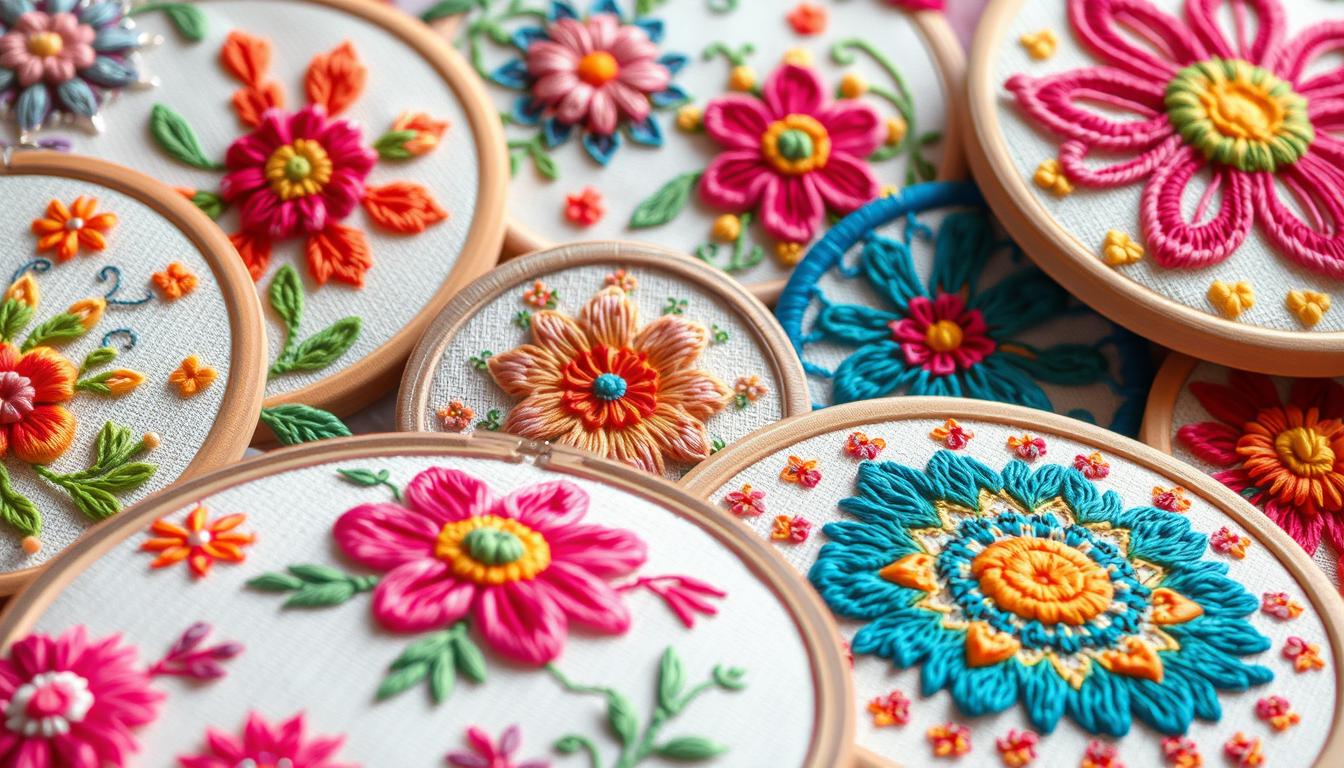
- Embroidery patterns range from simple monograms to complex botanical designs.
- Hand embroidery and machine options suit beginners and advanced makers alike.
- Stitching supports creative therapy and mindful crafting benefits.
- Use online tutorials, pattern libraries, and the Embroiderers’ Guild of America to learn and find inspiration.
Why embroidery patterns elevate your DIY work: benefits and creative possibilities

Embroidery patterns add style and purpose to your projects. You can choose a William Morris motif or sketch a simple monogram. This makes your tee or tote uniquely yours.
Personalizing items turns them into meaningful, one-of-a-kind pieces. They reflect your taste and style.
You can mix motifs and textures for bold, bespoke compositions. Combine vintage samplers with modern shapes for striking contrasts. Creative choices show in small details like color, stitch density, and thread sheen.
Embroidery is practical for repairing or refashioning garments. Use visible mending to cover stains and holes. Add decorative patches to reinforce high-wear areas or rework a faded shirt with floral motifs.
These simple fixes extend the life of clothes. They make them more valuable to you.
Apply embroidery to home decor too. Embroidered pillowcases, dish towels, and napkins elevate everyday linens. Follow quick tutorials from sewing blogs to learn how to embellish household items and use scraps efficiently.
Stitching has wellness benefits. The repetitive rhythm of hand embroidery calms the mind and supports mood regulation. Many use needlework as creative therapy, finding peace in the slow pace of stitches.
Therapeutic embroidery is a gentle, process-focused activity. You don’t need perfect results to feel a benefit. Start with basic stitch samplers to build confidence and enjoy the journey of making.
| Benefit | How it helps your project | Best use cases |
|---|---|---|
| Customization | Personal motifs and color choices make items unique and intentional | Monograms, themed gifts, visible mending on garments |
| Upcycling | Embroidery hides wear and adds new value to old textiles | T-shirt refashions, patched jeans, trimmed sleeves |
| Creative expression | Collage and mixed motifs let you experiment with texture and form | Hoop art, mixed-media patches, hybrid quilt panels |
| Wellness | Repetitive stitching reduces stress and supports mindful focus | Daily stitch sessions, group sewing circles, therapeutic embroidery projects |
| Accessibility | Simple stitches and free patterns lower the barrier to entry | Beginner samplers, community classes at local guilds and libraries |
Choosing and creating embroidery patterns that fit your project
Choosing the right embroidery patterns is key for any DIY project. You can adjust designs to fit your fabric, size, and skill level. This ensures your final piece looks like it was meant to be.
First, decide if you’ll do hand or machine embroidery. Then pick the best transfer methods and layout for your tools.

Design methods: draw it yourself and tracing techniques
If you like to draw, sketch on tracing paper or use a water-soluble pen on fabric. Pin the tracing paper to the cloth and stitch through it to keep lines sharp. Tracing is great for detailed designs or historical motifs.
Trace parts of designs, then mix them to create something new. This fits perfectly with your project, whether it’s for a garment or home decor.
Using transfer methods: carbon paper, water-soluble stabilizer, and self-adhesive stabilizers
Carbon paper is a simple, old-school way to transfer designs. Place carbon between your design and fabric, then trace with a stylus. This method gives you sharp lines on your fabric.
For more detailed work, use water-soluble stabilizer. Print or draw on it, stick it to your fabric, and stitch through. Then, wash it away for clean lines. Self-adhesive stabilizers offer the same benefits without needing pins.
Collage and abstract approaches for unique patterns
Abstract and collage methods let you create unique designs. Mix different stitches, like Sashiko or colcha, to add texture. You can also combine images and motifs for a layered look.
This method is perfect for upcycling and making your piece feel truly handmade.
When to use embroidery software for machine and hand-friendly designs
Embroidery software is useful for precise designs. It helps with scaling, color counts, and machine files. You can also print out simplified designs for hand embroidery.
Use software for designs that need to be exact. For more organic, hand-driven work, choose manual methods.
How to apply hand embroidery and machine embroidery to common DIY projects
First, think about how stitching will add to your project’s look and feel. Hand embroidery is great for small, detailed work. Machine embroidery is better for quick, uniform designs. Choose the right threads, stabilizers, and backing to avoid puckering and make finishing easier.
Embroidering clothes is perfect for fixing, decorating, and updating them. You can mend a torn knee on jeans with an appliqué and running stitch. Add initials or a floral pattern to a collar to give an old shirt a new look. For precise patterns on jackets or uniforms, use machine embroidery.
When mending, pick a patch shape that fits the garment. Use a satin stitch or zigzag to finish edges. This makes the fix look like it was meant to be.
For home decor, turn your embroidery into pillows, table runners, hoop art, or framed panels. Small embroidered blocks make a striking table runner. Repeat a simple design on napkins for a coordinated look that holds up in the wash with the right stabilizers.
Pillows need a few extra steps: fuse interfacing, center the design, and add a backing that hides seams. Hoop art can stand alone or be part of a gallery wall. Framed embroidery adds a museum-like touch without breaking the bank.
Your list of accessories and gifts can grow quickly with hand and machine embroidery. Sew embroidered panels into bags and pouches. Make patches for backpacks, craft lavender sachets, or stitch tiny motifs for holiday ornaments.
Personalized handkerchiefs and aprons make great gifts with names or dates. Use machine embroidery for quick logo replication on multiple items. Reserve handwork for unique touches.
Combine embroidery with sewing projects like quilts, coasters, and napkins. Insert embroidered blocks into quilts, use scrap pieces for coasters, and decorate napkins with motifs. Backstitching stabilizes edges, and adding interfacing or lining strengthens bags and pouches.
Keep projects organized with simple tips: trim stabilizer close to the work for framed pieces, use tear-away or cut-away stabilizers based on fabric, and choose the right needle size for your thread and cloth. For thick materials, hoop carefully and select a heavy-duty stabilizer for machine embroidery.
| Project | Best Method | Stabilizer | Key Tip |
|---|---|---|---|
| Denim jacket patch | Hand embroidery for detail, machine for satin edges | Cut-away stabilizer under patch | Use heavy needle and secure patch edges |
| Pillow cover | Hand embroidery for texture, machine for repeats | Medium-weight cut-away or tear-away | Fuse interfacing and add a hidden zipper |
| Table runner | Machine embroidery for multiple blocks | Cut-away stabilizer for linens | Plan motif spacing before stitching |
| Zipper pouch | Hand panel plus machine construction | Spray adhesive stabilizer for tricky fabrics | Line pouch and trim stabilizer close to seam |
| Quilt block | Hand or machine, depends on detail | Light tear-away for delicate cotton | Sash pieces with plain strips for balance |
| Ornament or sachet | Hand embroidery for charm | None or light tear-away | Use small motifs and secure hanging loops |
embroidery techniques, tools, and learning resources to boost your results
Start by mastering a few basic moves. Learning simple stitches boosts your confidence. A small sampler helps you test different threads and fabrics.
Basic stitches
Practice running stitch, backstitch, satin stitch, French knot, stem stitch, and chain stitch. Keep each sample small. Note the best thread, needle, and fabric for you.
Stitch samplers
Make a portable sampler for later. Use it to track stitch length and spacing. It becomes a quick reference for your projects.
Embroidery tools and materials
Choose a hoop that fits your work. Wooden and spring-steel hoops are good for hand work. Follow your machine maker’s advice for machine work.
Choose needles that match your thread and fabric. Different threads like stranded cotton and metallics change your design. Keep sharp scissors, a thimble, needle threader, and a bright light handy.
Match your fabric to your project. Cotton and linen work for most projects. Canvas or denim are better for heavy threads. Use stabilizers for delicate transfers and stretchy fabrics.
Where to learn
Find tutorials and patterns on craft blogs and videos. Many makers share free samplers and guides online.
The Embroiderers’ Guild of America (EGA) offers study boxes and courses. Local classes and libraries also have resources for beginners.
Ideas for beginners and scrap-buster projects
Start with quick projects like hoop art and small pouches. These projects help you practice while making something useful.
Use scraps for small projects. Small pouches and patches turn leftovers into cute items. Treat each scrap as a chance to try new stitches and colors.
Keep a list of beginner projects to try. Regular practice helps you grow your skills and enjoy the calming effects of embroidery.
Conclusion
Embroidery patterns can change your DIY projects in big ways. They add personality, value, and a calm pace to everyday items. You can choose hand embroidery for a personal touch or machine embroidery for speed.
Hand stitching gives you a tactile feel and a slow pace. Machines are great for bigger or repeated tasks, keeping quality high.
Don’t be afraid to try different ways to design your embroidery. Use drawing, tracing, collage, or software to find your style. Start with basic tools and simple projects to build your skills.
Online tutorials, local classes, and groups like the Embroiderers’ Guild of America can help. They’ll boost your confidence and teach new techniques.
Begin with a small project like a towel, pouch, or patch. This lets you practice stitches and pattern transfers. Use a sampler to track your progress and try new patterns.
Let making become a way to relax and support your wellbeing. As you get better, mix upcycling with your designs. This way, you’ll create useful, beautiful items to enjoy and share.
Embracing embroidery turns simple textiles into special, handcrafted pieces. These projects offer both practical and emotional benefits. They show that DIY embroidery is a smart, creative way to refresh your space and support mindful crafting.