Can a simple hoop and a few colorful threads turn screen time into a hands-on lesson in patience, focus, and creativity?
Embroidery is a craft that invites kids and families to join in. You’ll find beginner-friendly sets like Stitch Sampler and Pot Plant Stitch Sampler. These kits are on best-seller lists.
Many kits, like Stitch Sampler Beginner Kit, come with everything you need. This includes pre-printed patterns, hoops, needles, thread, and tutorials. Sellers report over 1,600+ verified 5-star reviews for these kits.
This guide will help you pick the right embroidery kits. It will also show you where to buy them and how to teach basic stitches at home. You’ll learn how to care for finished pieces and explore personalized embroidery and gifts.
Key Takeaways
- Embroidery kits make a screen-free activity that boosts fine motor skills and focus.
- Beginner kits often include hoops, pre-printed patterns, needles, thread, and tutorials.
- Popular kits like Stitch Sampler and Pot Plant Stitch Sampler are beginner-friendly and well-reviewed.
- You can turn kids’ projects into personalized embroidery and embroidered gifts.
- The guide covers buying, teaching, care, and custom embroidery options for families.
Why embroidery kits are great for kids’ creativity and learning
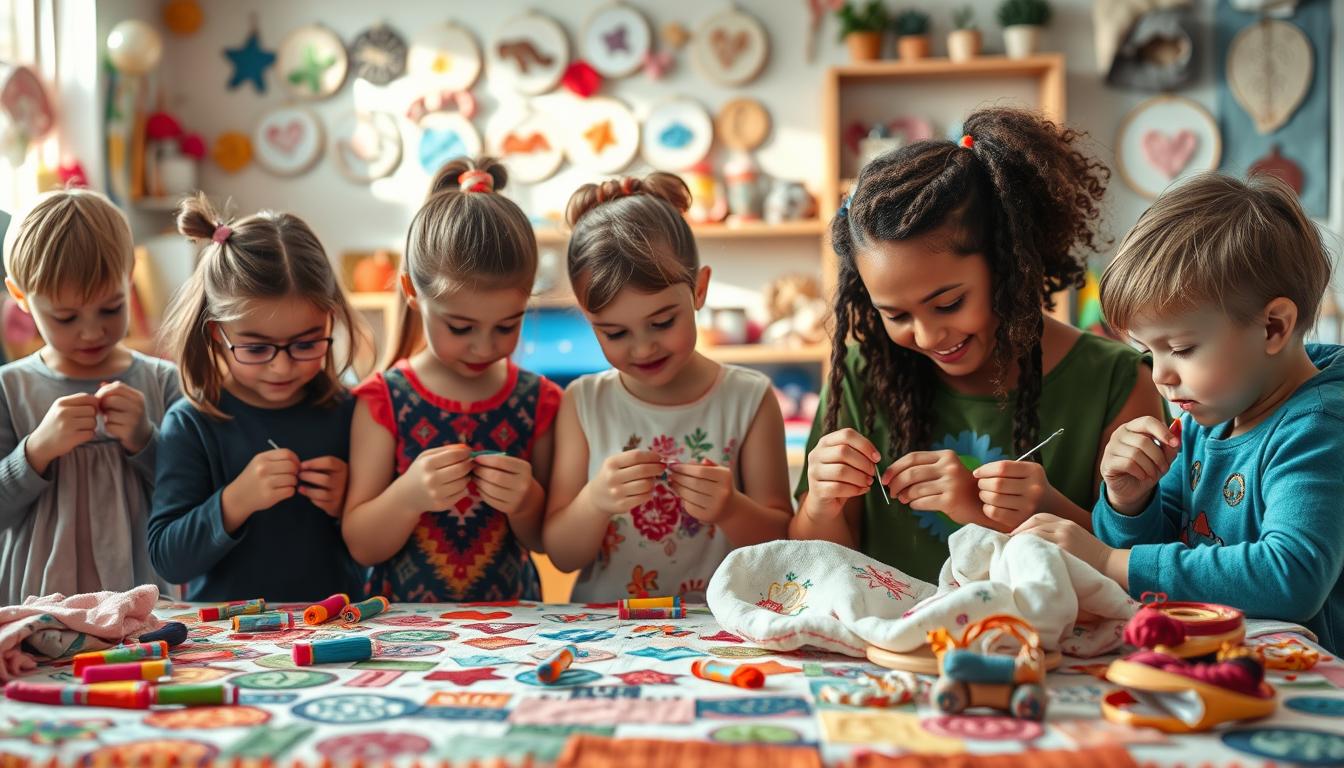
Embroidery kits make quiet afternoons fun and educational. They come with simple patterns and clear steps. This lets kids practice stitches and learn real skills.
Parents and teachers love these kits because they mix art with structure. They’re perfect for school projects and weekend fun.
Developmental benefits: Hand sewing improves fine motor control and hand-eye coordination. Kits like Stitch Sampler and stitch practice samplers offer age-appropriate patterns. These patterns help kids use both hands effectively.
Embroidery kits also teach sequencing and patience. Starter kits start with basic stitches and then get more complex. This gradual challenge keeps kids focused and builds their attention span.
Emotional and cognitive benefits: Needlework has a calming effect and supports mindfulness. The repetitive motion of stitching reduces stress. Completing a project boosts confidence and gives a sense of accomplishment.
Customer stories show the kits’ therapeutic value. Some parents say their kids enjoy embroidery during recovery or as a hobby. These stories show how art and craft can help with emotional health.
Social and family bonding opportunities: Many kits are designed for sharing. Seasonal bundles and family-friendly Stitch Sampler sets have patterns for everyone. Working together on a project teaches teamwork and builds pride in the finished work.
Local shops offer more ways to enjoy embroidery. They have classes and machine embroidery demos. Searching for “embroidery near me” might find workshops, finishing help, or custom services to make a child’s project special.
How to choose the best embroidery kit for your child
Choosing the right kit is key for your child’s success and fun. Look for kits that are age-appropriate, have simple tools, and materials that fit your child’s focus span. The kit should start with small victories and grow your child’s skills over time.
Age and skill-appropriate materials
Make sure the kit is right for your child’s age and skill level. Beginner kits are usually for kids 8+ and come with big needles, pre-threaded floss, and easy patterns. Some kits have levels that help your child learn from basic stitches to more complex ones.
For younger kids, choose kits with blunt needles and thick thread to avoid frustration. Older kids can handle finer materials, like professional embroidery threads.
Contents checklist: what a quality kit should include
A complete kit saves you time and money. Look for kits with pre-printed fabric, an adjustable hoop, different thread colors, needles, a threader, scissors, and a seam ripper.
Good kits will tell you about hoop sizes and thread counts. They should have 6-inch to 8-inch hoops, 6-strand floss in various colors, and clear instructions. Bonus points if they offer video tutorials for extra help.
Safety and durability considerations
When kids use sharp or small items, safety is important. Choose blunt needles, non-toxic threads, and safe inks. Tell kids not to wash their project before it’s finished to keep the design.
Opt for durable materials like 100% cotton muslin, strong threads, and bamboo hoops. These materials can handle lots of practice and make your child’s work last longer.
When comparing kits, think about what you get for the price. A good beginner kit should have quality supplies, clear instructions, and safety features. It’s a better deal than a cheap kit that’s missing important tools. If you want to do more custom or professional embroidery later, start with a kit that teaches the basics well.
Top embroidery kits for kids and beginners (best sellers and new arrivals)
You’re looking for a kit that teaches skills and keeps kids engaged. It should also make pretty embroidered gifts. Here are some top picks for beginners and seasonal craft sessions. They are kid-friendly, with clear instructions and lots of positive reviews.
Stick and Stitch is a top seller. The Stitch Sampler Beginner Kit and Pot Plant Stitch Sampler are favorites. Floral Frame Beginner Kit, Bee Happy, and Little Bouquet are also popular. Customers love the video tutorials and easy patterns.
Theme-based kits make it fun for kids to choose projects they like. Animal kits like Flora the Cat and bee designs are hits. Floral kits like Little Bouquet and Floral Jar are great for slow stitching.
Seasonal kits include Autumn Leaf and Spring Ride. Holiday kits have snowy scenes and Christmas ornaments. Novelty kits feature mandalas and Halloween designs.
Modern kits come as starter bundles with step-by-step guides. Brands like Dimensions and Craftwiz offer bundles labeled “4 stages from beginner to expert.” These sets help you learn more stitches and build confidence.
What to expect in a kit: 6–8 inch hoops, pre-printed cotton, 6-strand floss, needles, and more. Some kits have water-soluble ink for easy cleanup and extra fabric for practice.
When shopping online or in stores, compare what each kit teaches. Look for stitch counts and video access. These features make a kit a valuable learning tool.
If you’re making gifts, choose kits with neat finishing options. Look for fabric that’s good for framing or turning into patches. Kits with multiple project templates let kids make several gifts without buying more.
Where to buy kids’ embroidery kits and related embroidery services
Finding the right place to buy kits and get help is key for your child’s stitching journey. You can find a variety of beginner sets, instructional bundles, and fibers on major marketplaces and craft stores. Local shops offer hands-on classes, finishing, and machine help for in-person support.

Online embroidery retailers and marketplaces
Amazon and Etsy are great for finding best-selling sampler kits and brand-name sets. These sites provide clear contents lists and hoop sizes. Craft-specific retailers also offer video tutorials and detailed stitch guides for beginners.
Yarn and material brands like DROPS and Scheepjes sell fibers for expanding projects. Shopping online makes it easy to compare prices and read reviews before buying.
Local embroidery shop and stitching services
Use “embroidery near me” to find local stores with kid-friendly kits and classes. A local shop can show you machine stitching, help with framing, and provide supplies for little hands.
You can book workshops and seasonal stitching circles for your child to learn with others. These in-person experiences are great with take-home kits for practice.
Custom and personalized embroidery options
Many retailers and shops offer custom embroidery and personalization services. They can add names or dates to finished pieces. Professional embroidery studios can digitize a child’s design for machine stitching on various items.
Look for vendors that offer both hand-stitched kits and custom embroidery. This way, your child’s work can become a lasting gift or heirloom.
Tips and step-by-step guide for teaching kids embroidery at home
Begin with a friendly introduction to get both you and your child excited. Collect basic tools and pick a colorful workspace. Choose an embroidery kit that fits your child’s age and interests. Keep lessons short and fun to boost confidence.
Create a safe and organized stitching area. You’ll need an adjustable lamp, a 6–8 inch hoop, and blunt needles. Also, have small scissors, a needle threader, and a container for threads. Use a washable mat to protect surfaces from spills.
Start with simple stitches like the running stitch and backstitch. Then, learn satin stitch for filled areas and French knots for texture. Chain stitch is great for decorative lines. Use sampler patches for practice without worrying about mistakes.
Set a 10–15 minute goal for each practice session. Praise your child for finishing a motif. Break tasks into steps like threading the needle and tightening the hoop. This makes progress clear and keeps your child motivated.
Use both printed and video instructions for better learning. Many kits come with QR codes for video lessons. Pair these with beginner books for extra help. Pause videos after each step for hands-on practice.
Teach basic troubleshooting early. Show how to separate floss strands and tighten the hoop. Demonstrate removing mistakes and practicing on scrap fabric. These skills reduce frustration and speed up learning.
Plan lessons that match your child’s attention span and interests. Hold sessions of 10–30 minutes. Choose kits with themes like animals or florals to keep things exciting. Celebrate small achievements like mastering a new stitch.
When your child is ready, introduce custom projects. Explore personalized embroidery on small fabric gifts. For more advanced techniques, consider local stitching services or a beginner course in machine embroidery.
Product care, finishing projects, and turning stitches into keepsakes
After your child finishes a piece, a few steps will keep it looking great for years. You can display projects in hoops, frames, or sewn items. The right finish protects the stitches and makes it ready for display or gifting.

Finishing and framing your child’s embroidery
For a neat hoop finish, trim excess fabric leaving a small margin. Fold the edge to the back and secure with a running stitch or fabric-safe glue. Tighten the hoop screw so the fabric stays smooth and taut.
If you prefer a decorative frame, mount the piece on acid-free board before placing it behind glass. You can turn small panels into ornaments or pillows by stitching them into simple shapes and adding a backing fabric and stuffing.
Washing and long-term care instructions
If your kit used water-soluble ink for pattern lines, wait to wash until the embroidery is complete. To clean finished work, hand wash gently in cool water with a mild detergent. Rinse carefully and lay flat to air dry.
Use colorfast, mercerized cotton threads and pre-washed fabrics to reduce shrinkage and bleeding. When you need to press a finished piece, place a thin cloth over the stitches and iron on low heat to avoid crushing the design.
Creative ways to use finished pieces
Finished panels make thoughtful embroidered gifts. You can convert them into patches for jackets, appliqués for backpacks, or framed wall art. Seasonal designs become ornaments that families will treasure year after year.
Local embroidery and stitching services can help if you want a polished product. Many shops offer professional embroidery to digitize and reproduce a child’s design for clothing or durable textiles. You can request custom embroidery to create matching sets, or use embroidery services to apply stitched panels onto garments and household items.
| Finish Option | Best Use | Care Notes |
|---|---|---|
| Hoop display | Quick wall art or classroom display | Keep out of direct sunlight; dust with a soft cloth |
| Framed with glass | Long-term preservation and gifts | Use acid-free backing; consider professional framing for heirlooms |
| Pillow or soft toy | Functional keepsake for children | Spot clean or hand wash; avoid machine agitation |
| Patches and appliqués | Personalize clothing and bags | Use a firm backing; consult a local shop for secure attachment |
| Machine-reproduced pieces | Matching sets and durable gifts | Ask a professional embroidery provider to digitize designs for best results |
Conclusion
Embroidery helps your child improve fine motor skills, patience, and focus. It’s a fun way to make something beautiful. Kits like Stitch Sampler and Floral Alphabet come with clear instructions and videos.
When choosing a kit, pick one that fits your child’s age and interests. Make sure it has the right tools and materials. For more help, look for local classes or online tutorials.
Keep your finished work safe by following care tips. Start with a kit that has tutorials. This way, embroidery becomes a fun hobby and a way to make lasting gifts with your child.