Have you ever wondered why a simple change in supplies can turn a good stitch into a great piece of textile art?
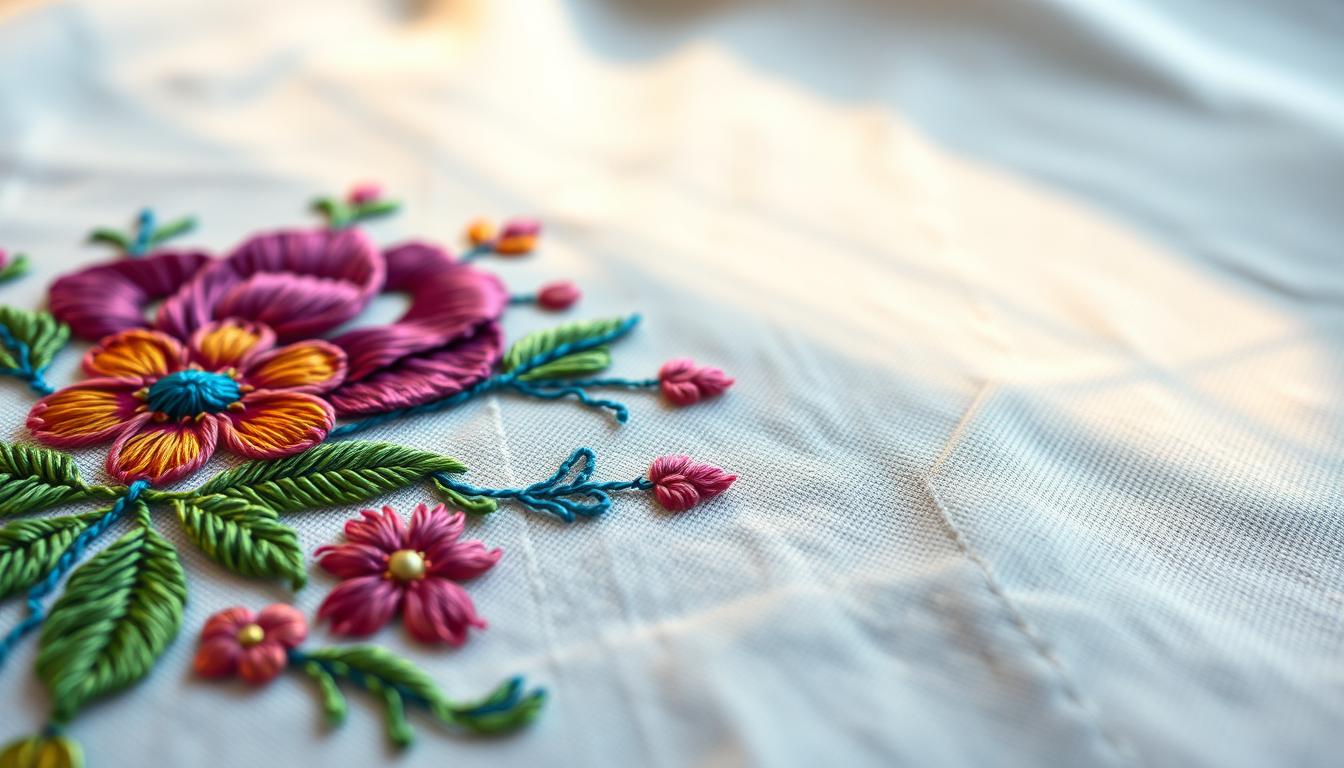
Embroidery is all about making choices. The right fabric, needles, and thread make your work look better and last longer. Cotton and linen fabrics provide a solid base for your stitches.
Choosing the right needle size for your thread prevents big holes and tangles. This ensures your embroidery stays smooth and even.
Start with a clear plan. Sketching your design before you begin makes your stitches more deliberate. Whether you stitch by hand or use software, preparing well leads to quick progress.
Learning from trusted brands and guides helps a lot. Singer offers great beginner tips. Brands like PFAFF® and Husqvarna Viking show how good tools and thread improve your work. They help with both simple projects and more complex fabric embroidery.
Key Takeaways
- Choose sturdy, natural fabrics like cotton or linen for better stitch support.
- Match needle size to thread strands to avoid large holes or pulling issues.
- Sketch and plan designs before stitching for more polished results.
- Practice basic needle techniques to build consistency and control.
- Quality thread and proper digitizing elevate both hand and machine embroidery.
Choose the right fabric and supplies for successful needlework
Your choice of materials shapes every stitch. Start with sturdy, natural embroidery fabric like cotton or linen. This keeps stitches neat and reduces puckering. For delicate or stretchy textiles, layer fabric or use a backing for stability. Plan design placement before you hoop so motifs sit where you want them.
Why fabric choice matters for embroidery
Different fabrics respond to stitching types in unique ways. Tight weaves hold fine detail well. Looser weaves need larger stitches and might benefit from lightweight stabilizers. Heavy materials like denim or terrycloth demand more robust needles and a compatible stabilizer to prevent distortion.
Selecting stabilizers and hoops
Match stabilizers to fabric weight: lightweight tear-away for thin wovens, medium for everyday cottons, heavyweight for thick fabrics. Use wash-away stabilizers when you want no trace after laundering. Choose hoops slightly larger than your design so fabric sits snugly without stretching. For machine work, center the fabric and avoid drum-tight tension to prevent warping.
Needles, thread, and other essential tools
Pick needles by size to suit your fabric and embroidery thread. The right needle lowers skipped stitches and thread breaks while keeping holes small. Invest in quality embroidery thread for vibrant, long-lasting color and minimal fraying. A magnifying lamp helps with detailed work. Beginner kits from trusted brands teach hooping, basic stitching types, and include essential notions to get you started.
Plan and transfer your design: preparation for flawless stitching
Begin with a clear sketch or a photo-based concept. Refine it until the shapes look good at stitch scale. Good design planning saves time and helps choose the right outlines and fills for your thread art.

Design planning and sketching
Work in stages: start with a rough sketch, then simplify details. Mark key lines for outlines and fill areas. Keep motifs bold for crisp edges.
If you plan both hand work and machine work, test a small motif first. This helps judge scale and density. Use tracing paper or a lightbox for consistent repeats. For cross stitch, convert curves to stepped blocks before transferring.
For creative needlework, note color changes and thread textures on the sketch. This avoids surprises during stitching.
Best transfer methods for fabric
Choose transfer methods based on your fabric and design contrast. Water-soluble pens work well on light cottons and wash out cleanly. Heat-transfer pens and transfer paper are fast for applications that must survive handling.
For delicate fabrics, try a lightbox and dressmaker tracing wheel to avoid marking. For thick or textured materials, pin baste a paper pattern or use temporary adhesive stabilizers. Match transfer visibility to the thread colors you plan to use so guides stay visible until stitching covers them.
Digitizing basics for machine embroidery
Embroidery digitizing turns artwork into machine instructions. Start by simplifying logos and photos for clean stitching. Choose software at your skill level, then assign satin for lettering and running stitches for outlines.
Set stitch densities carefully and reduce unnecessary jump stitches. Use brands like PFAFF for precise design placement and alignment tools. Final checks should include hoop choice and stabilizer selection to prevent puckering and thread jumps.
| Step | Hand Techniques | Machine/Digitizing Tips |
|---|---|---|
| Sketching | Rough, simplify, mark outlines for split stitch | Clean artwork, high-contrast lines for software import |
| Transfer | Water-soluble pen, tracing wheel, lightbox | Heat-transfer, placement features in machine apps |
| Stitch planning | Outline first, then fills; test color blends | Assign stitch types, set densities, reduce jumps |
| Stabilization | Use tearaway or cutaway based on fabric weight | Match stabilizer to stitch density to avoid puckering |
| Applications | Creative needlework and cross stitch projects | Thread art, machine embroidery, and precise placement |
embroidery stitches and techniques to create clean edges and smooth fills
Begin by outlining shapes before filling them. Use a short split stitch or backstitch to set a crisp boundary. This prevents the filling from bleeding over the edges.
Keep your stitch length steady and your tension even. This ensures smooth curves and prevents puckering.

Outline techniques for clean edges
For clean edges, use split stitch, stem stitch, chain stitch, and backstitch. Shorter stitches help keep curved lines smooth and edges neat. For a raised look, add a thin padding row before a satin edge.
Filling techniques and stitch direction
Choose filling techniques based on the shape and texture you want. Satin stitch and long-and-short fills provide solid coverage. Seed stitch or French knots add texture.
Plan your stitch direction to follow the form and light. This improves shading and color blending, like in petals or leaves.
Tension, stitch length, and strand selection
Adjust tension so threads lie flat but fabric doesn’t pucker. Test stitch length on scrap fabric to find the right balance. Use fewer strands for detail work and more for bold fills.
Practice basic stitches like running stitch, backstitch, and satin stitch. This builds control over stitch length and direction. The same principles apply to counted techniques like cross stitch or needlepoint.
When digitizing designs for machine work, set stitch densities and directions like handwork. Proper digitizing prevents gaps in fills and keeps outlines clean. This makes your final piece look polished.
Troubleshooting common problems and comparing related craft methods
When your project hits a snag, clear steps make repair faster and keep your work looking professional. Start by assessing fabric stability, needle condition, and thread quality. Small fixes often prevent bigger issues like puckering or skipped stitches from worsening.
Fixing puckering, skipped stitches, and thread breaks
For puckering, use a firmer stabilizer and a properly tensioned hoop. Switch to a non-elastic fabric or add a backing layer for fragile cloth. If you see skipped stitches, replace the needle and pick the correct size for your thread. Thread breaks respond well to higher-quality threads from brands like Gutermann or Aurifil and slowing your stitch pace to maintain consistent tension.
Preventing color bleeding and thread jumps
To avoid color bleeding, pre-wash fabric when possible and test thread dyes on a scrap. Use color catchers during laundering for mixed-color projects. Reduce thread jumps by trimming long jumps and lowering jump height in digitized designs. Select a stabilizer weight that matches fabric to keep layers from shifting and causing thread jumps during stitching.
Needlepoint vs embroidery and other craft comparisons
Needlepoint and cross stitch use counted or canvas-based methods that rely on grids and repeatable fills. In contrast, hand embroidery offers freeform outlines, satin fills, and varied textures. Thinking about needlepoint vs embroidery, realize that each uses different canvases, needles, and visual goals. Cross stitch favors evenweave fabric and X-shaped stitches, while needlepoint uses tent or basketweave on canvas.
Machine embroidery troubleshooting and best practices
For machine work, always run a test stitch on the same fabric with the same stabilizer. Use manufacturer guidance from Singer or Pfaff when selecting hoops and settings. Shorten jump stitches in digitizing, increase density where gaps appear, and swap to machine-grade thread to reduce thread breaks. Specialty hoops, like adhesive or magnetic options, help keep placement steady for complex designs.
Below is a concise comparison to guide tool and technique choices.
| Issue | Hand Repair | Machine Fix |
|---|---|---|
| Puckering | Use firmer stabilizer, tighter hoop, adjust stitch tension | Change stabilizer weight, use proper hoop, test stitch density |
| Skipped stitches / thread breaks | Replace needle, slow pace, use quality thread | Use correct-size machine needle, fresh thread, check timing |
| Color bleeding | Pre-wash fabric, test threads, use color catchers | Choose colorfast threads, pre-test fabric, avoid hot washes |
| Thread jumps | Trim long jumps, anchor with tiny stitches | Shorten jumps in digitizing, use jump stops, add tie-off stitches |
| Craft style | Freeform surface embroidery with varied stitches | Counted needlepoint or cross stitch for grid fills |
Conclusion
Improving at thread art comes from making smart choices. Choose the right fabric, stabilizer, and needle for each project. Also, plan your design before starting.
Using simple tools like a magnifying lamp can help. Doubling fabric for extra support also improves your work. These steps will help you achieve flawless embroidery more often.
Keep practicing basic stitches and look into machine options from brands like PFAFF and Husqvarna Viking. Learn about digitizing with platforms like CREATIVATE. This will help you make consistent fills and outlines.
Quality thread and correct hooping are also key. They make your finished pieces look better.
If you face problems, try adjusting tension or changing stabilizer weight. Swapping needles or revising stitch settings can also help. This practical approach will make common issues easier to solve and boost your confidence.
Use these tips to create a workflow that works for you. Don’t follow just one method. Instead, find what works best for you.
By combining planning, proper tools, and practice, you’ll get better at thread art. Try new materials and keep improving your skills. This way, your next piece will truly show your vision.